
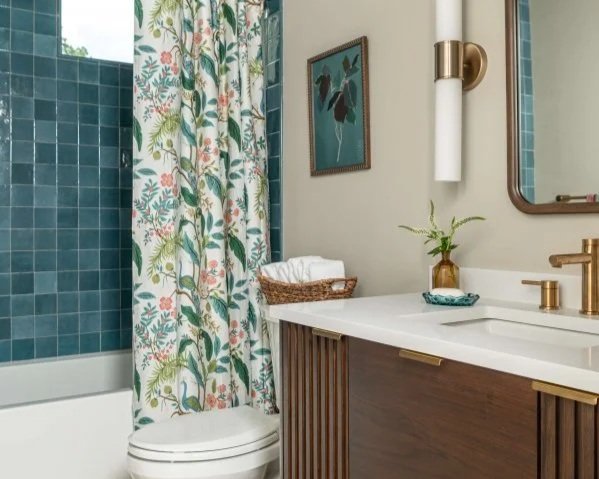
The last stop on this lovely home is the upstairs. These rooms were totally remodeled and an extra bathroom added. A new walk-in closet was tucked in under the eaves too.
When we started out the contractor and I thought this floor might be more of a “refresh” with just some new finishes. As with many projects though, once things started moving along, it grew significantly in design and construction. It now looks totally different from the original house!
Gameroom Redo
The game room was previously just a big bland work room of some kind, for the previous owner. Fluorescent lighting and some random work surfaces around the perimeter did not make for a particularly inviting space.
It had an 8’ ceiling height and some low, angled places, rather limiting the use of the room.
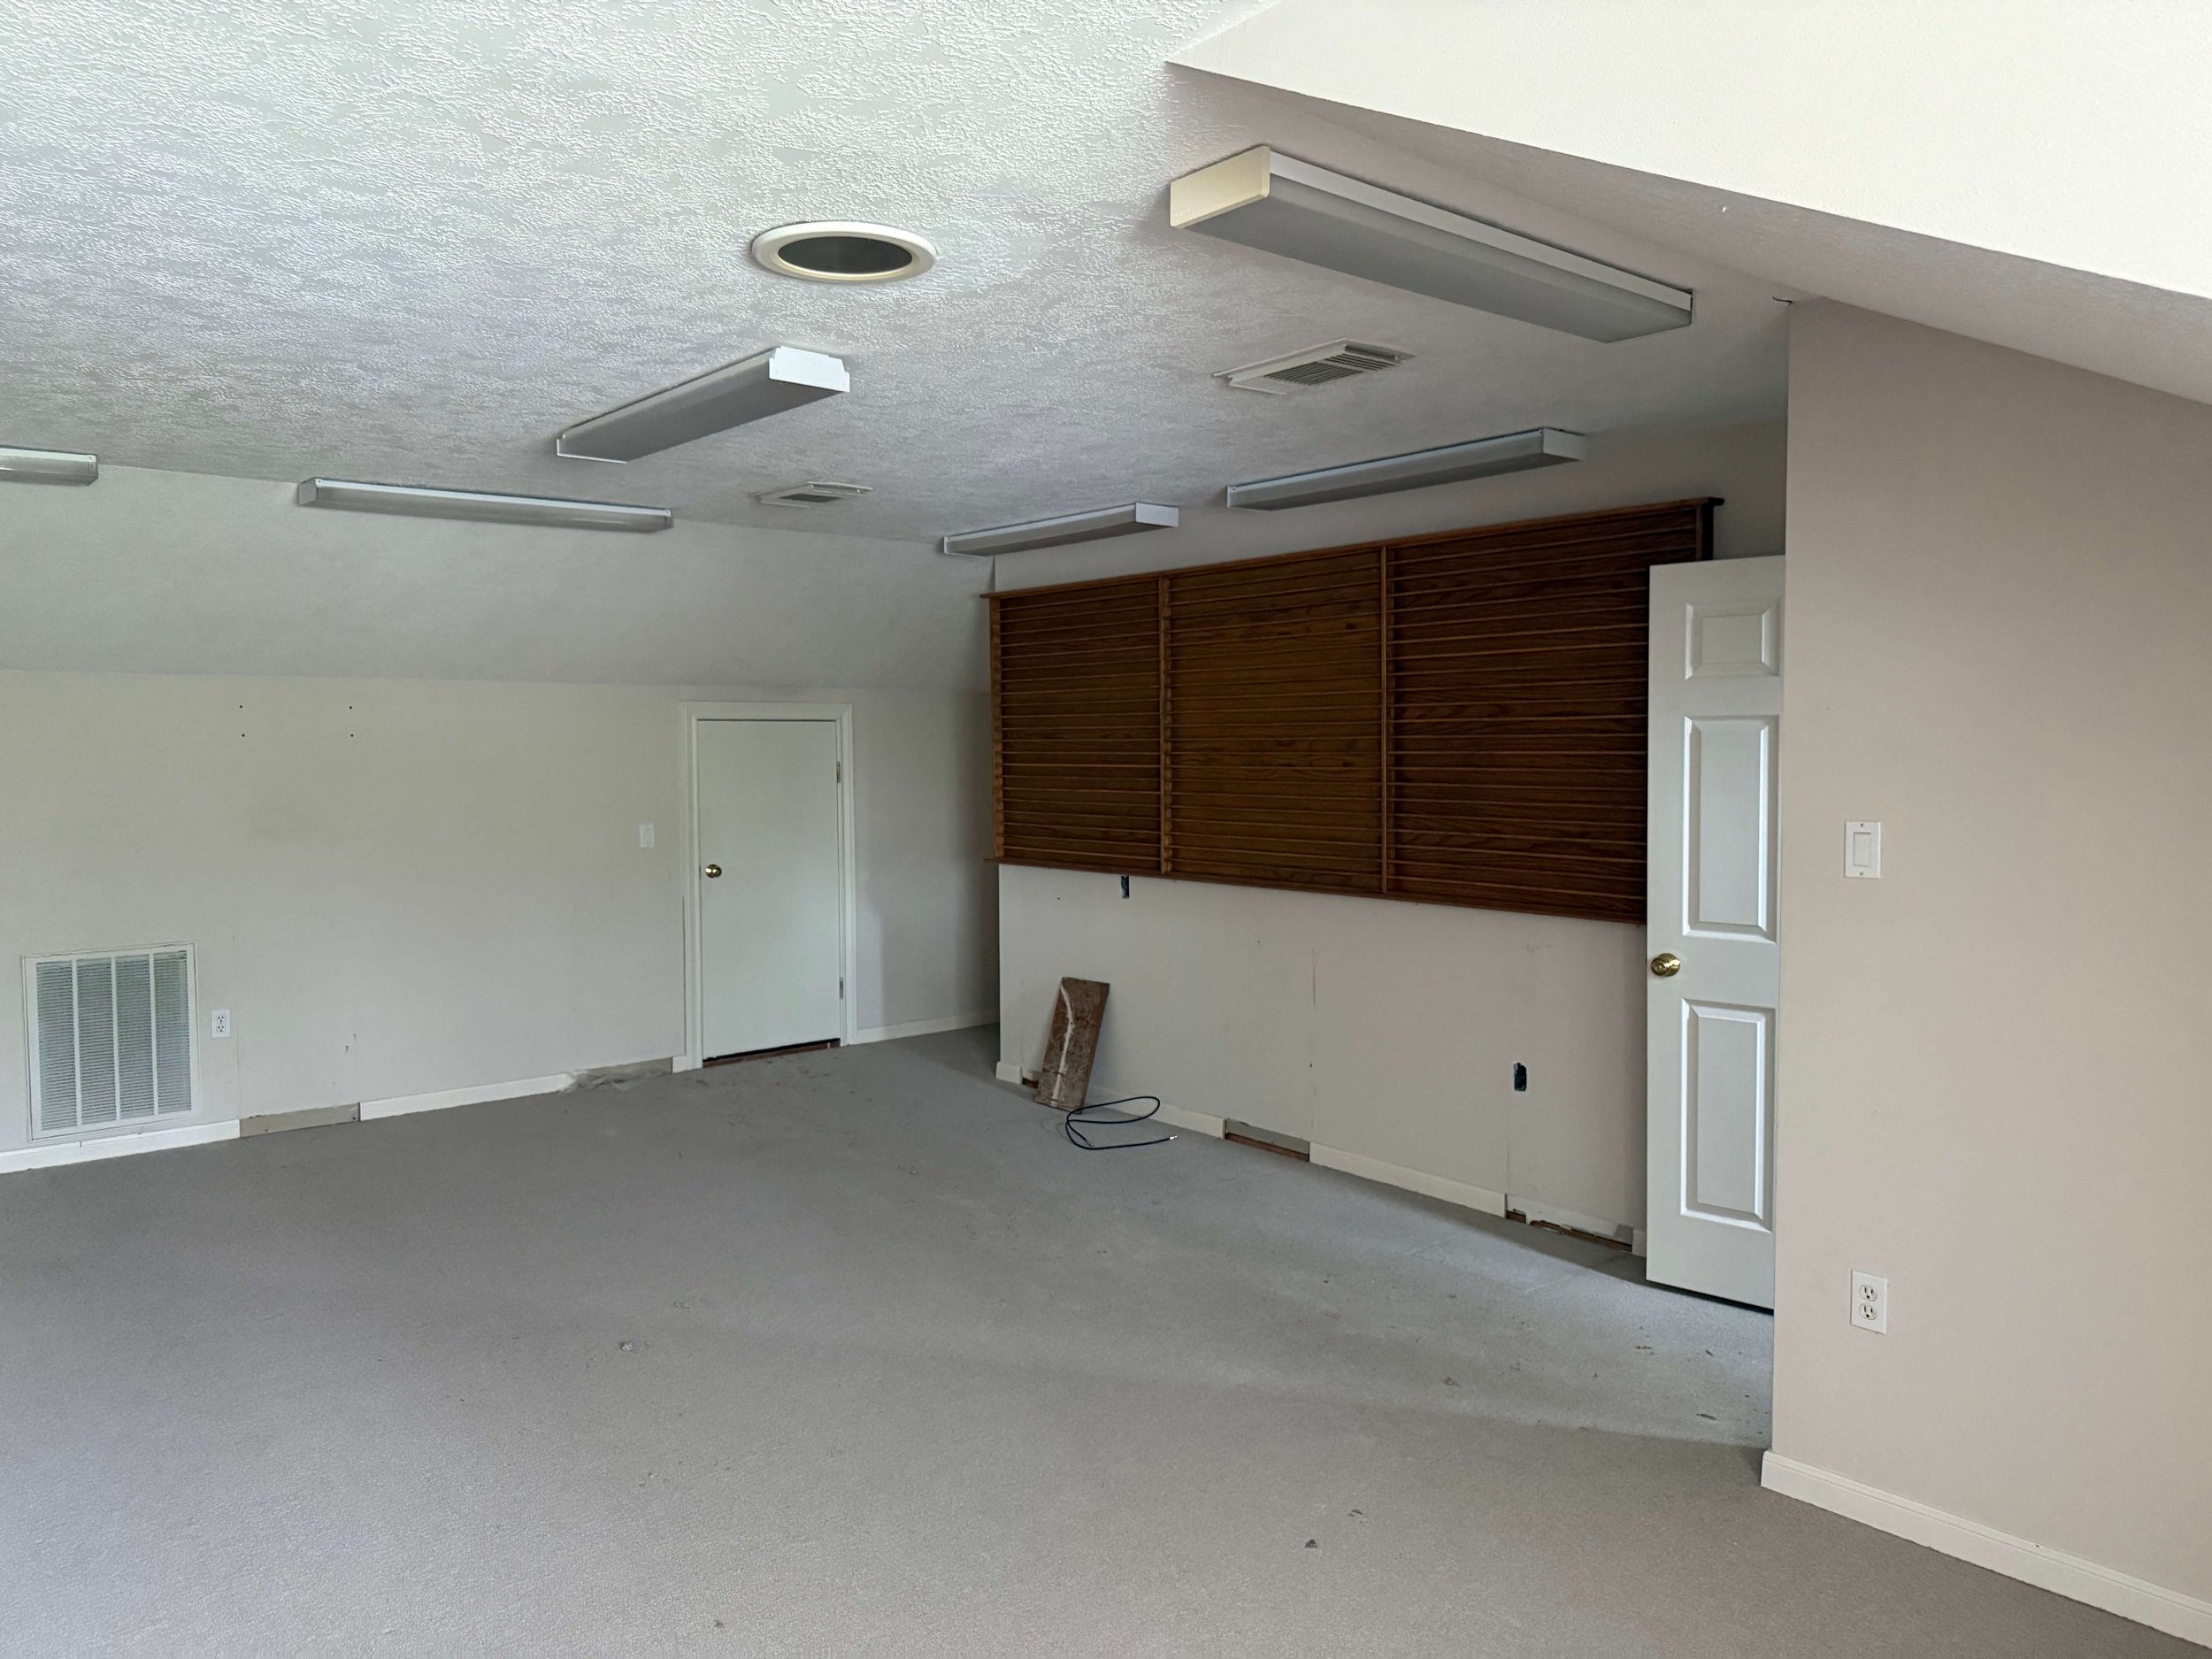
BEFORE - GAMEROOM
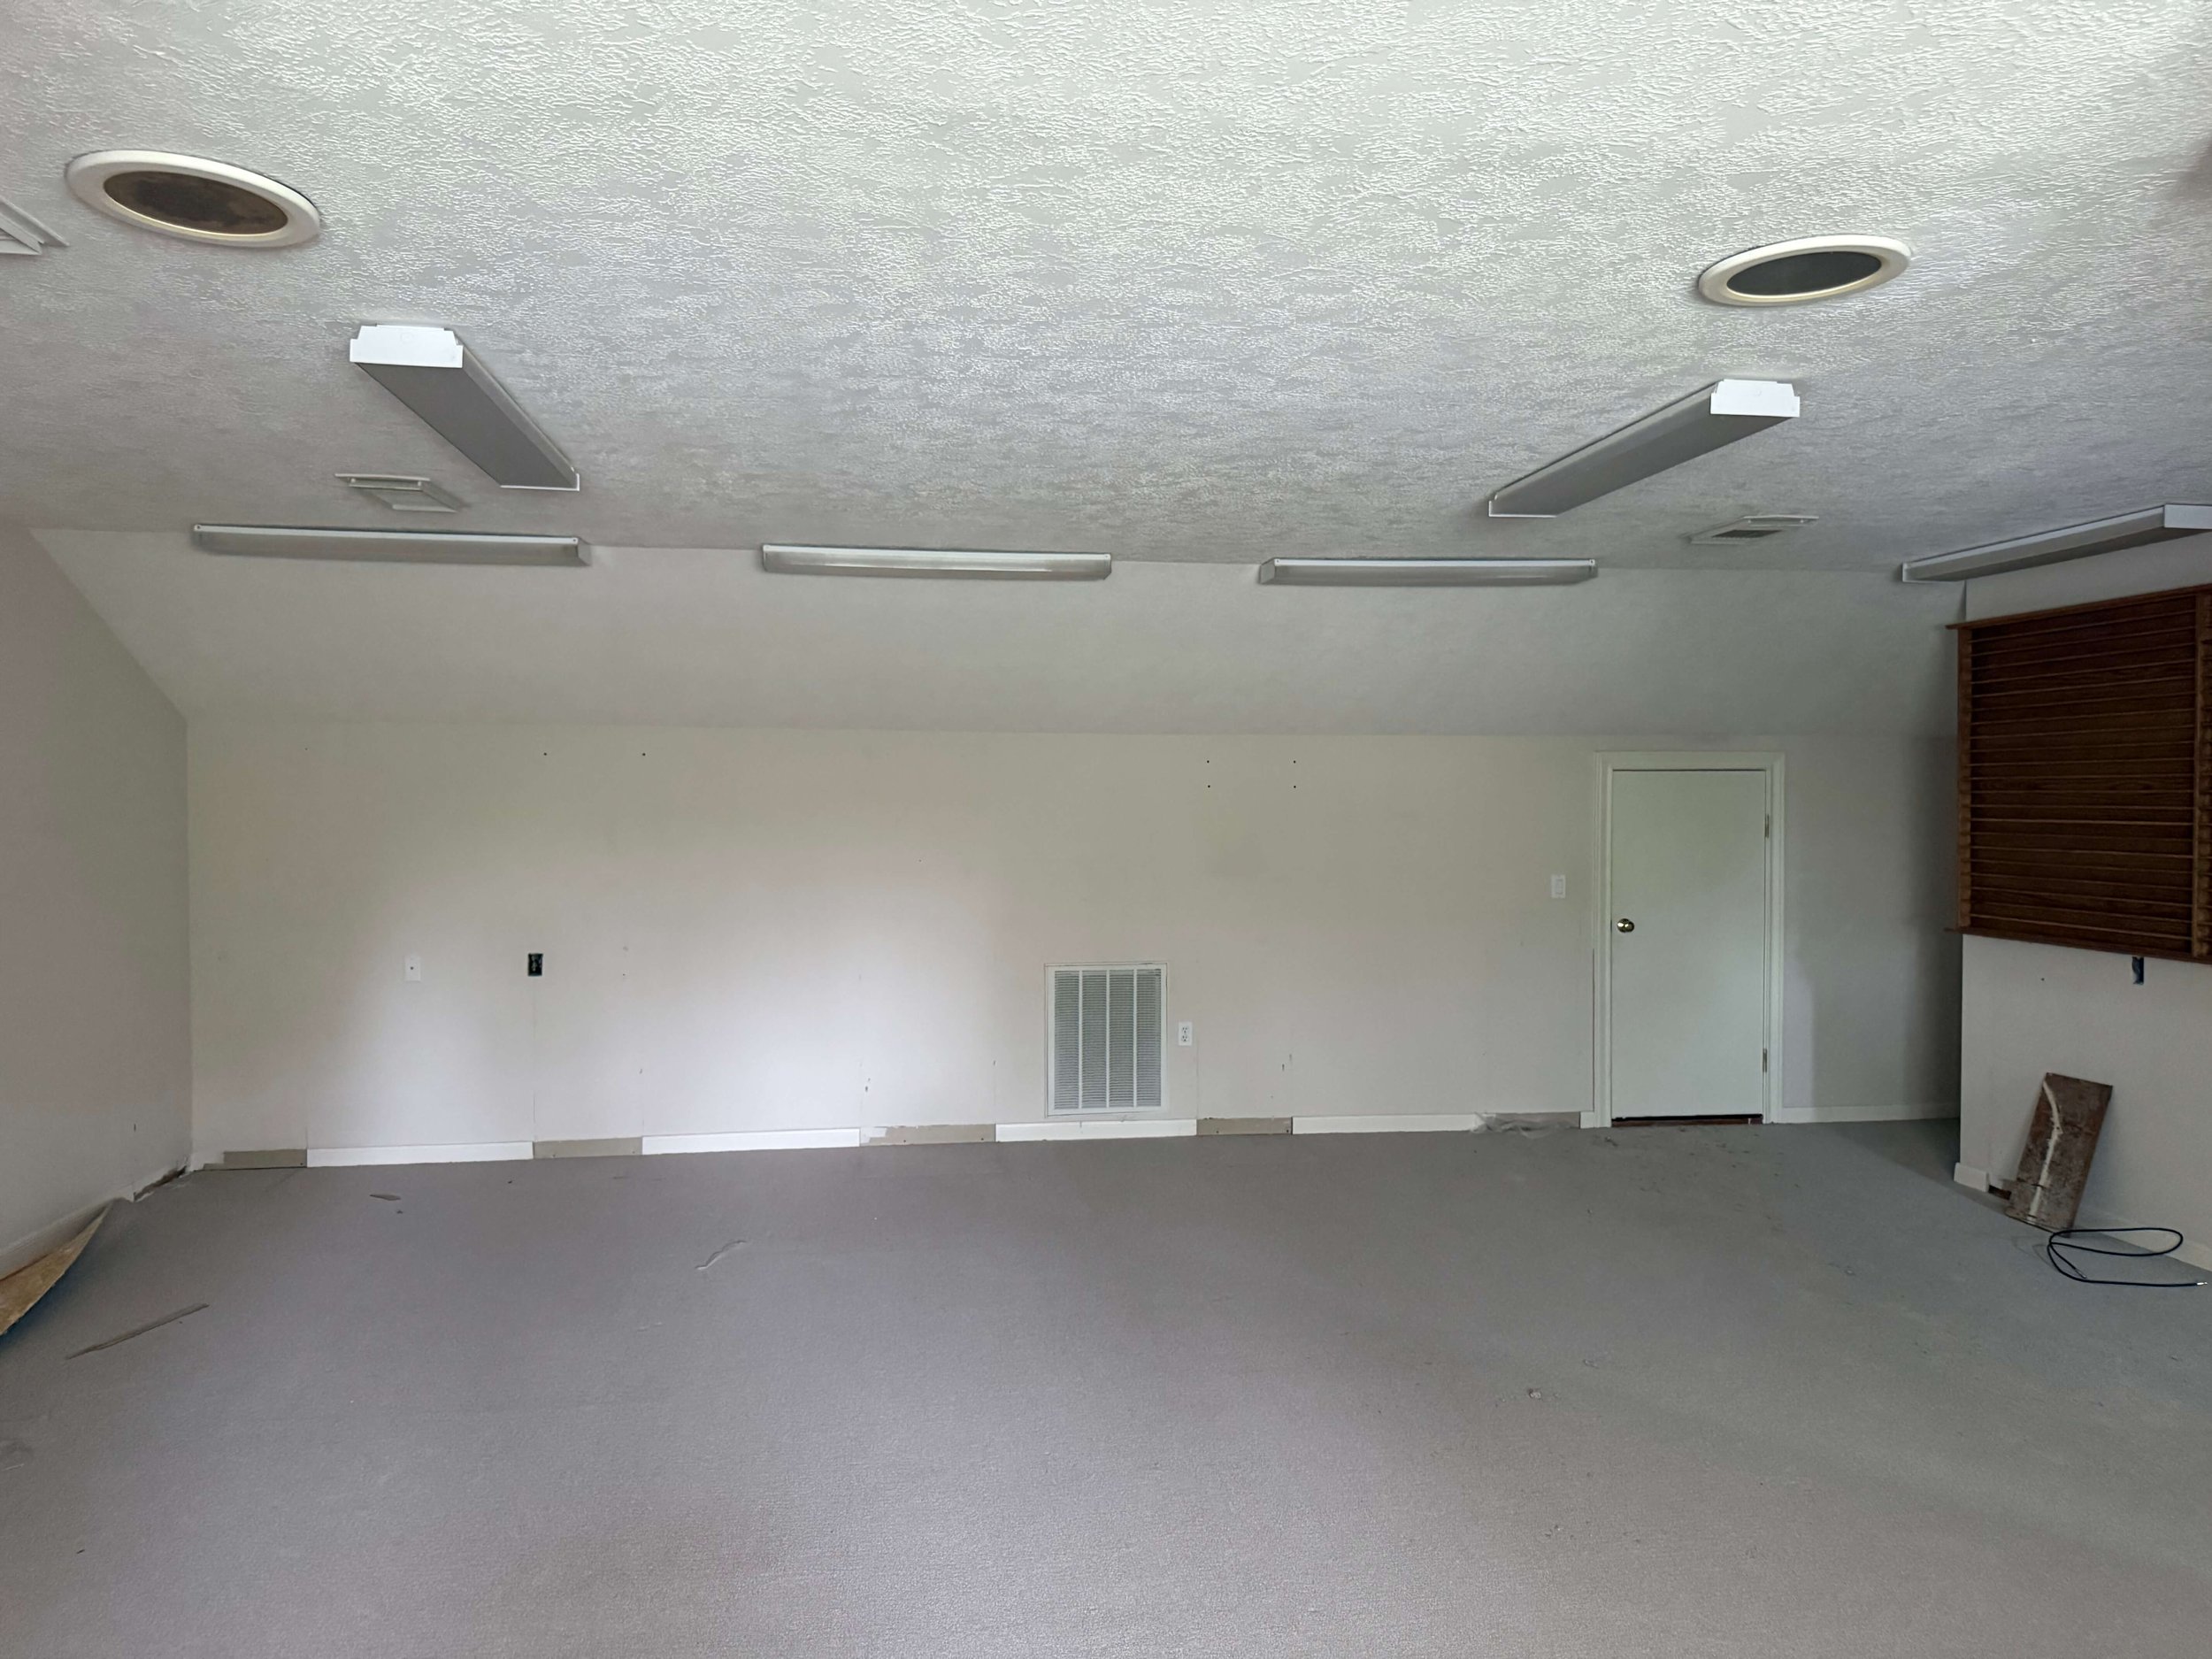
BEFORE - GAMEROOM
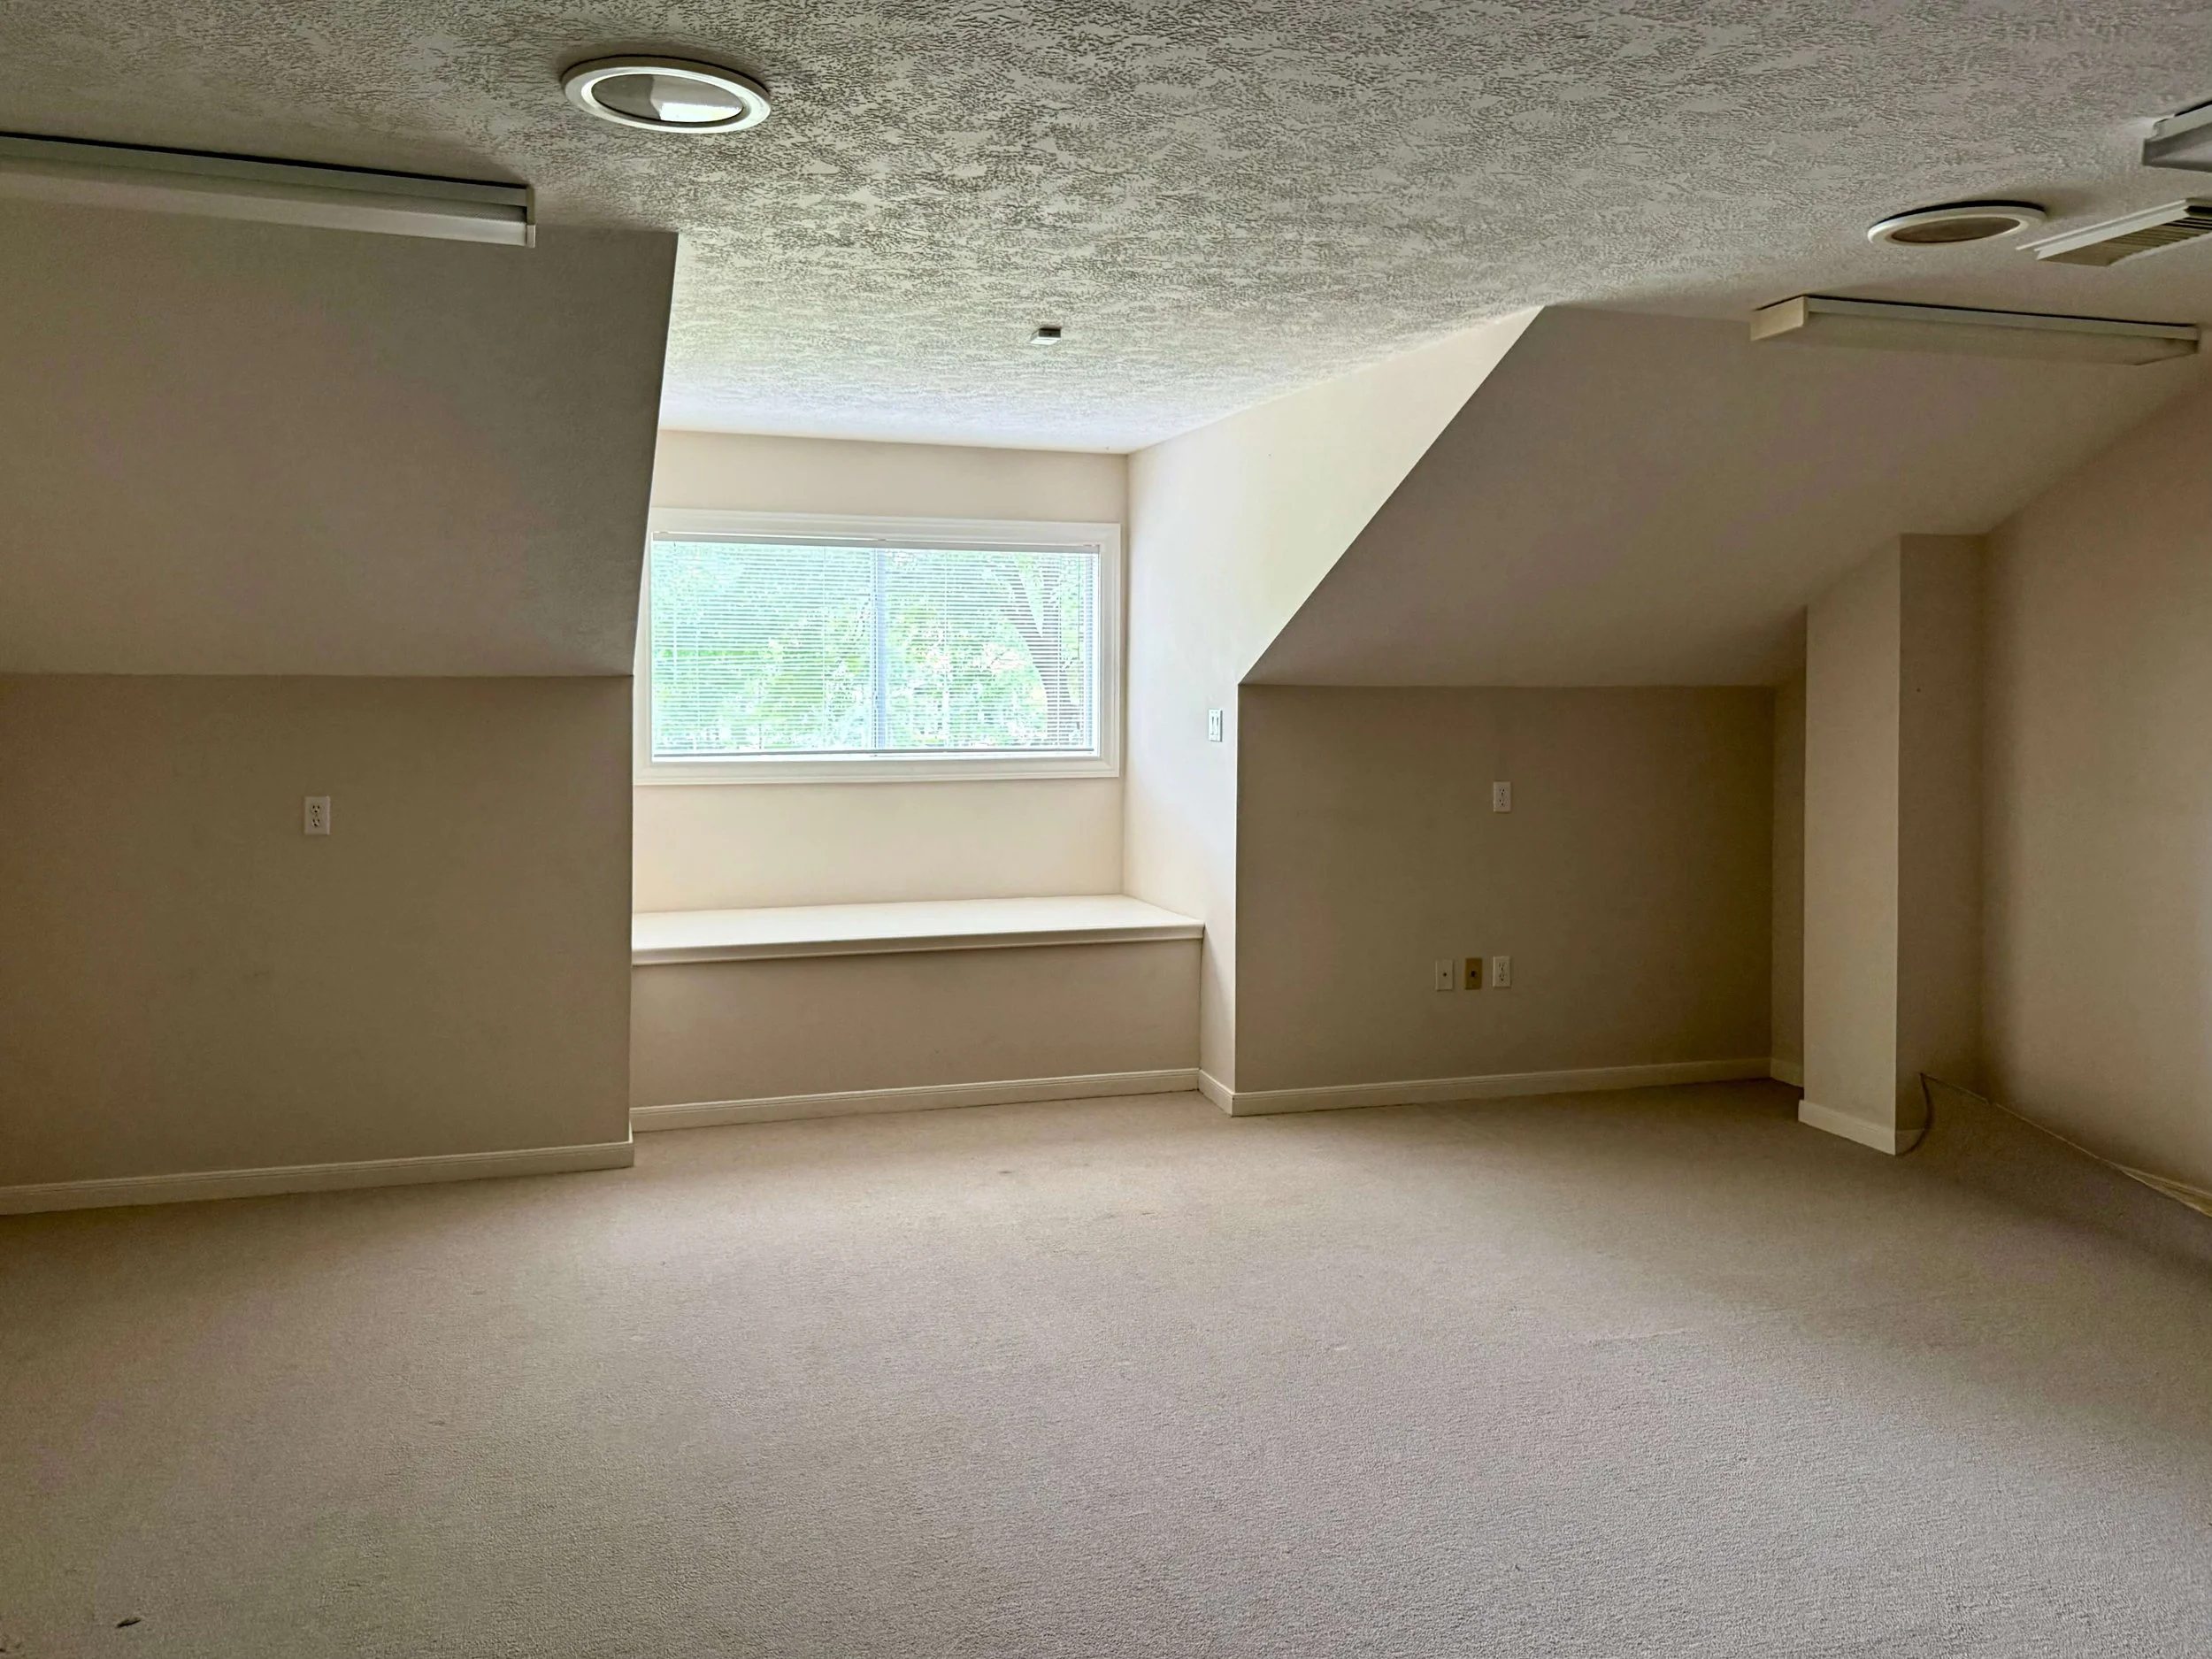
BEFORE - GAMEROOM
Here was the way the furniture would be laid out. We needed some open space for exercise too.
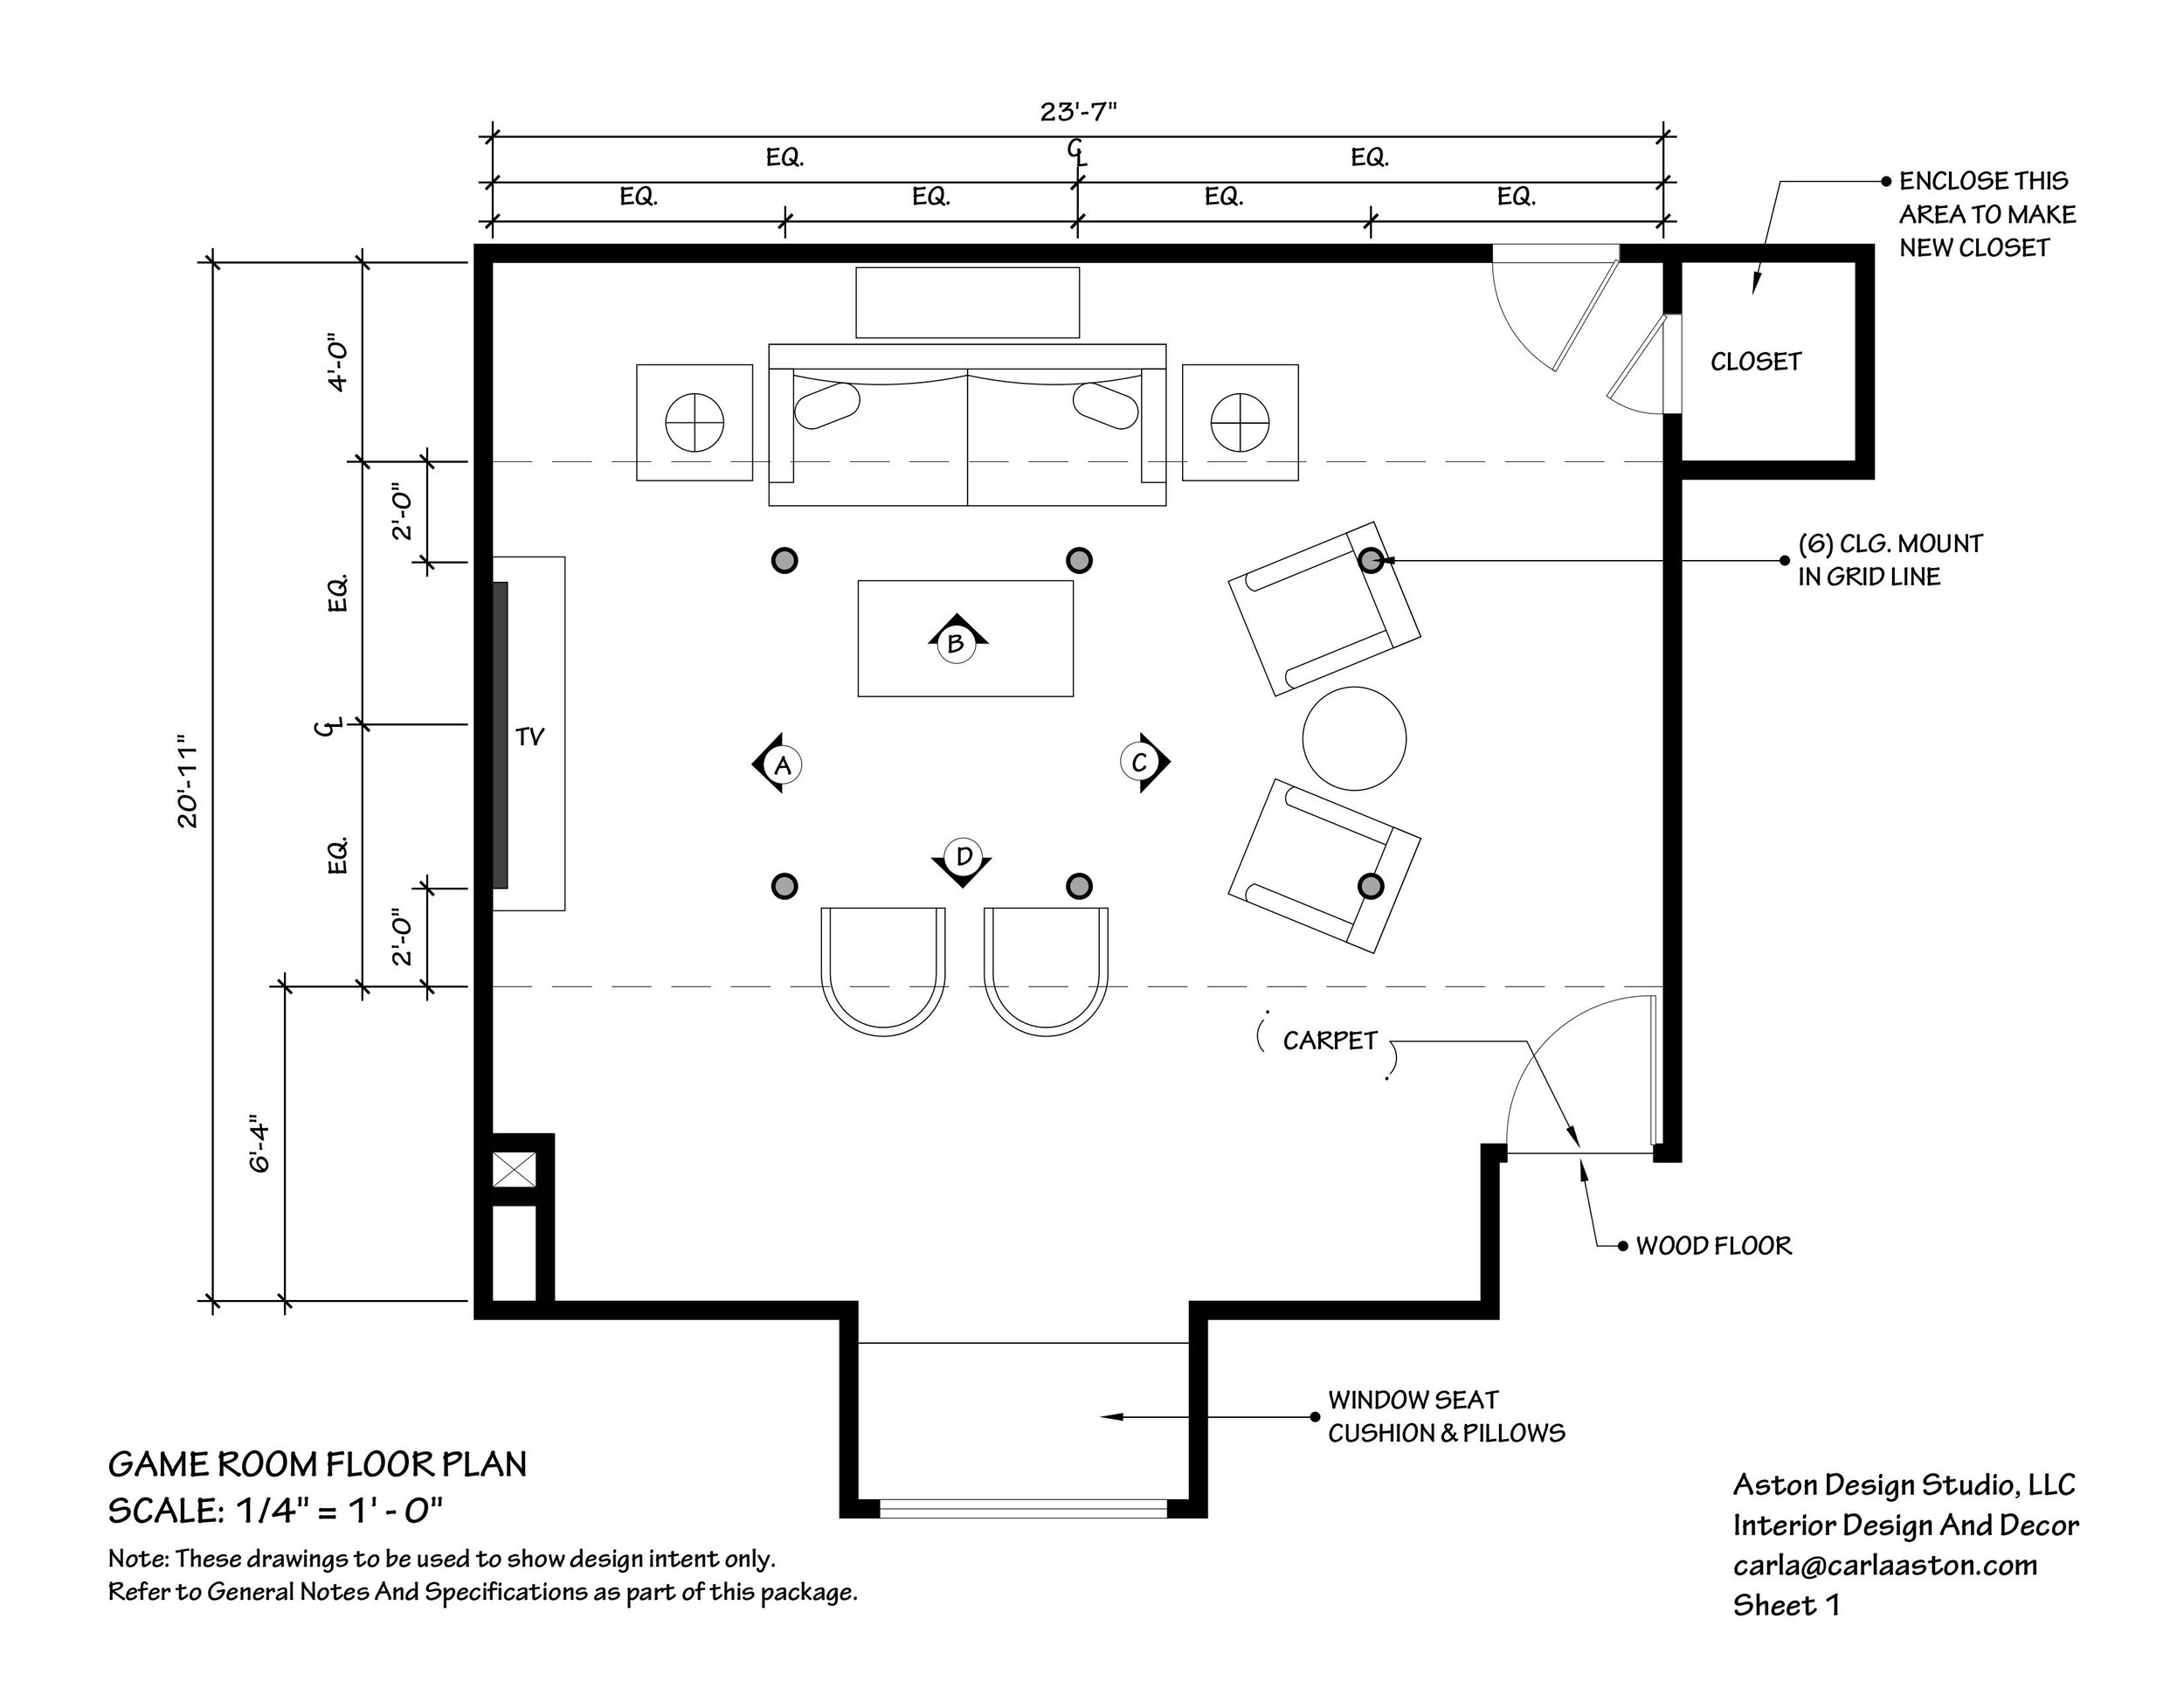
The furniture was all reused from their previous home that I designed for them about 8 years prior. It fit in nicely, although the sofa had a tight squeeze getting into this room! We only added some new pillows, accessories and a shade. Even their artwork we had in their gameroom before was reused here.
I went with some dense, patterned carpet to help with transmission of sound and provide a cushy feel underfoot.
We ended up adding cabinets on each side of the window since that ceiling was quite low there and then also added a coffee bar on the wall opposite the tv.
I detailed a vertical paneled wainscot and had everything above it painted one medium gray-green color to minimize all the angles and jogs in the ceiling.
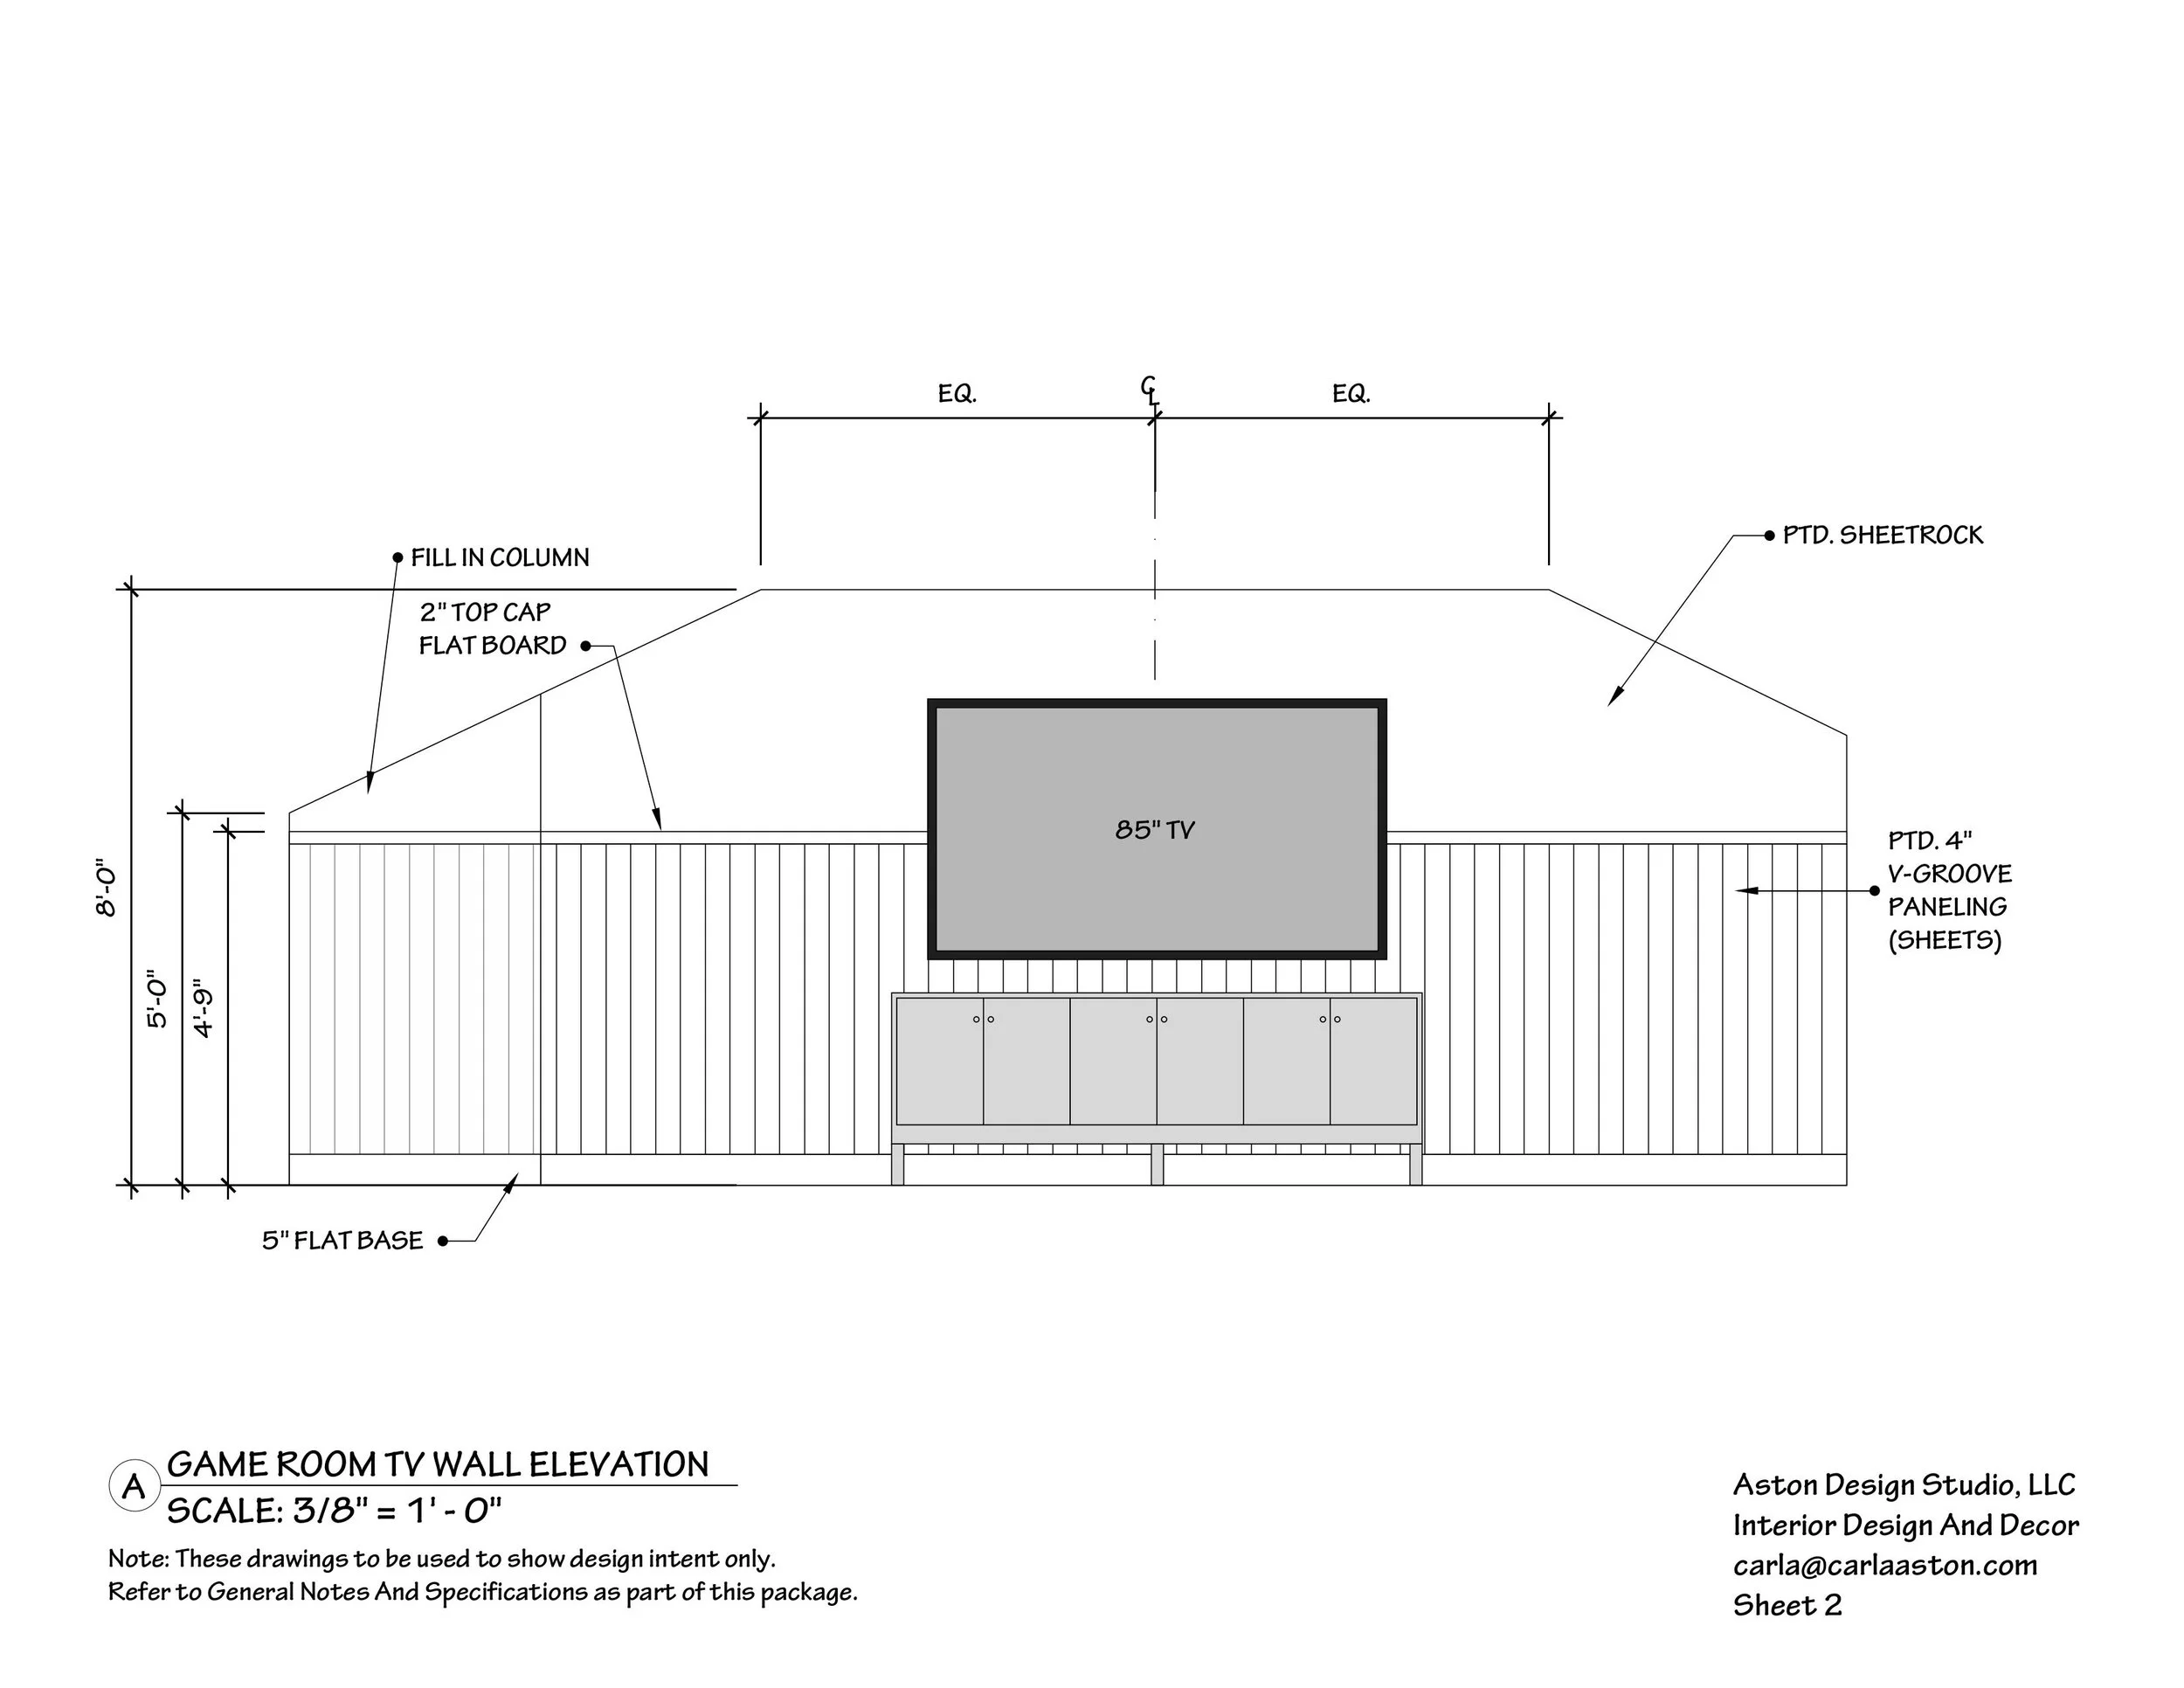
I wanted the top of the paneled wainscot to land a few inches below the lowest point of the angled ceiling. It worked out well proportionately too.
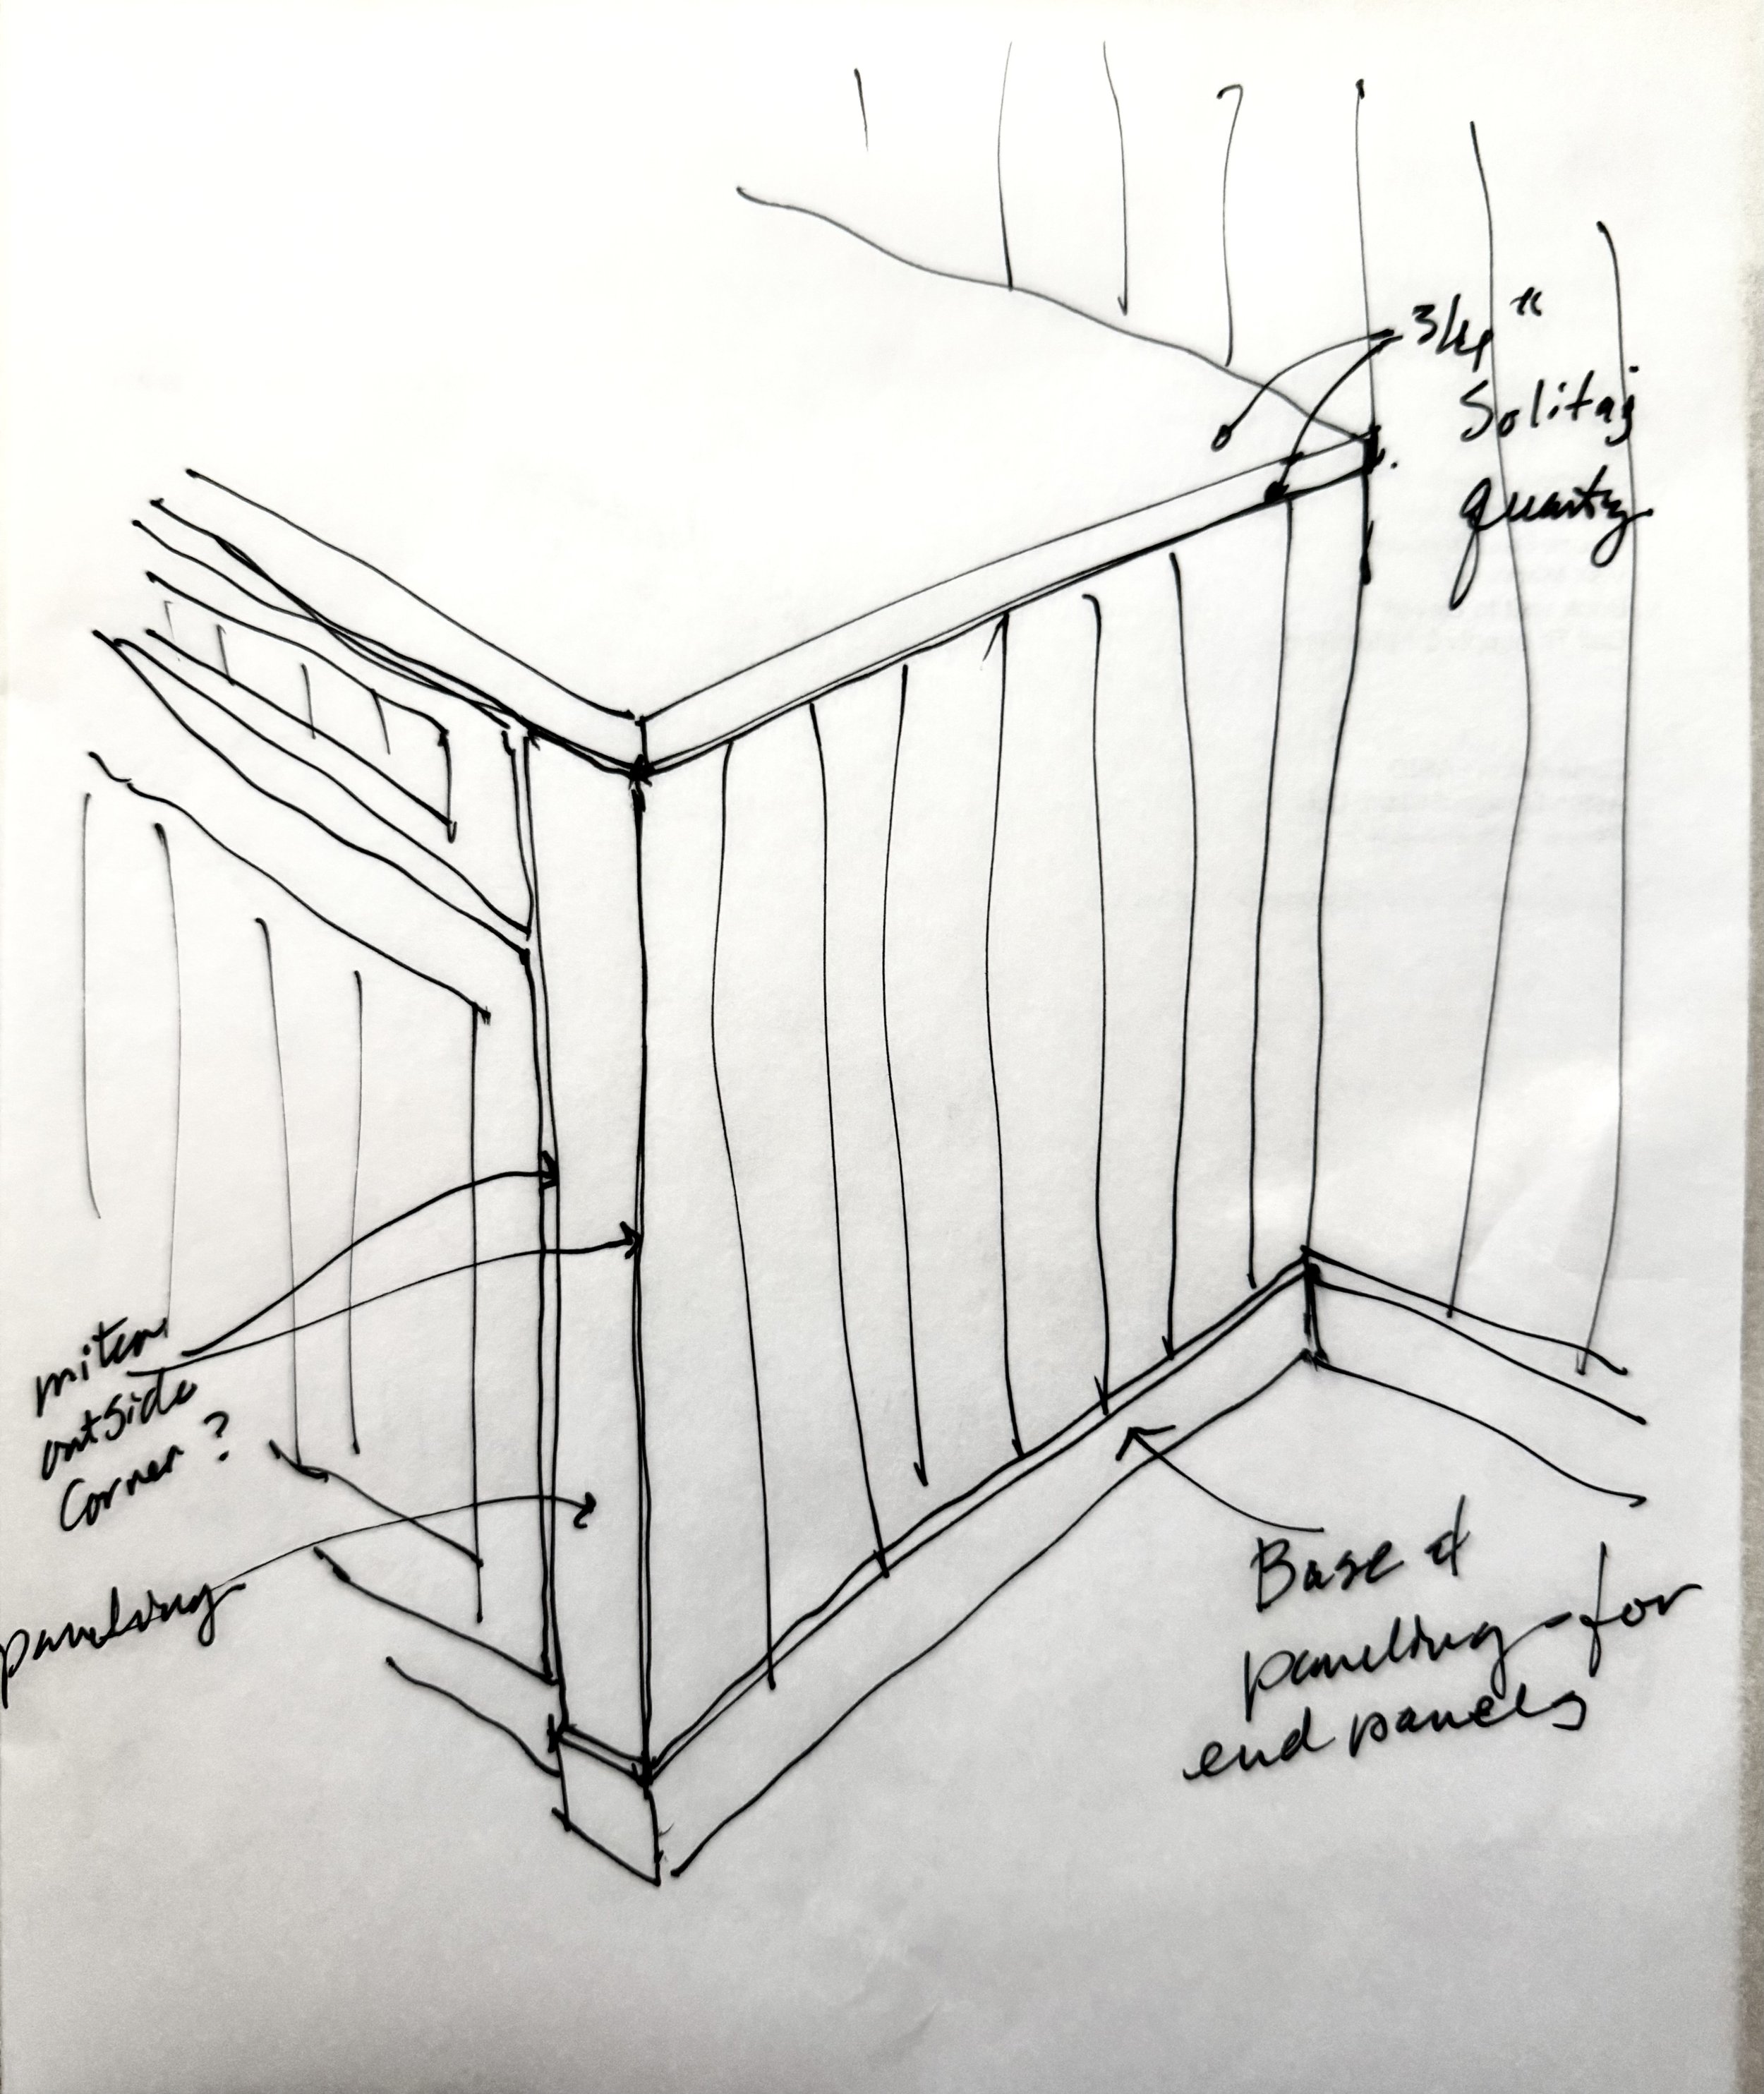
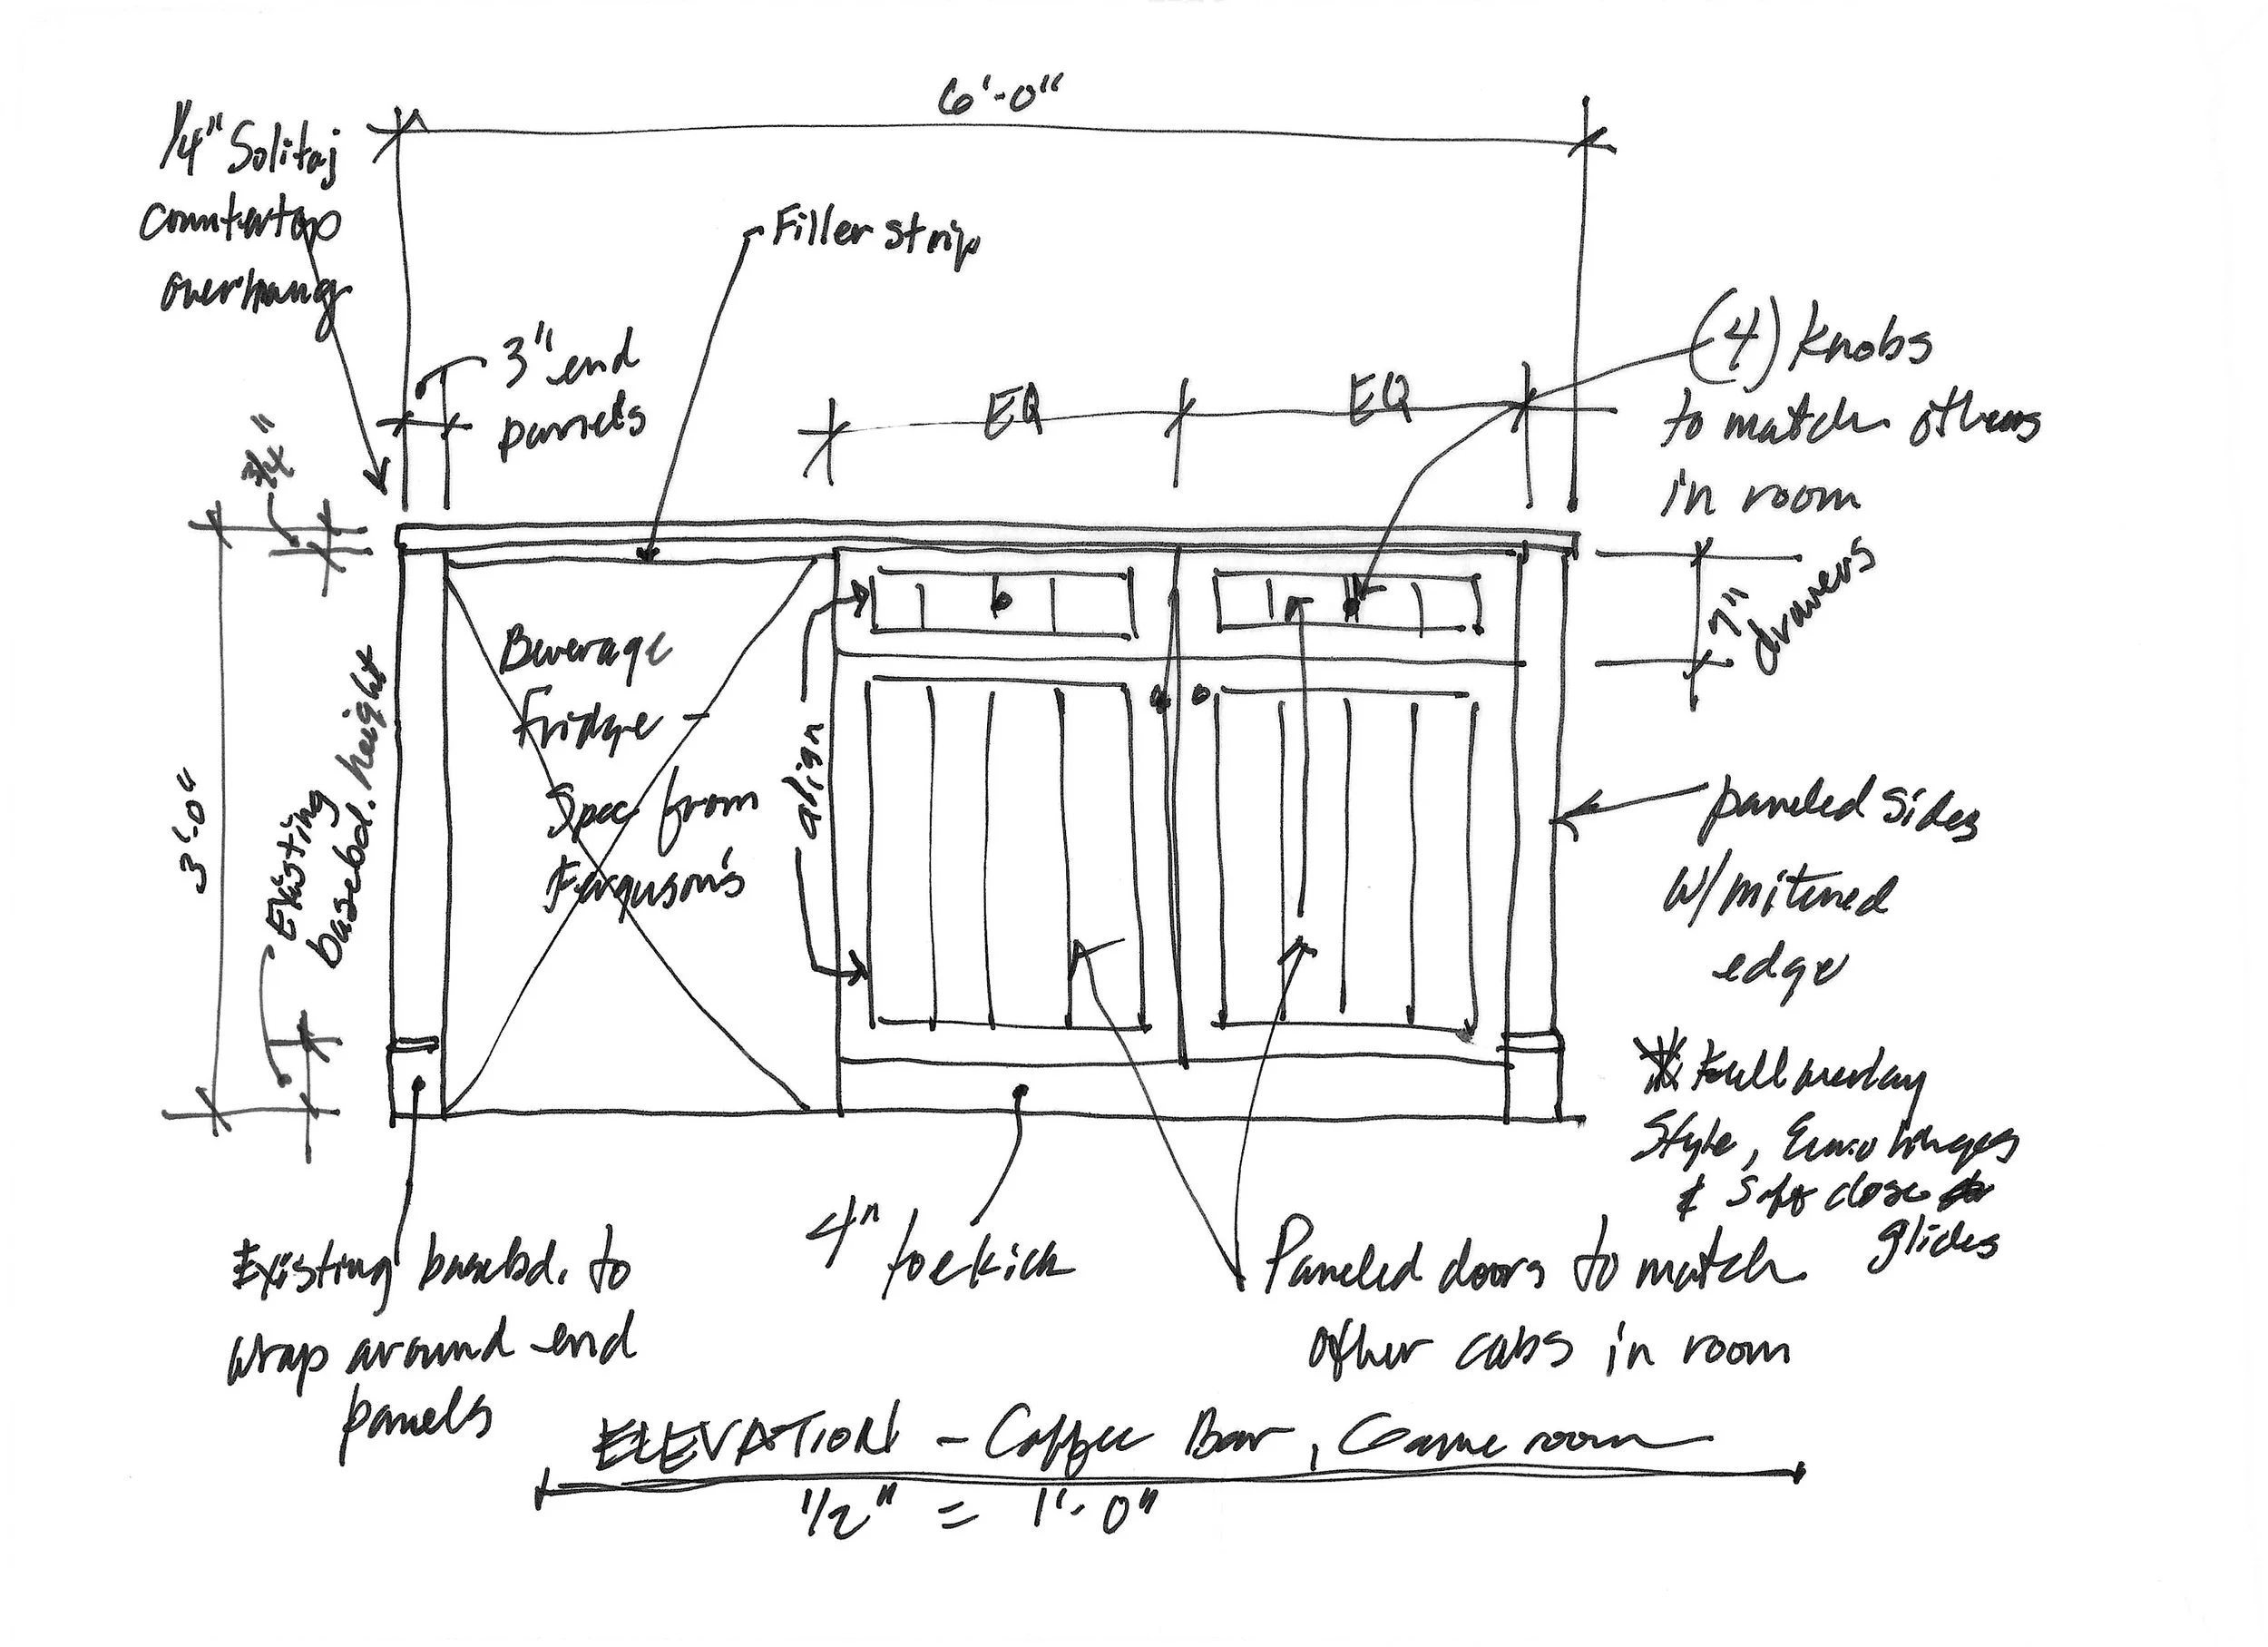
I carried that vertical paneling look to the cabinet door fronts and the sides of the coffee bar too. Since these were added on after all the drawings had been issued, we just used my sketches for these. They do get the point across though! :-)
Love the wood cabinet pulls up in this space, matching the ones we did in the kitchen and laundry room.
While I do generally select different cabinet pulls for various rooms in a home, with different finishes and styles, in this one case, I liked the way the wood pulls provided some link to the other parts of the house and how the wood adds warmth to these spaces without going full wood cabinetry.
The result is a cozy space that can be used for watching movies, doing some yoga, playing games or just hanging out.
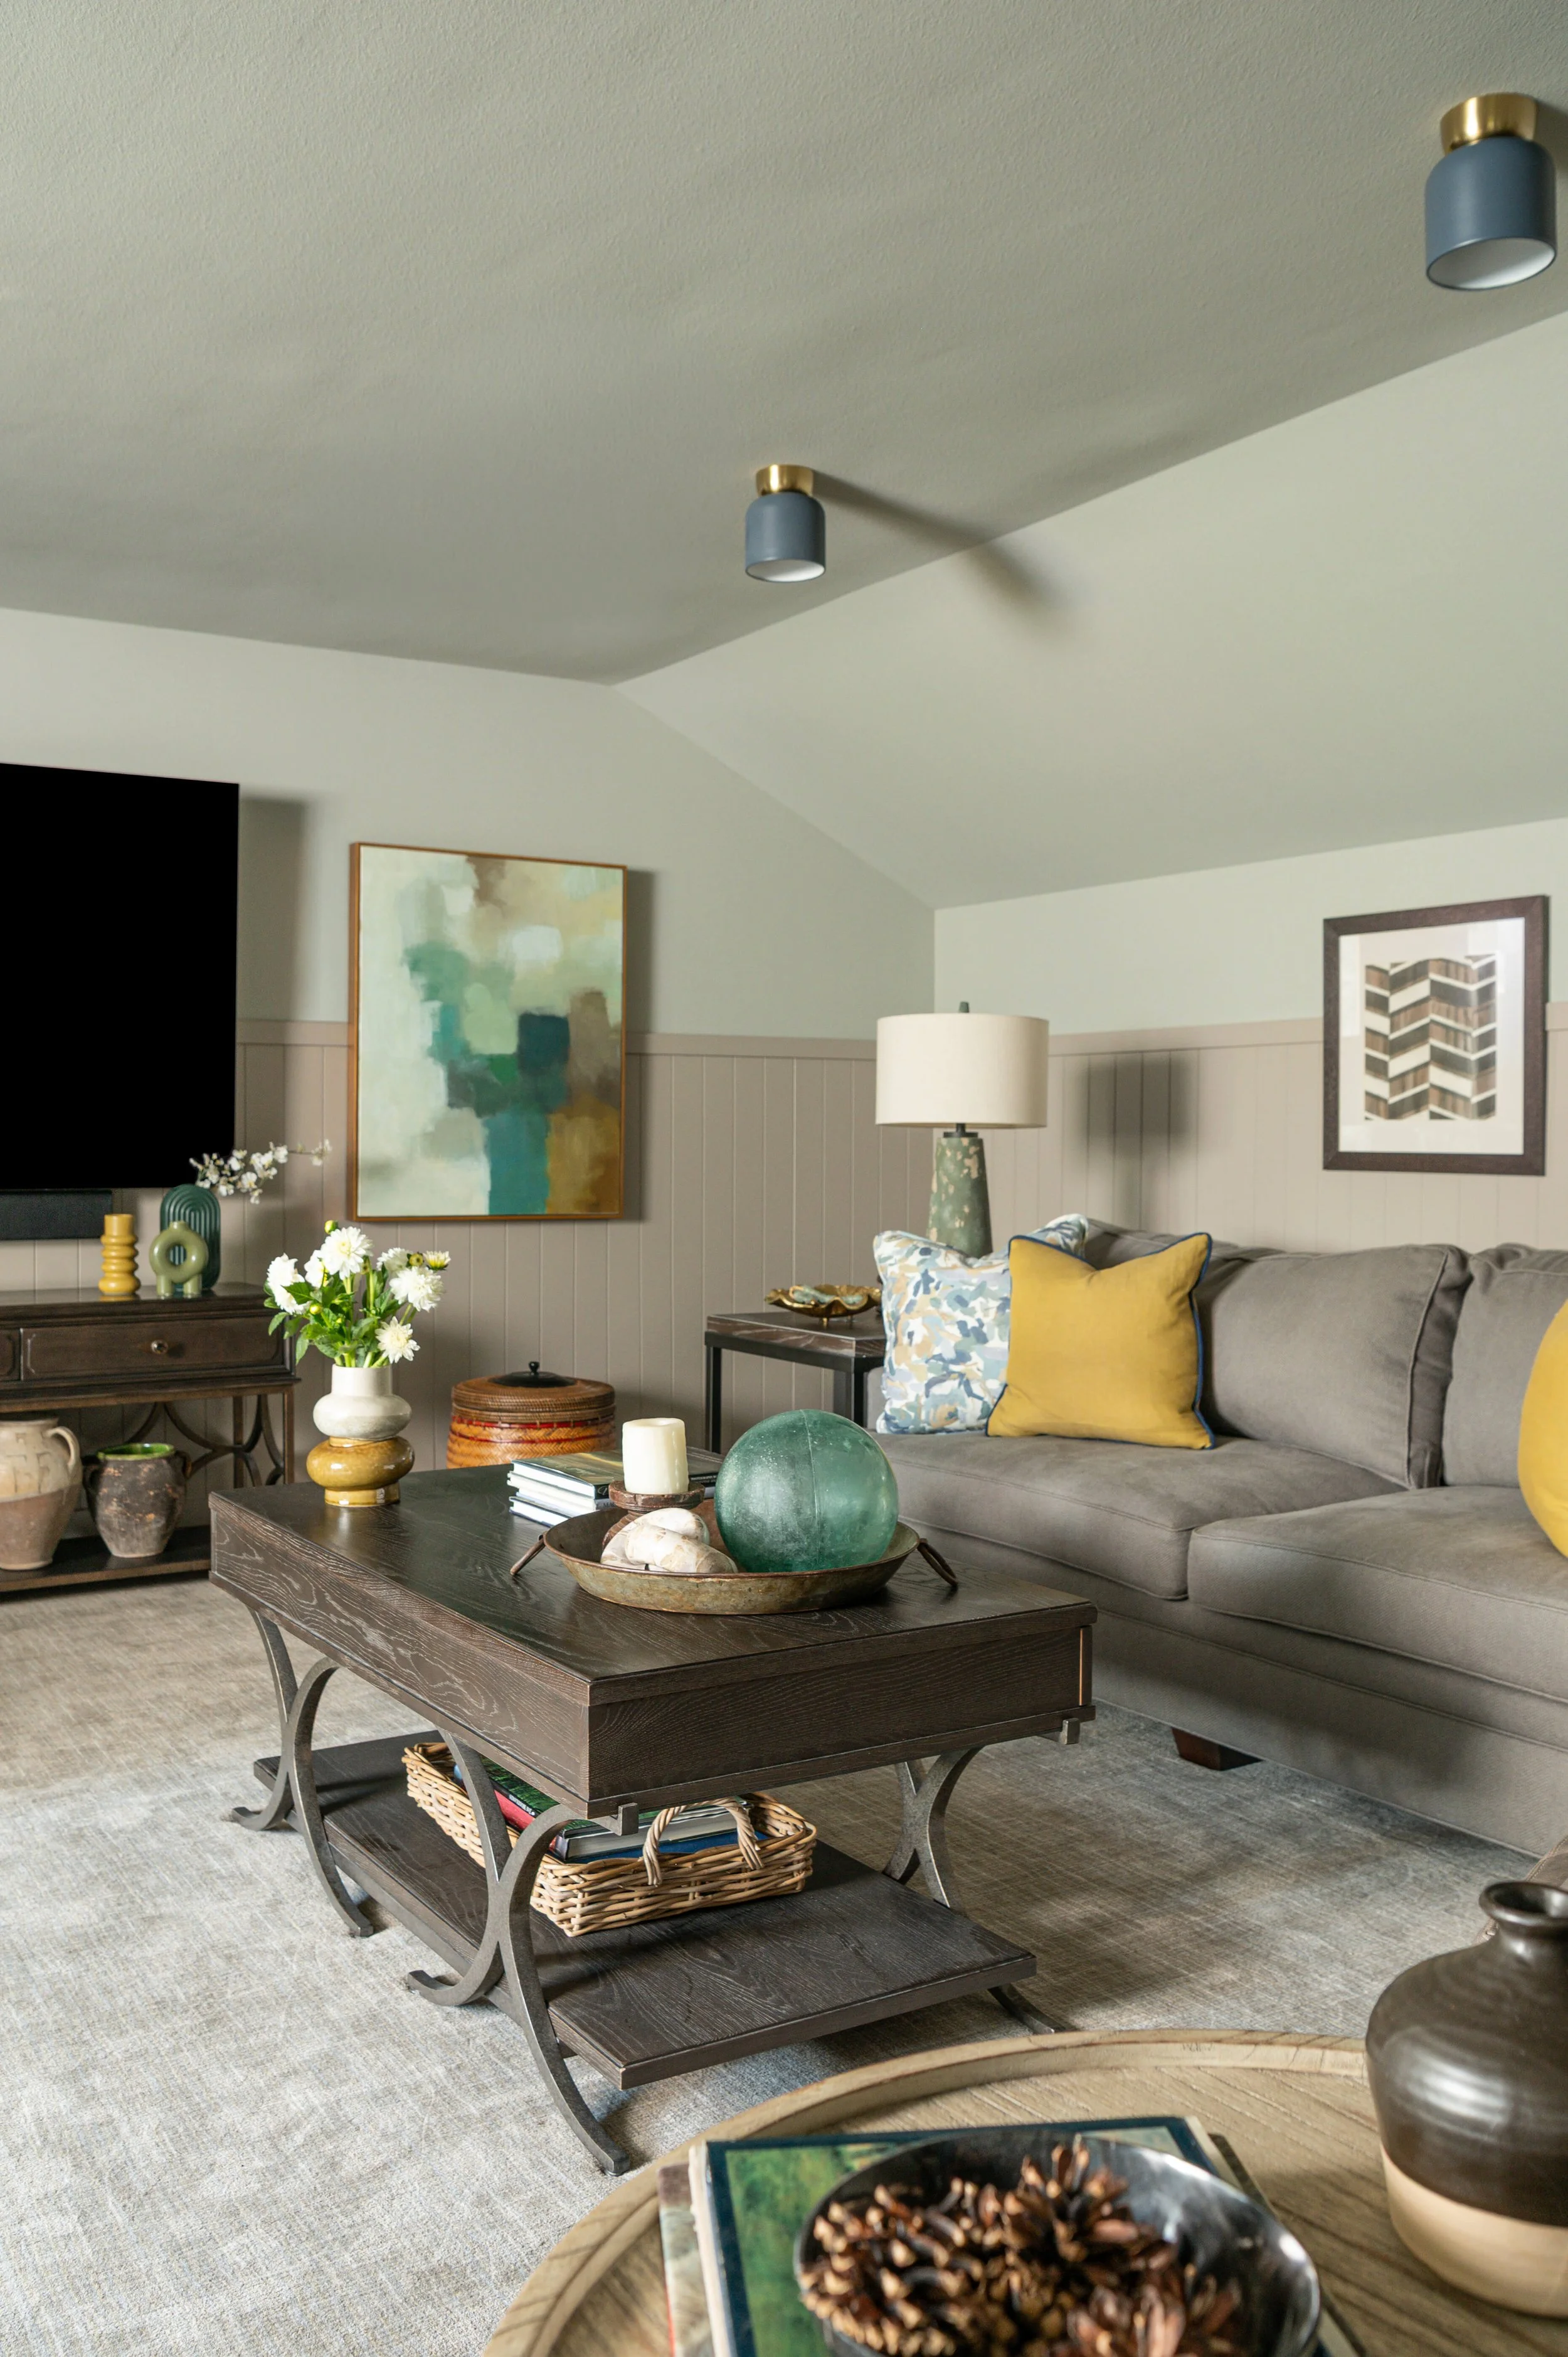
AFTER GAMEROOM - A cozy room using the furnishings from the client’s previous home with a new envelope of painted paneling, carpet and lighting. | Designer: Carla Aston, Contractor: CA Design Build, Photo: Ellen Renee Photography
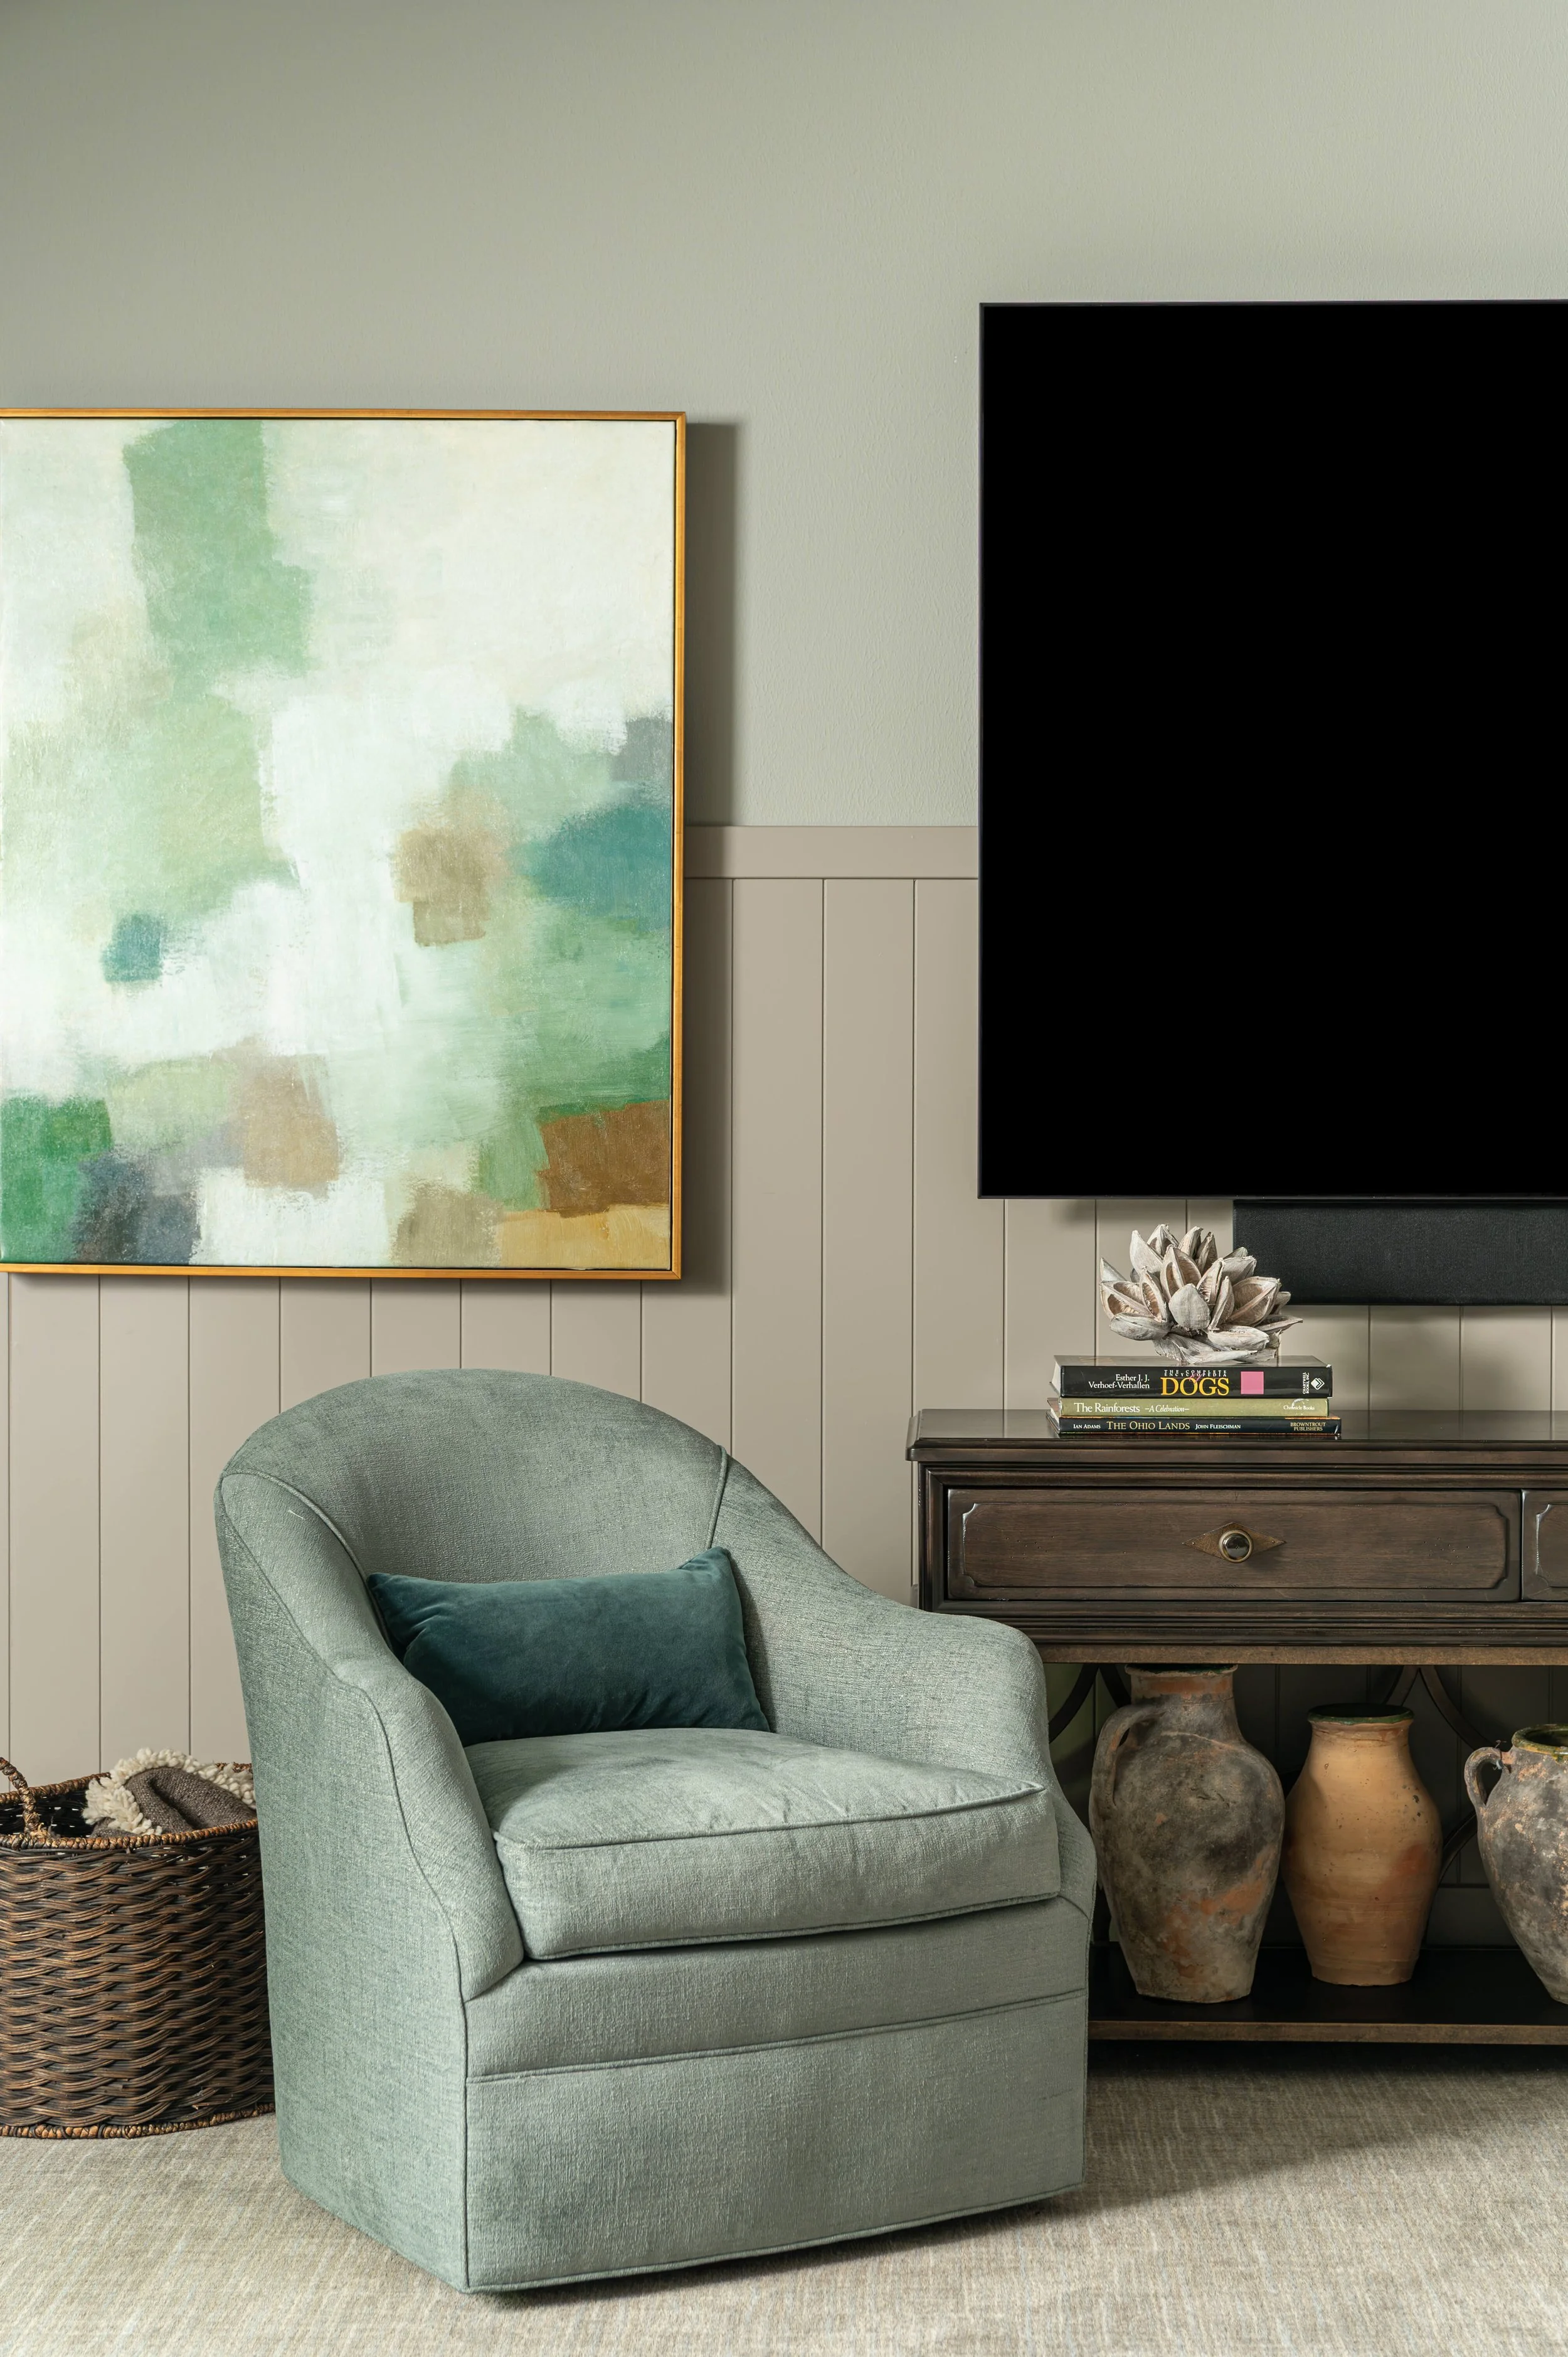
AFTER GAMEROOM - I just love the soft color palette up here. SW Sensible Hue on the upper walls and ceiling, SW Mega Greige on the paneling and cabinetry. | Designer: Carla Aston, Contractor: CA Design Build, Photo: Ellen Renee Photography
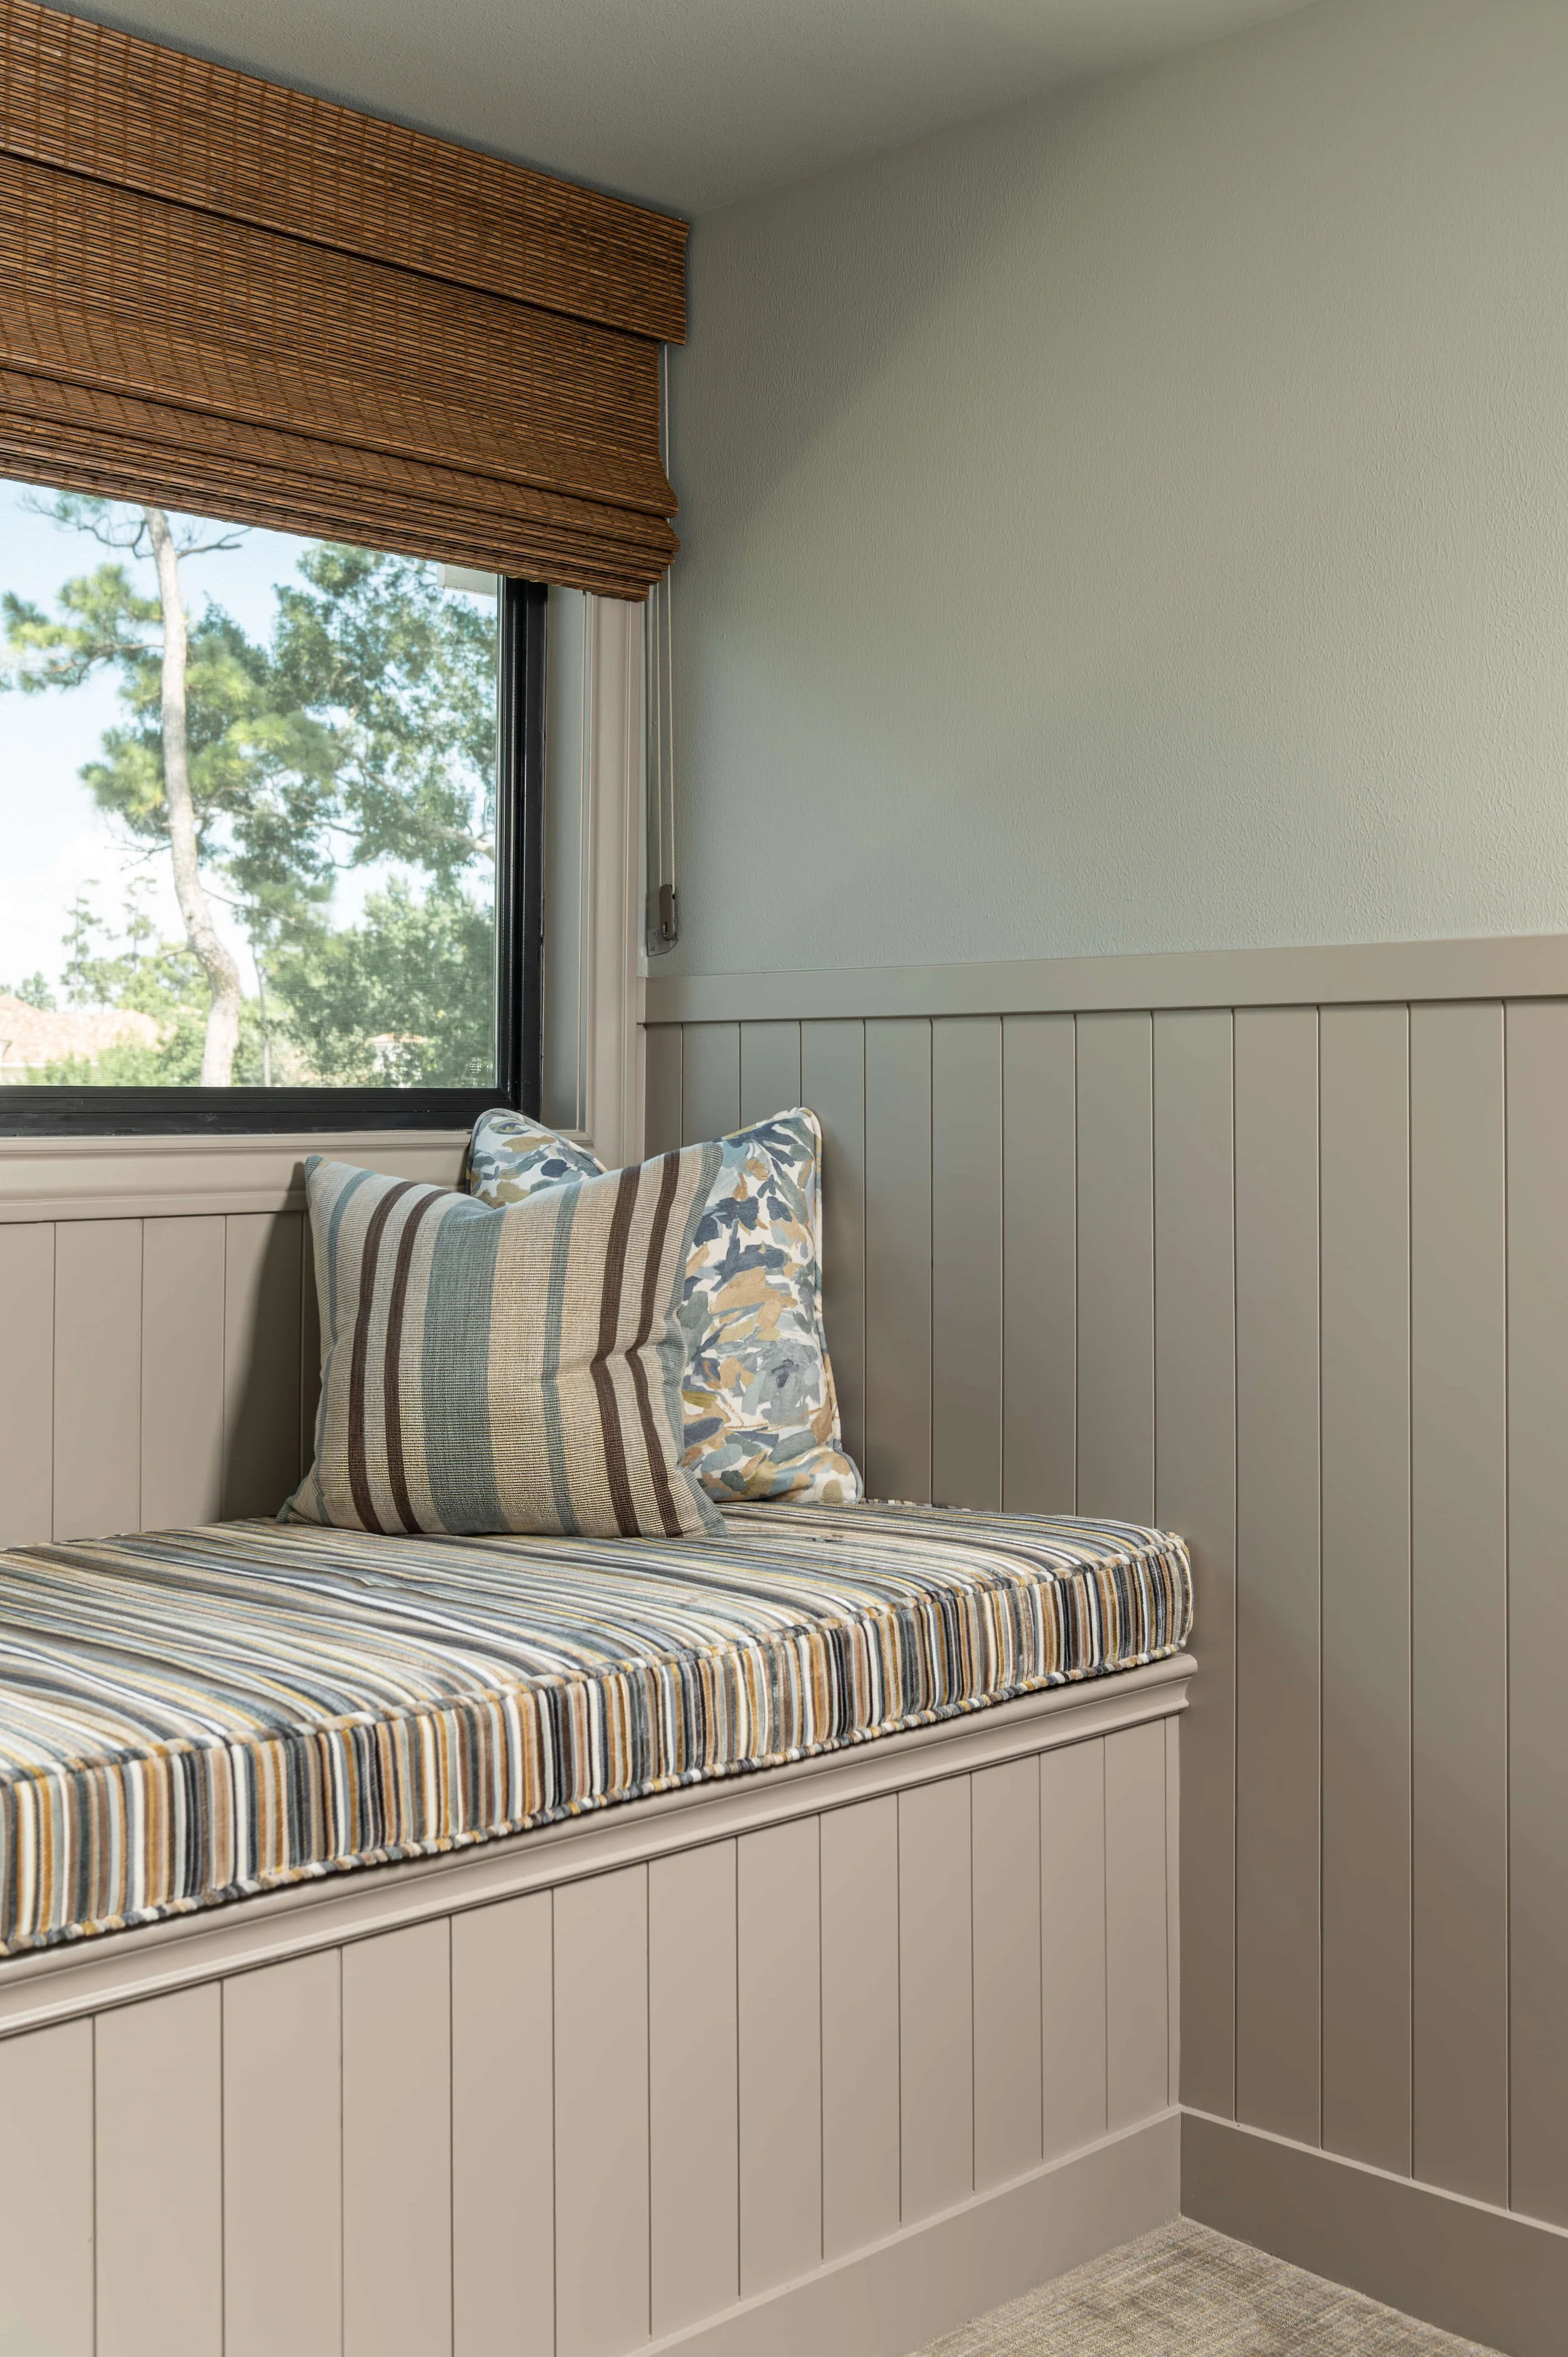
AFTER GAMEROOM - New items on the bench, besides the paneling were a cushion, pillows and woven wood shade. This bench is so deep it would make a great place to nap for a child. | Designer: Carla Aston, Contractor: CA Design Build, Photo: Ellen Renee Photography
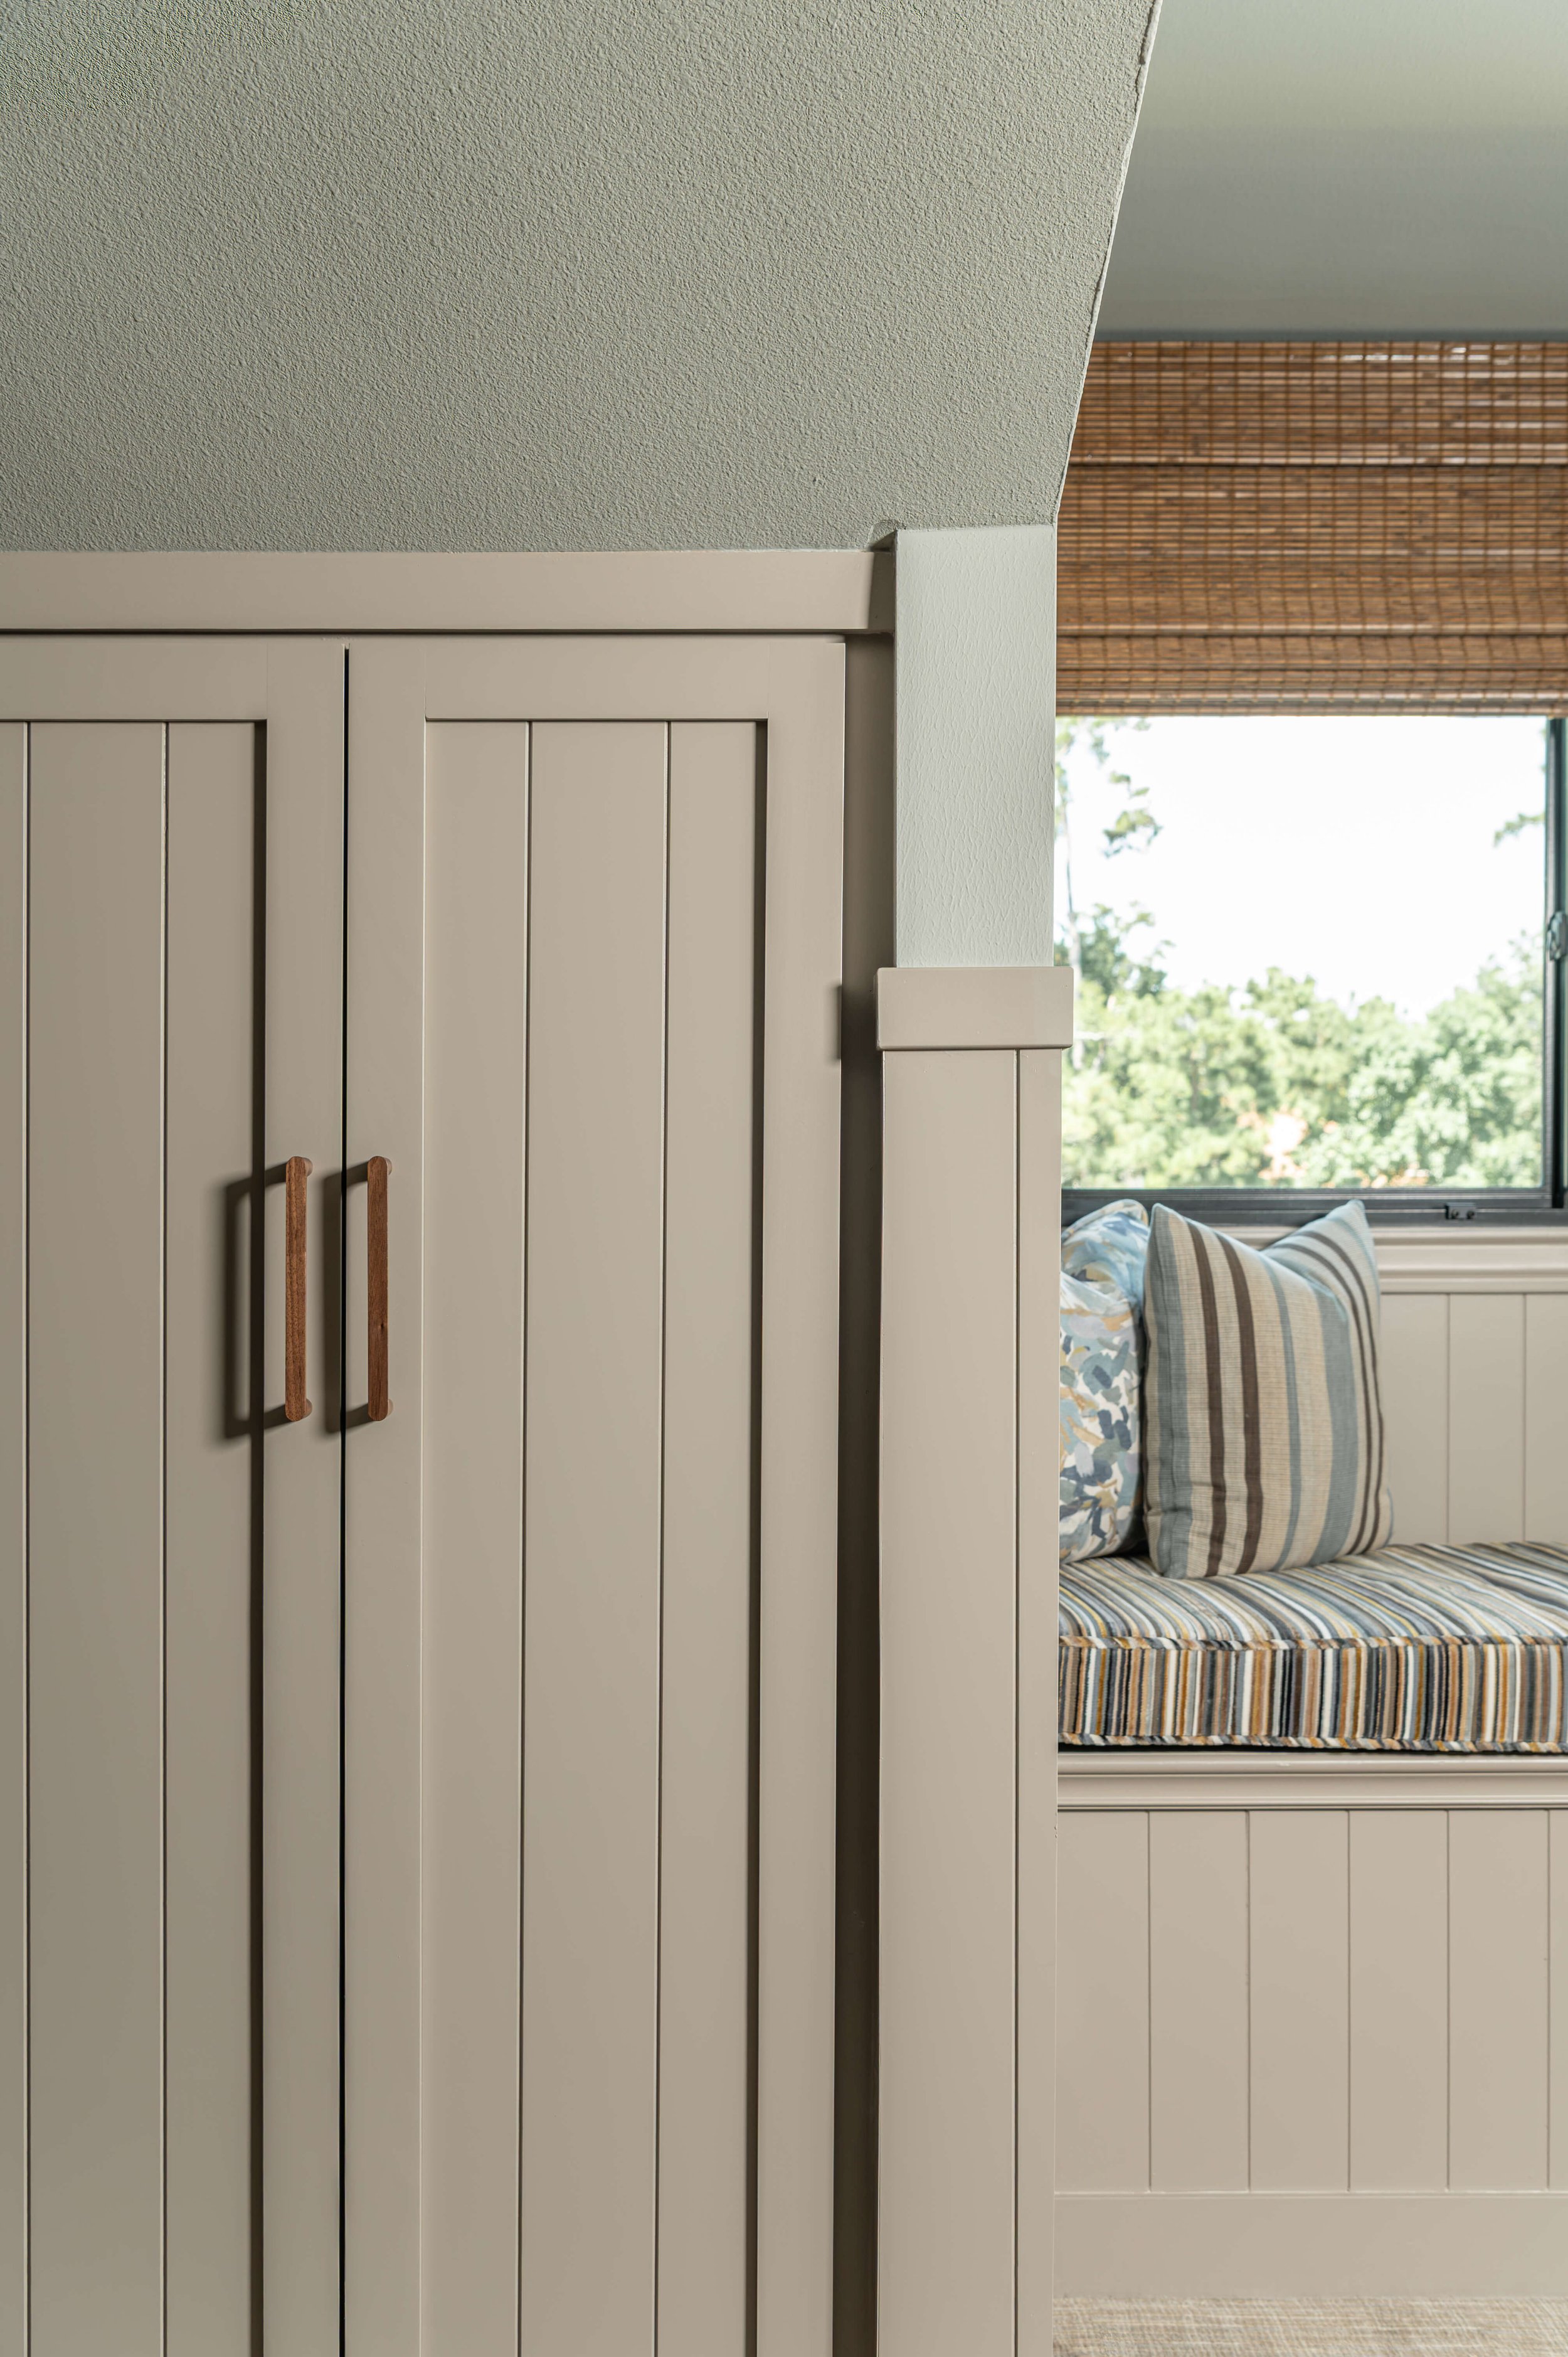
AFTER GAMEROOM - Vertical paneling on the walls and cabinet fronts distract the eye from the low ceiling and awkward angles. | Designer: Carla Aston, Contractor: CA Design Build, Photo: Ellen Renee Photography
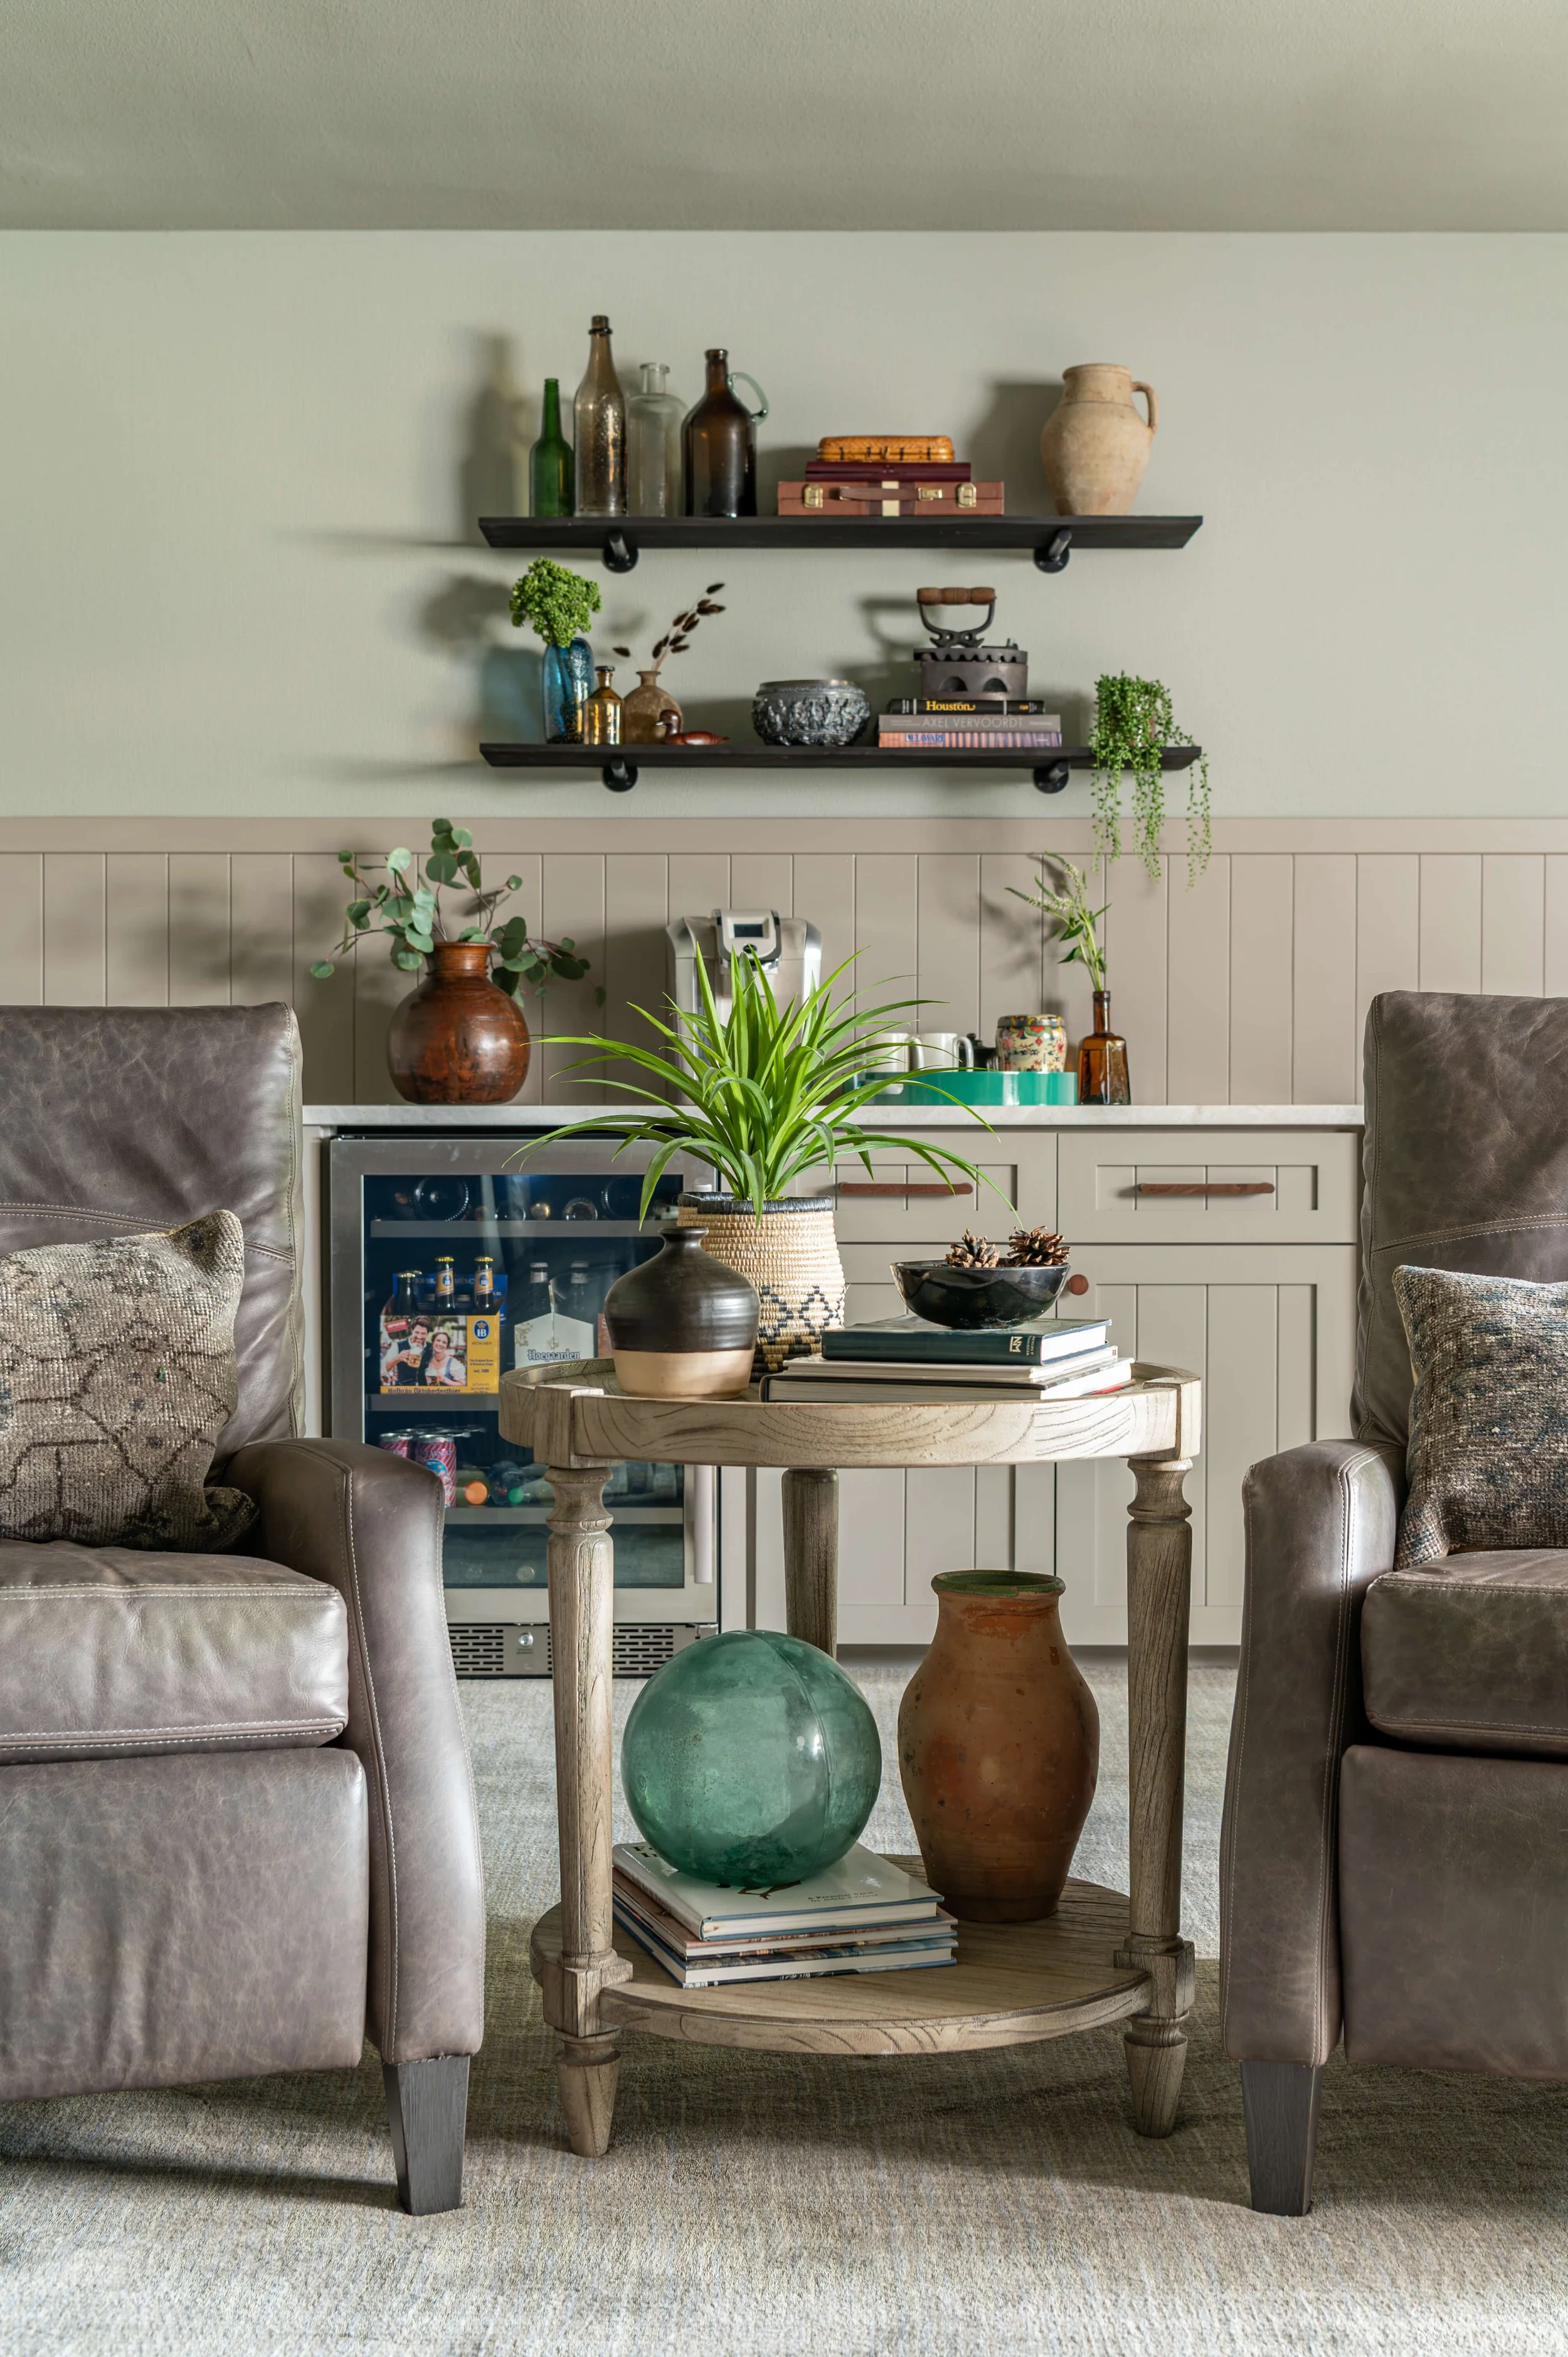
AFTER GAMEROOM - We even reused these shelves from the previous home’s gameroom, getting new brackets for this space. | Designer: Carla Aston, Contractor: CA Design Build, Photo: Ellen Renee Photography
Upstairs Hall Bath
This bathroom was shifted two feet into the adjacent room to make space for a second bathroom upstairs.
Here’s the original bathroom with some dated features.
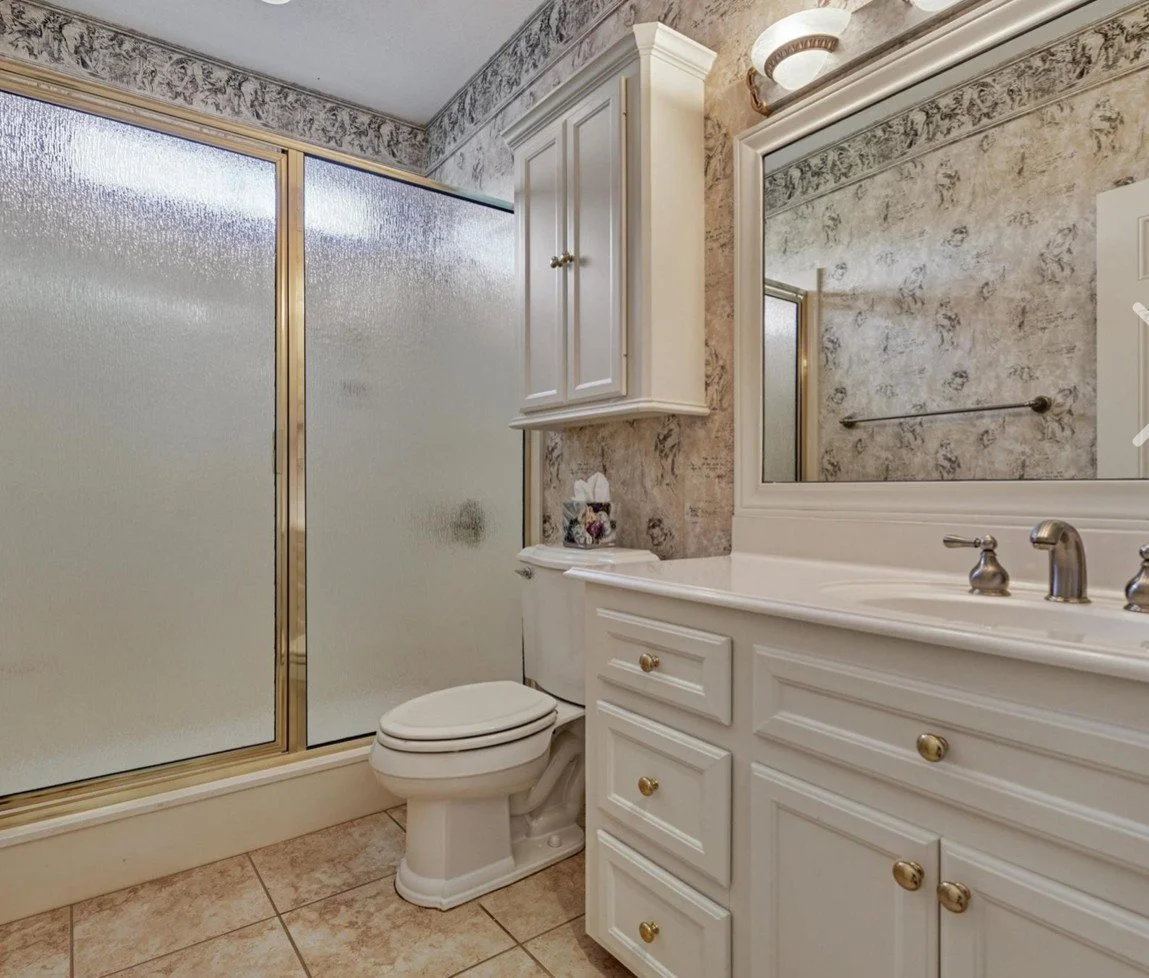
I really wanted to use some bold colorful tile, something kind of playful since we have a bunk-type bedroom up here. A fun, shaped tile was used on the floor with a greenish grout. We did a new tub and built in niches under the angled roof line.
A vanity that was ordered, not custom built, saved time for the carpenter on this job. I designed all of the secondary bathrooms with pre-made vanities for that reason. While they don’t really save much money, they save time in construction, if you find them readily available.
And here is the end result!
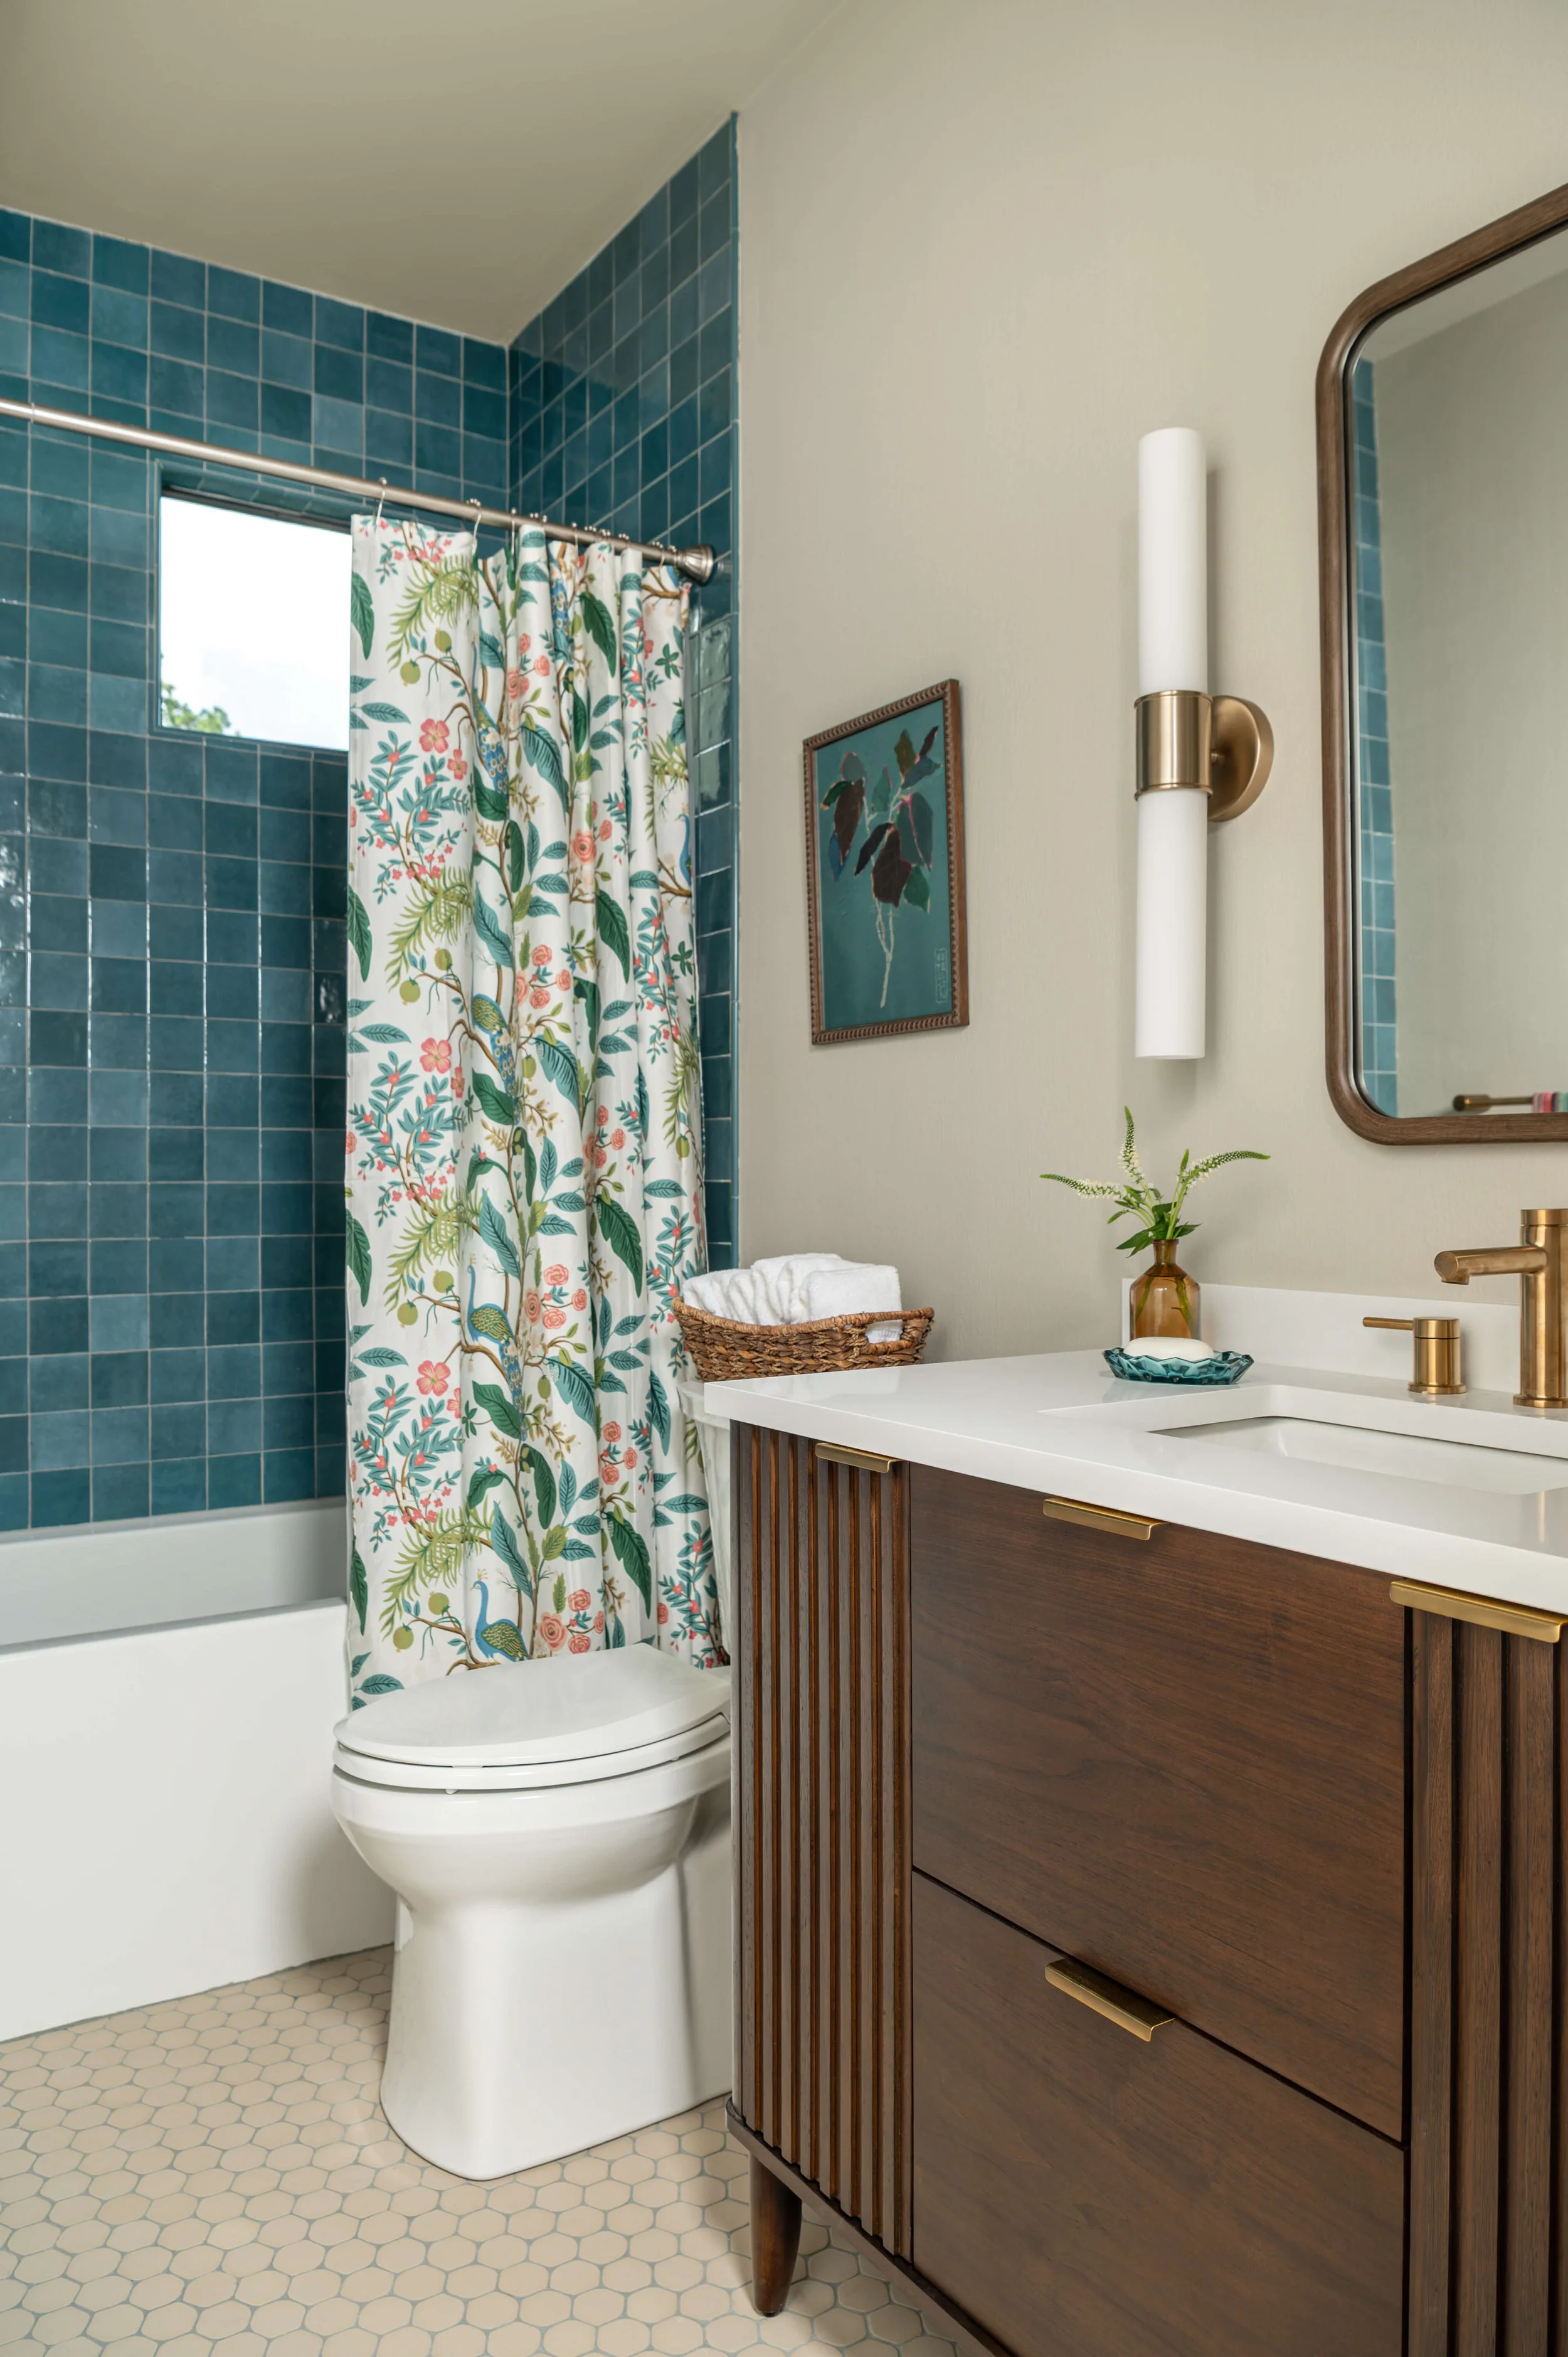
AFTER HALL BATHROOM - Coloful tile and some pretty accessories brighten up this hall bath. | Designer: Carla Aston, Contractor: CA Design Build, Photo: Ellen Renee Photography
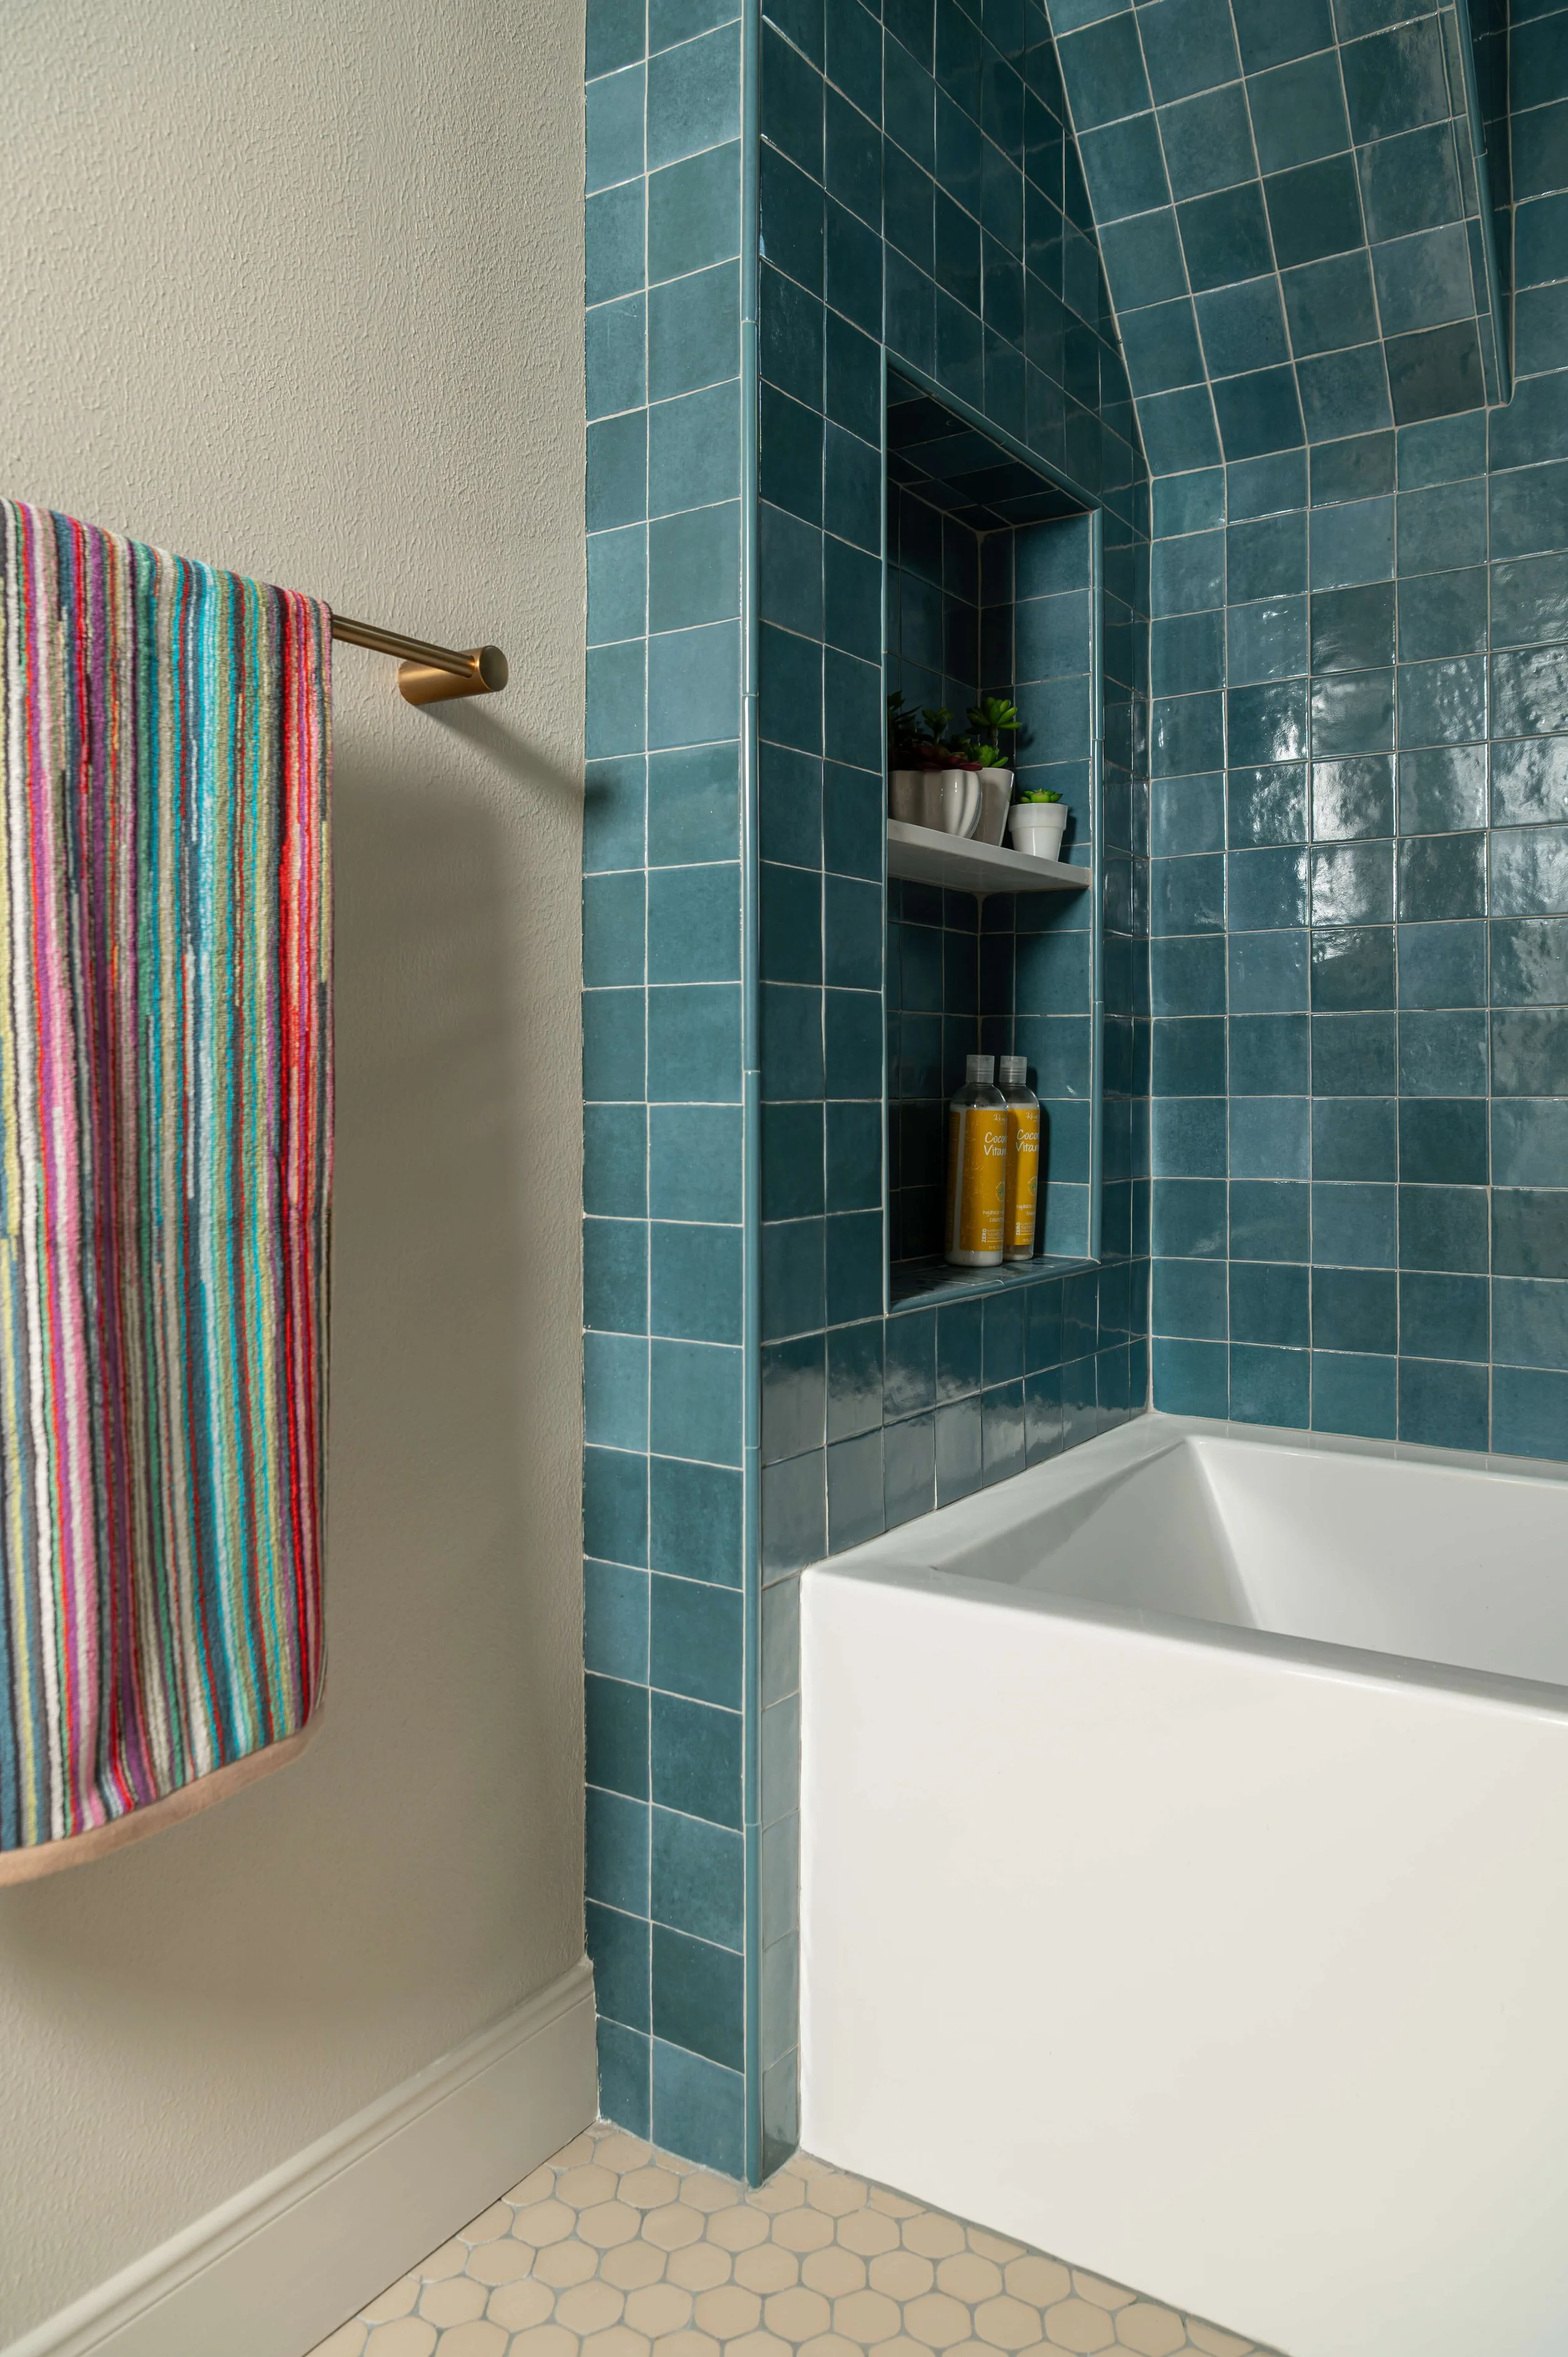
AFTER HALL BATHROOM - We built niches around this angled ceiling and an expert tile installer made it all work with the jolly trim pieces. | Designer: Carla Aston, Contractor: CA Design Build, Photo: Ellen Renee Photography
The decorating in here helps tie the colors together. The striped towels and a floral shower curtain add more color and pattern and are from one of my fave places for fun bath products, The Company Store. The art from Anthropologie is just the right finishing touch for this space.
Contractor: CA Design Build, construction only
Photography: Ellen Renee Photography
Drafting: Staci Nugent
I’ll be sharing the last two bedrooms and bathroom in my next post! See the rest, below.

The most dramatic part of this home’s transformation, I believe, is the dining room / butler’s pantry area. I’m so excited to share these gorgeous finished photos with you today!