
While we might not always get to touch or change everything in a remodel that we'd like because of budget or project priorities, I do so appreciate when we can affect those kinds of changes.
Such is true on some of my jobs right now.
I'm sharing just a few of my favorite details to incorporate in a project and why I like them, what benefit I think they bring, and how they can affect the overall outcome of a space.
1) Interior Design Lesson To Learn - Electrical Outlets On Backsplashes
I have posts I've written before on this topic even years ago, like in this post right here.
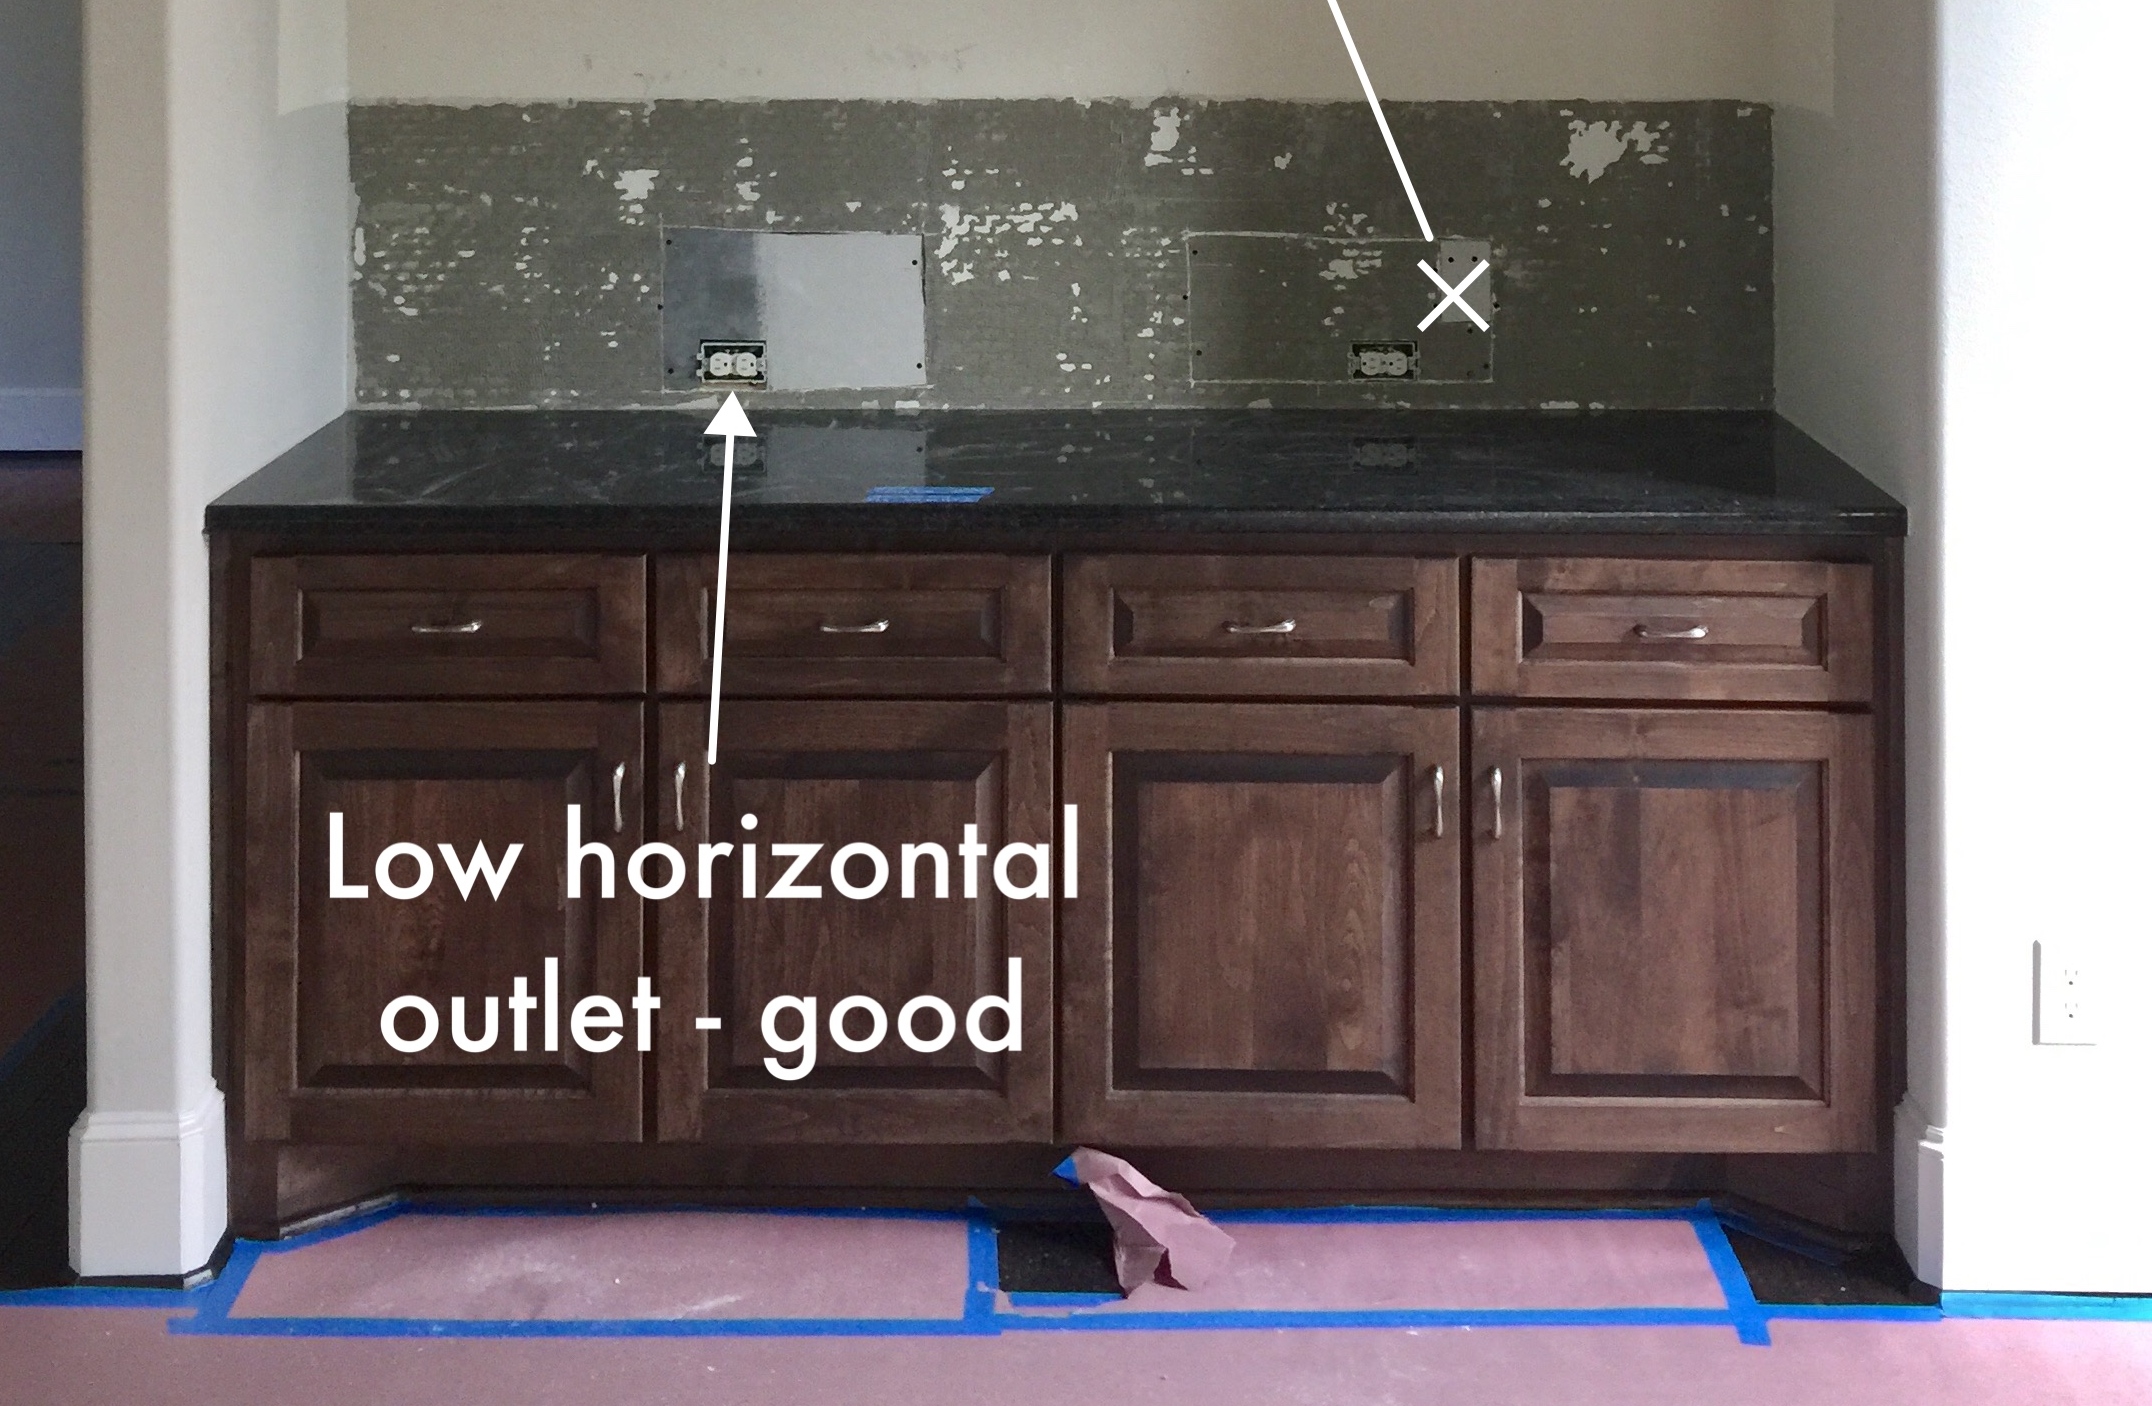
Of course, who doesn't love a beautiful Legrand Adorne system with everything tucked away under the cabinet, not disturbing the backsplash tile.
However, you can't always go to that expense and sometimes I'd rather my clients spend the money elsewhere. Sometimes, if they have an appliance that is plugged in on the counter all the time, like a coffee maker, then plugging in under the cabinet is not the best option anyway.
So, here's what we do. We lower the outlets and mount them horizontally, like in this pic below. This makes them more unobtrusive and minimizes their look. I mean, you stand a better chance hiding them with some decor this way, but they are still highly accessible for function.
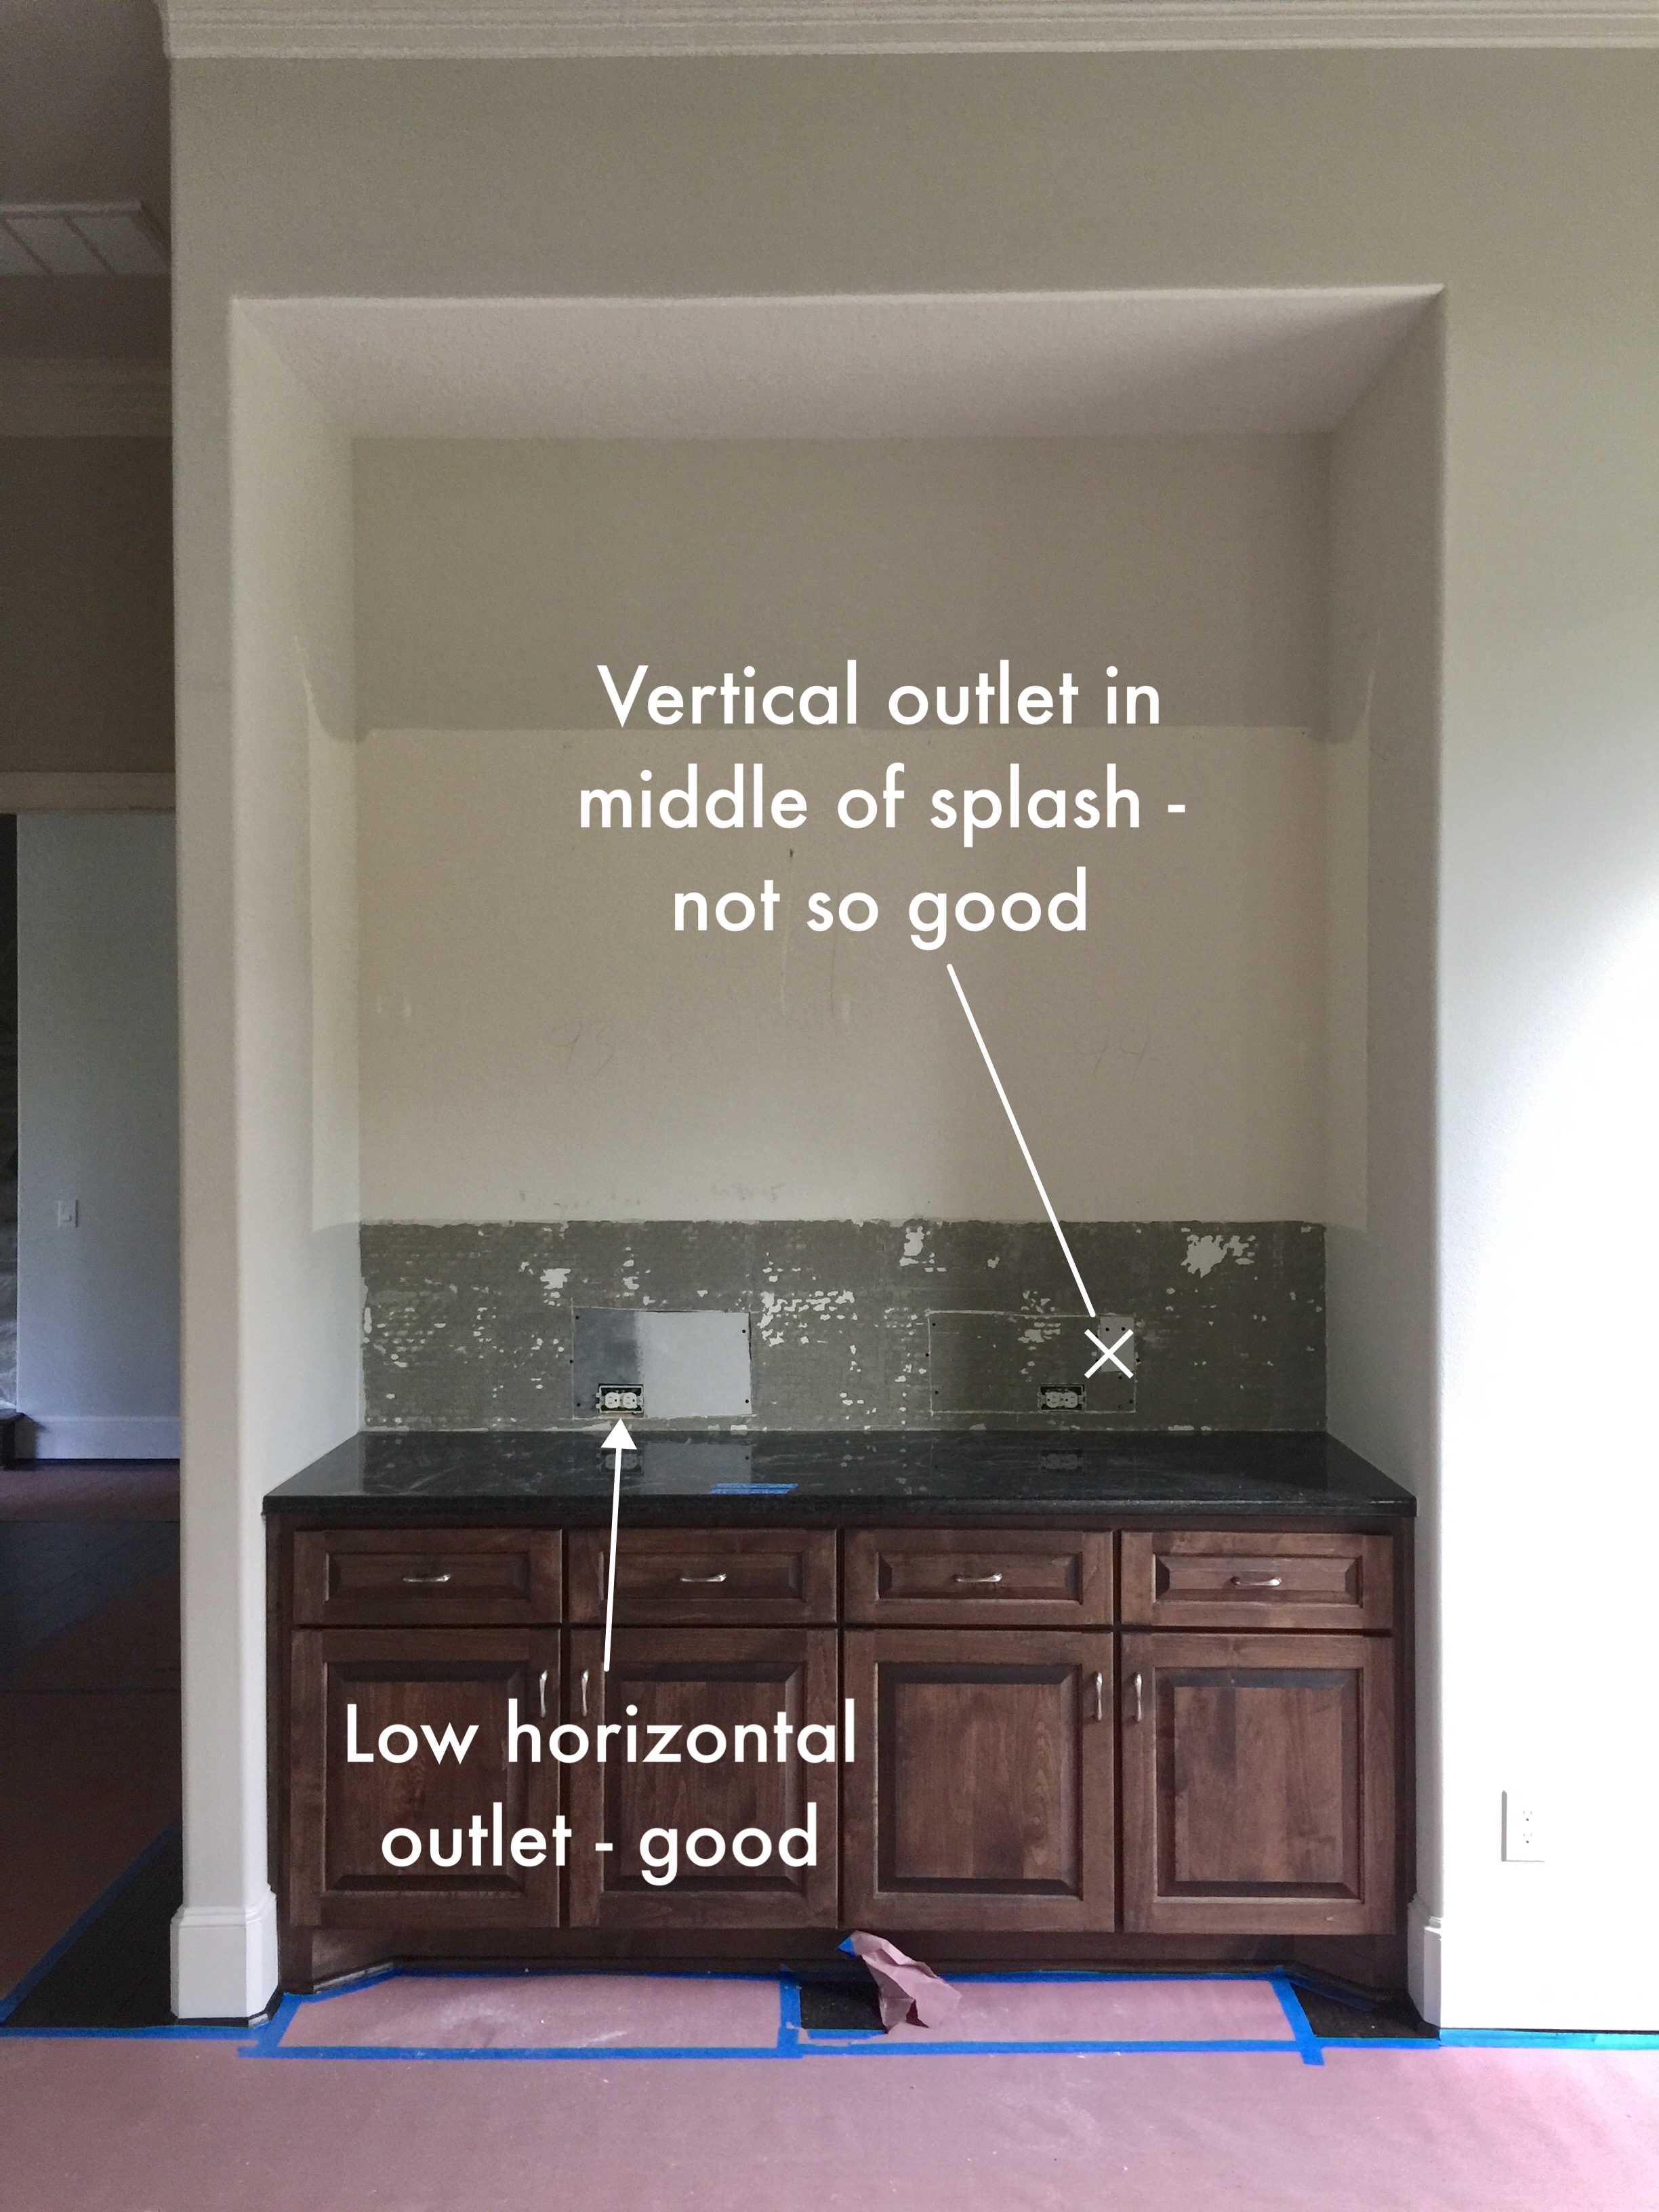

See these outlets peeking out from behind the decor? These are much less noticeable than if they had been positioned higher and vertically on the splash. See more about this remodel HERE.
We also try to get them to a color or finish that blends with the background. Even a closer tonality of the outlet will stop the glaring interruption in the visual you are trying to achieve in the backsplash.
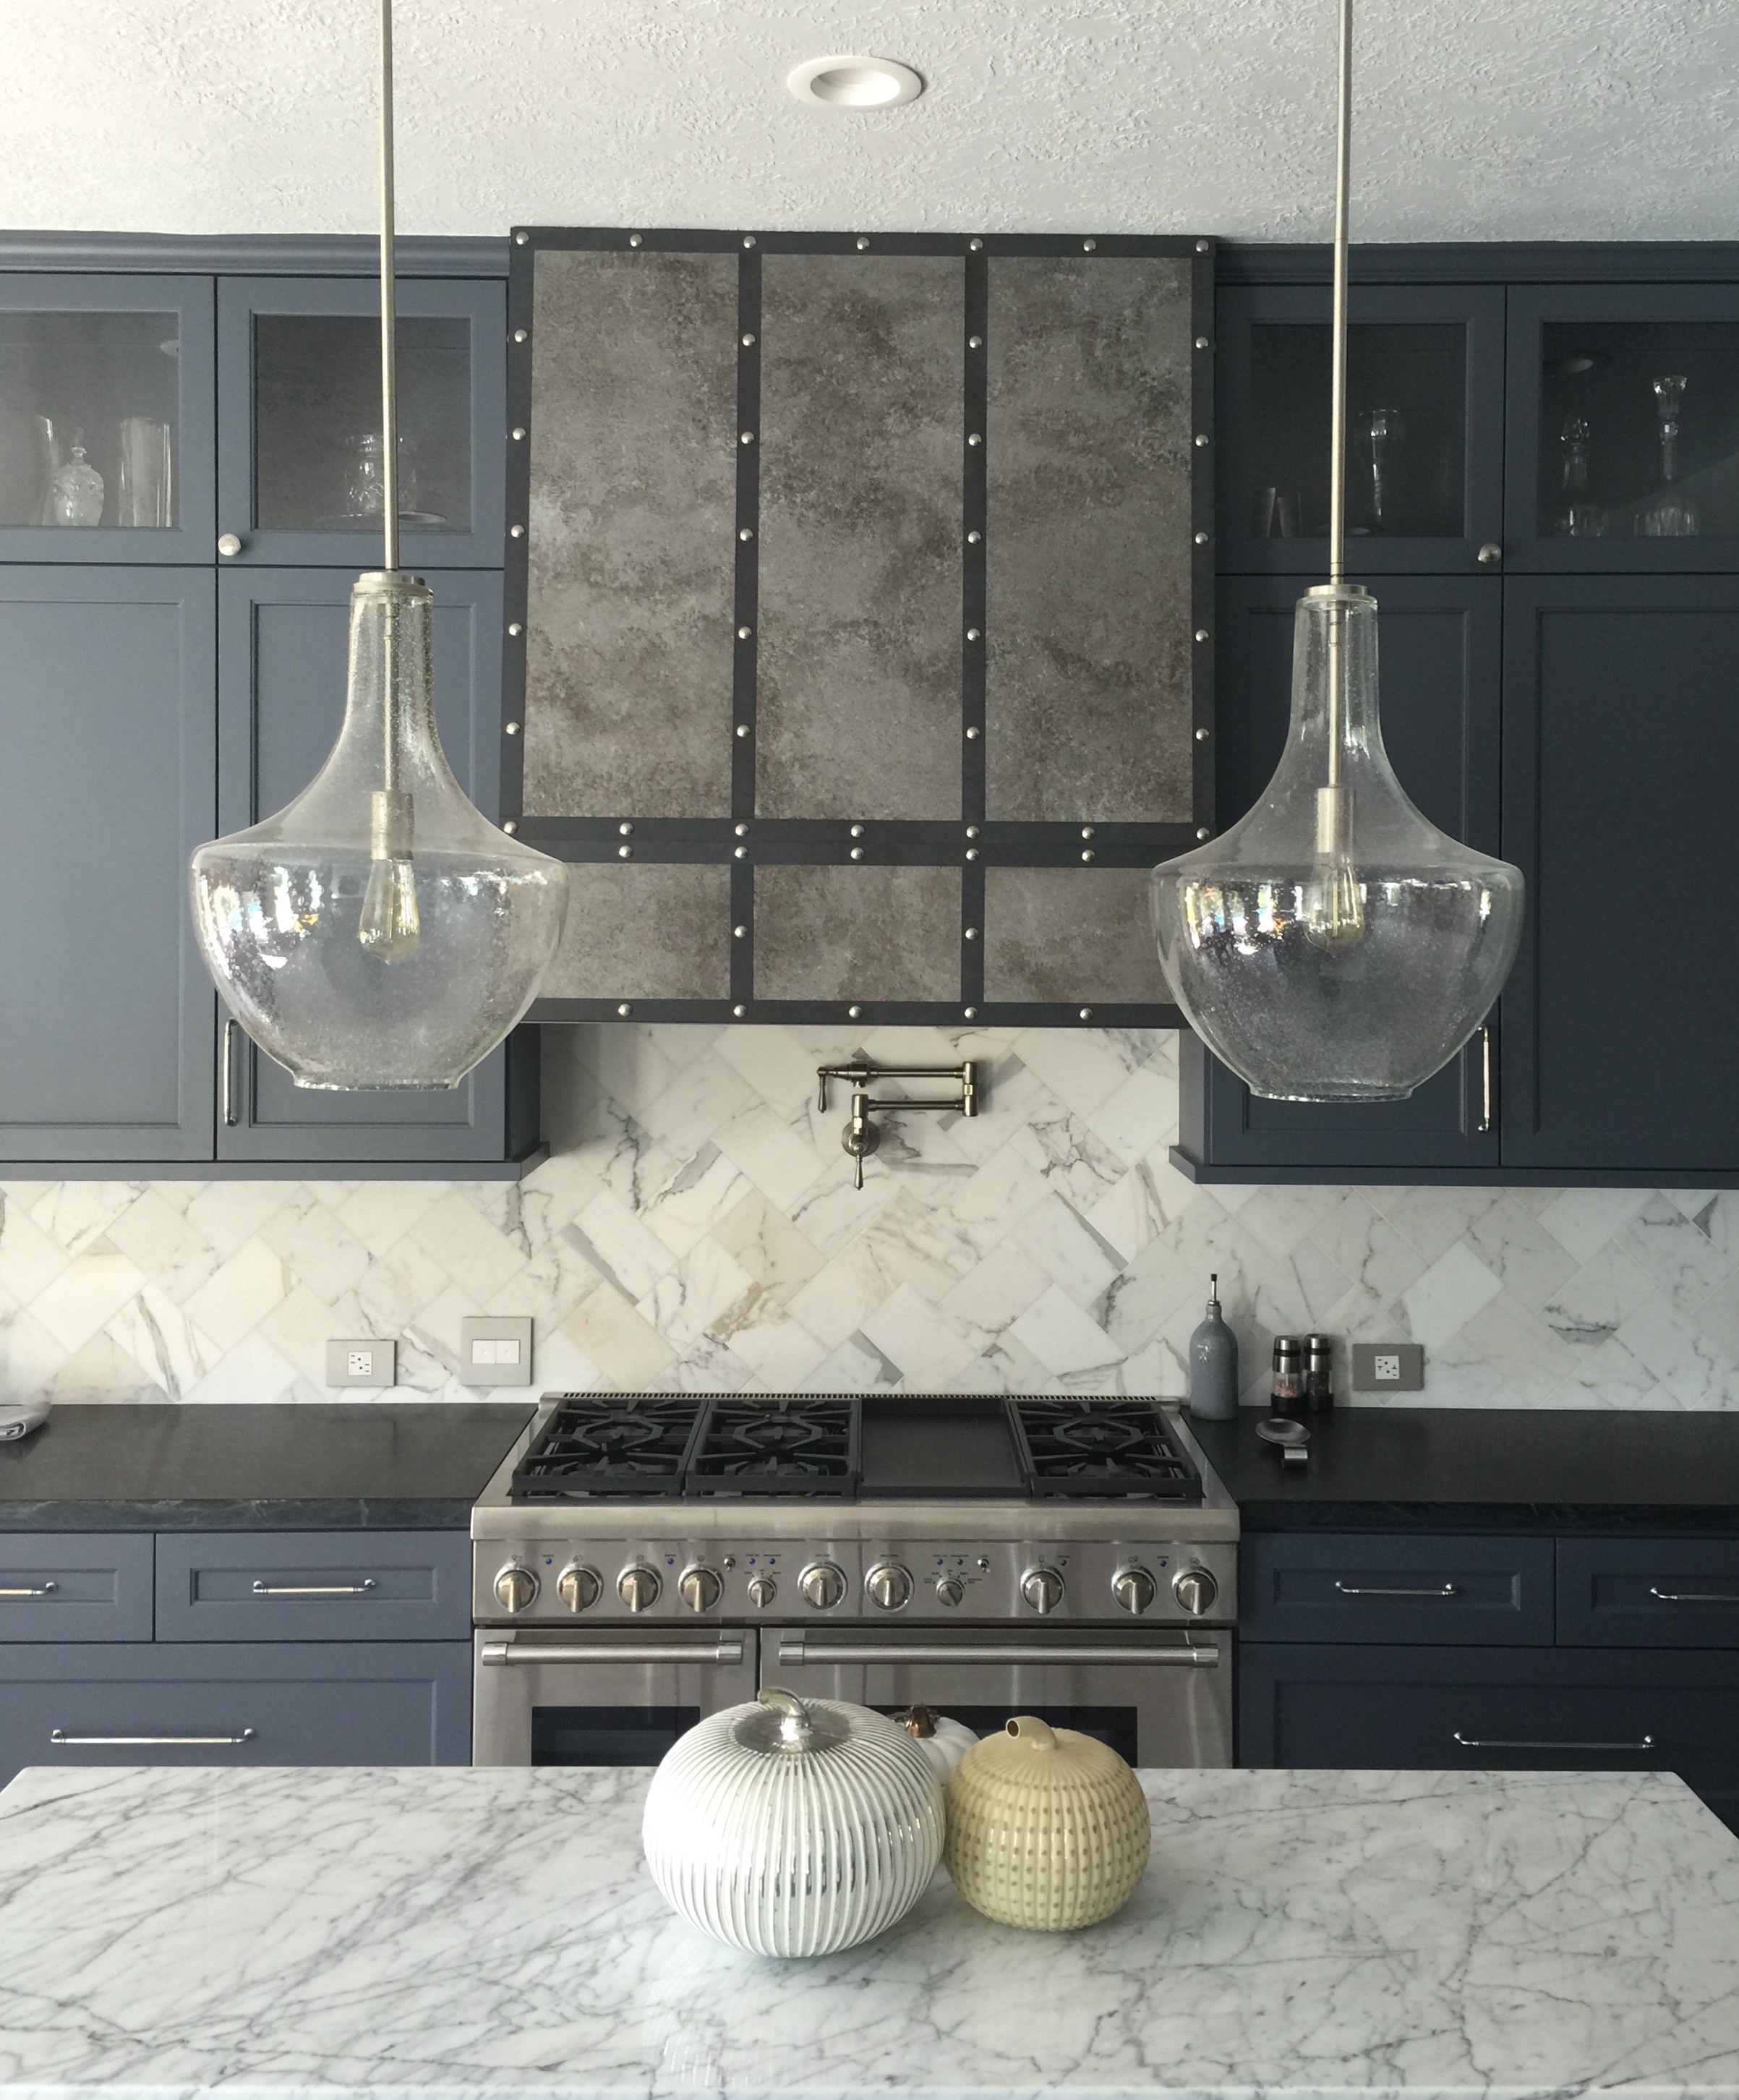
I like the stainless plates on this gray and white marble backsplash kitchen remodel of ours.
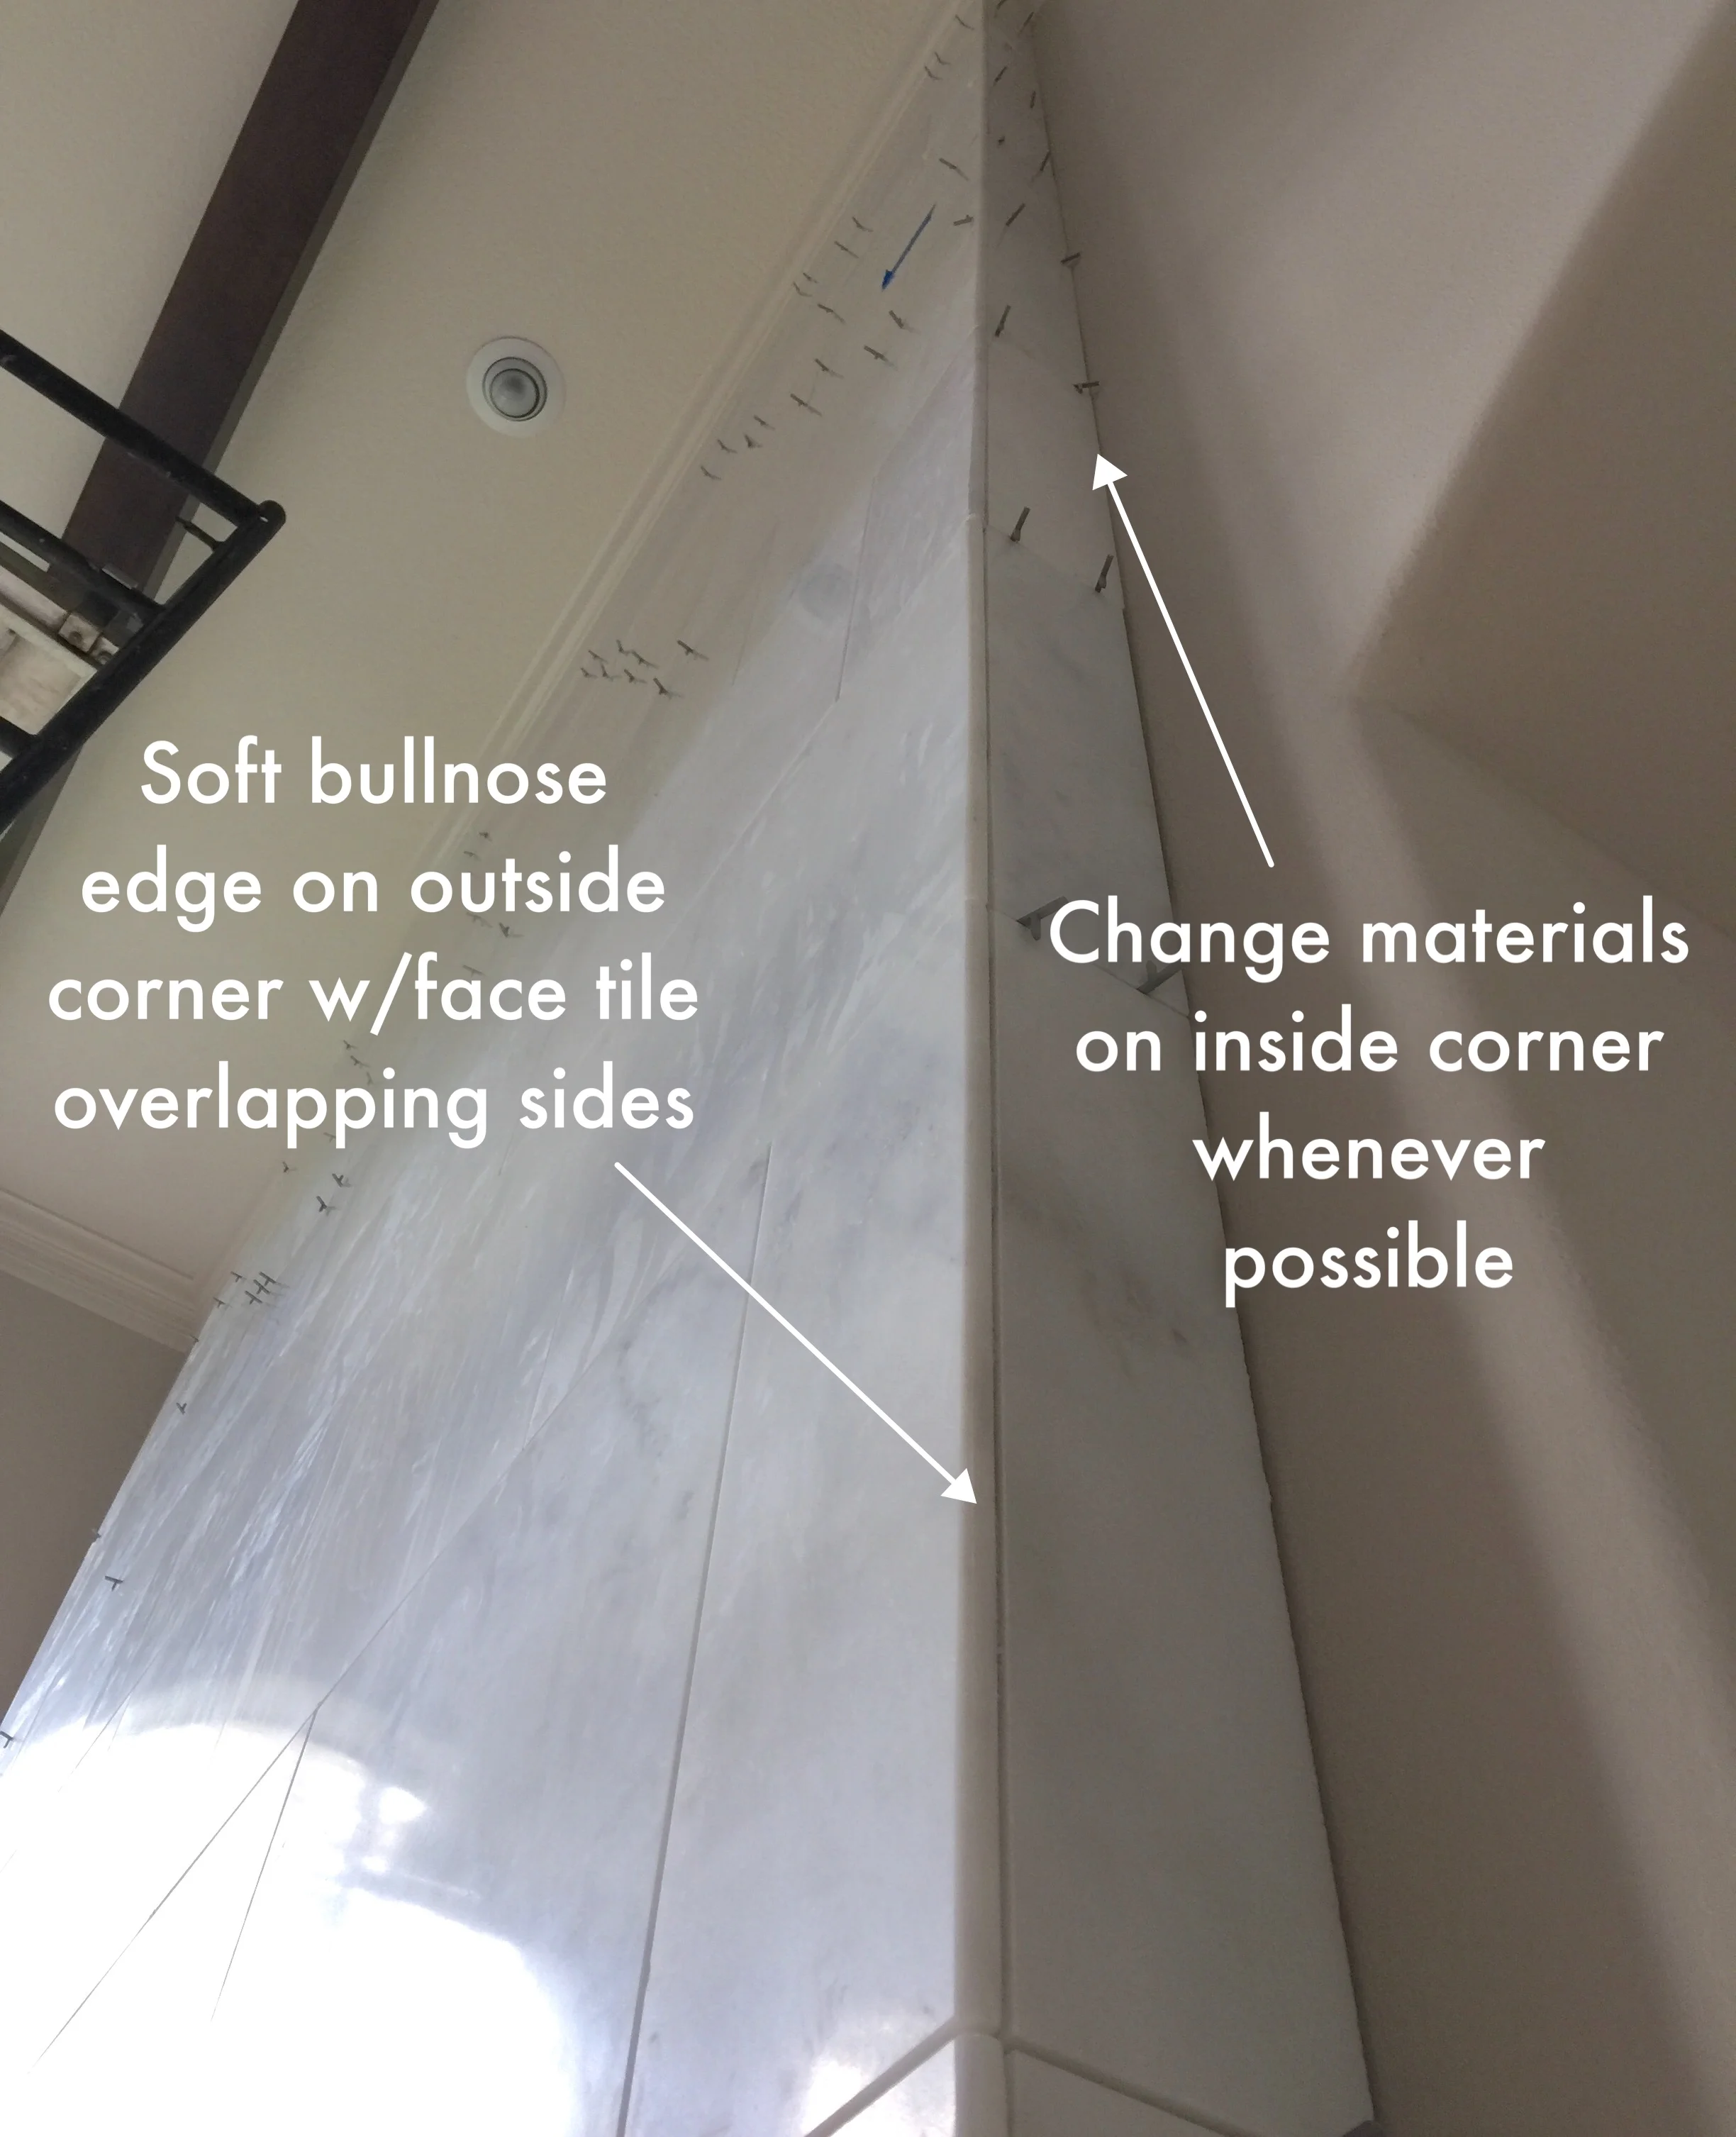
2) Interior Design Lesson To Learn - Facing Fireplaces With Tile Or Stone
I've gone over this tip before too, where I've talked about facing fireplaces with new tile or stone. I really don't like to see tile or stone applied flatly onto the wall. It should have dimension and depth to feel like a more massive element in the room. The tile should return to the wall and die on an inside corner, like it does here.
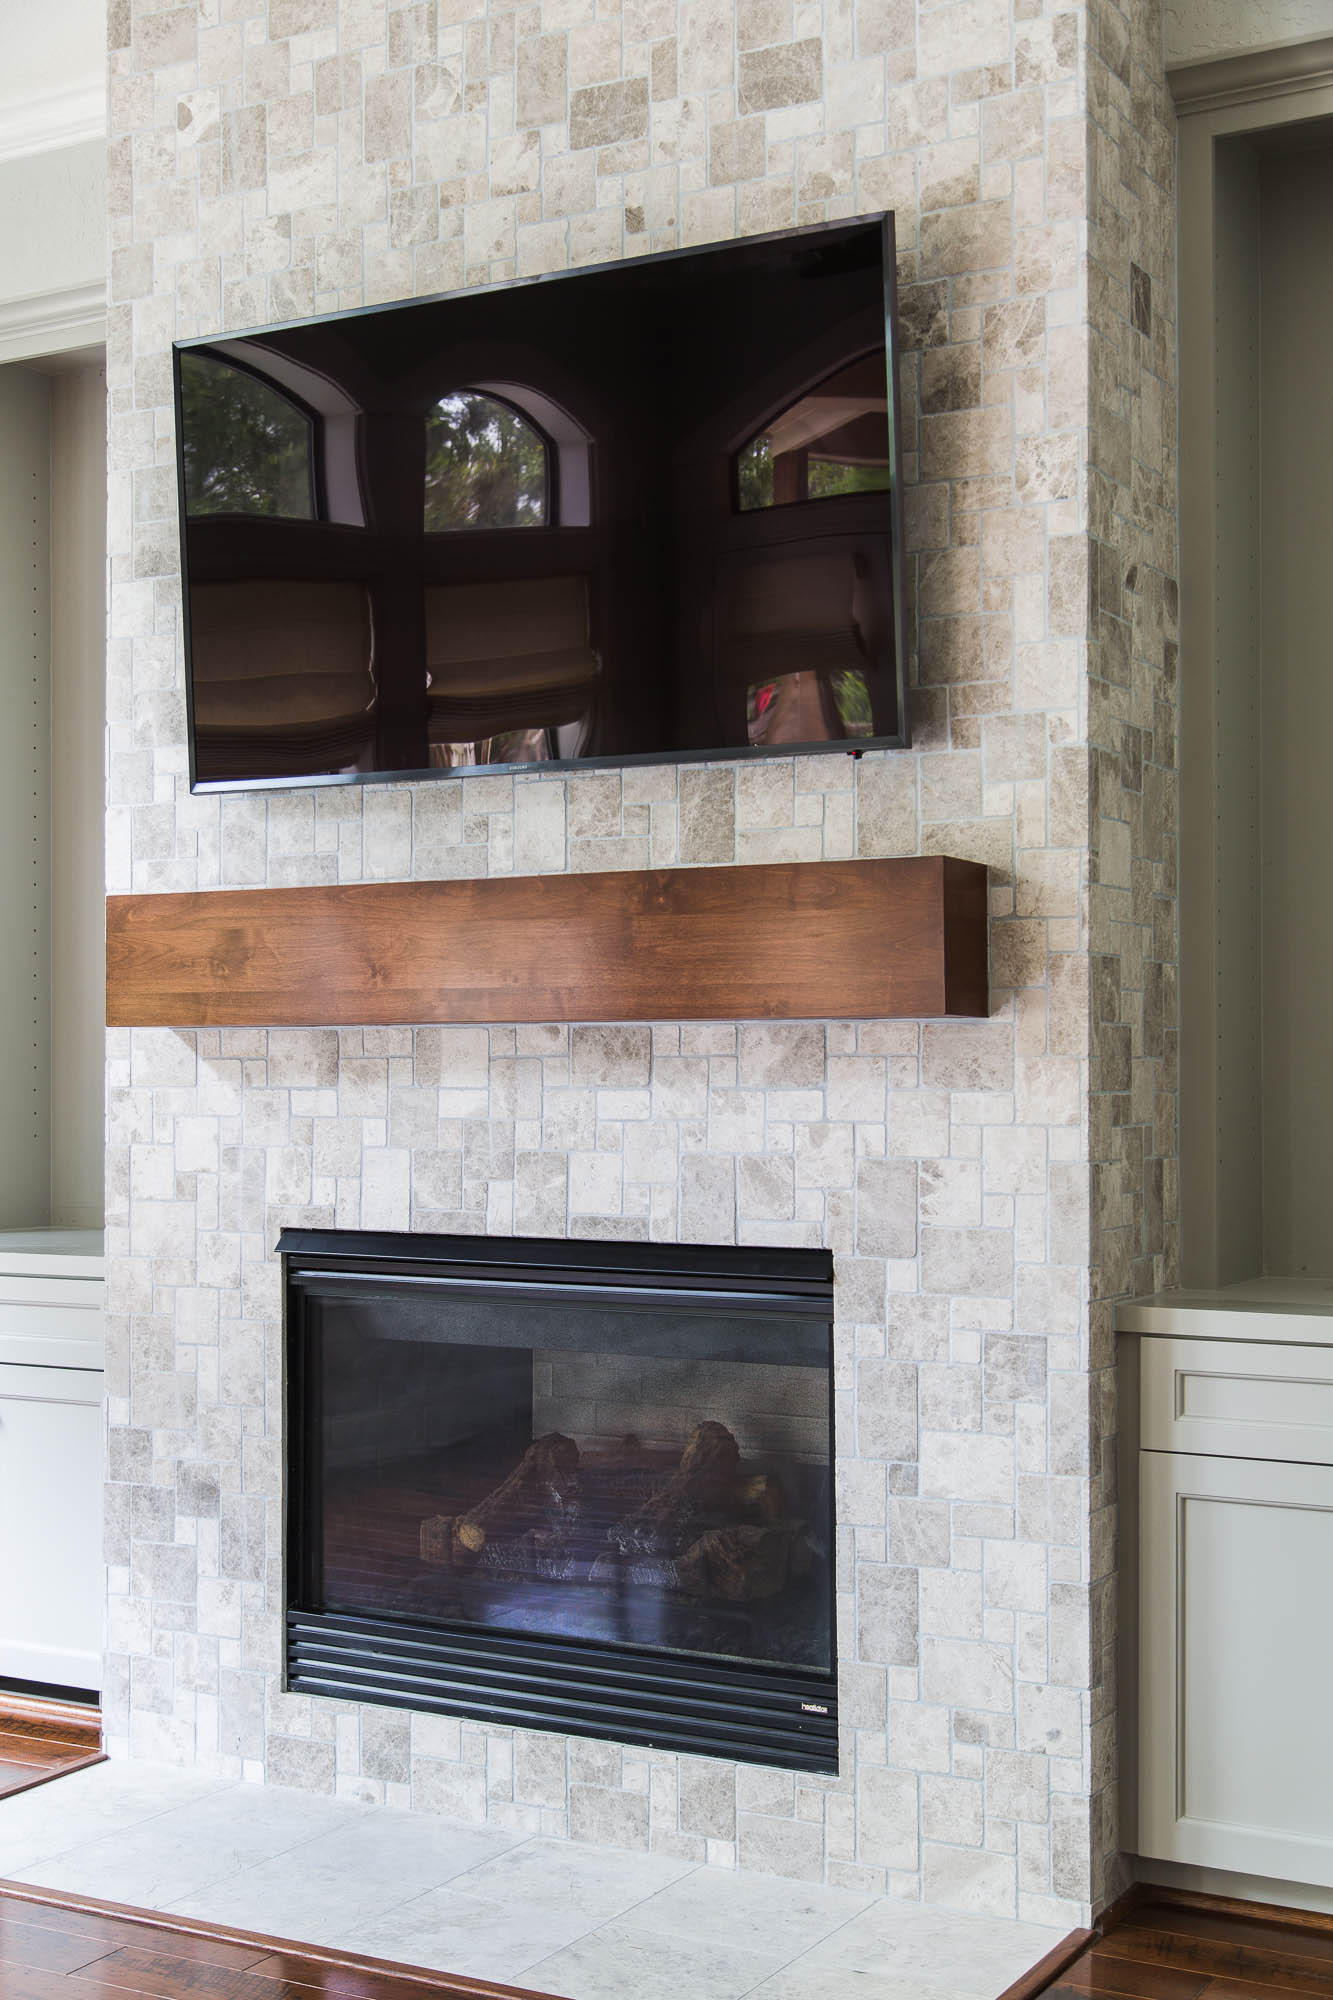
And wow, what beautiful craftsmanship is going into one of my jobs now, where the front edge of our marble tile is being slightly bullnosed for a softer look. That tile, once grouted, will give this fireplace wall the gravitas it needs to anchor the visual in this high ceiling space.
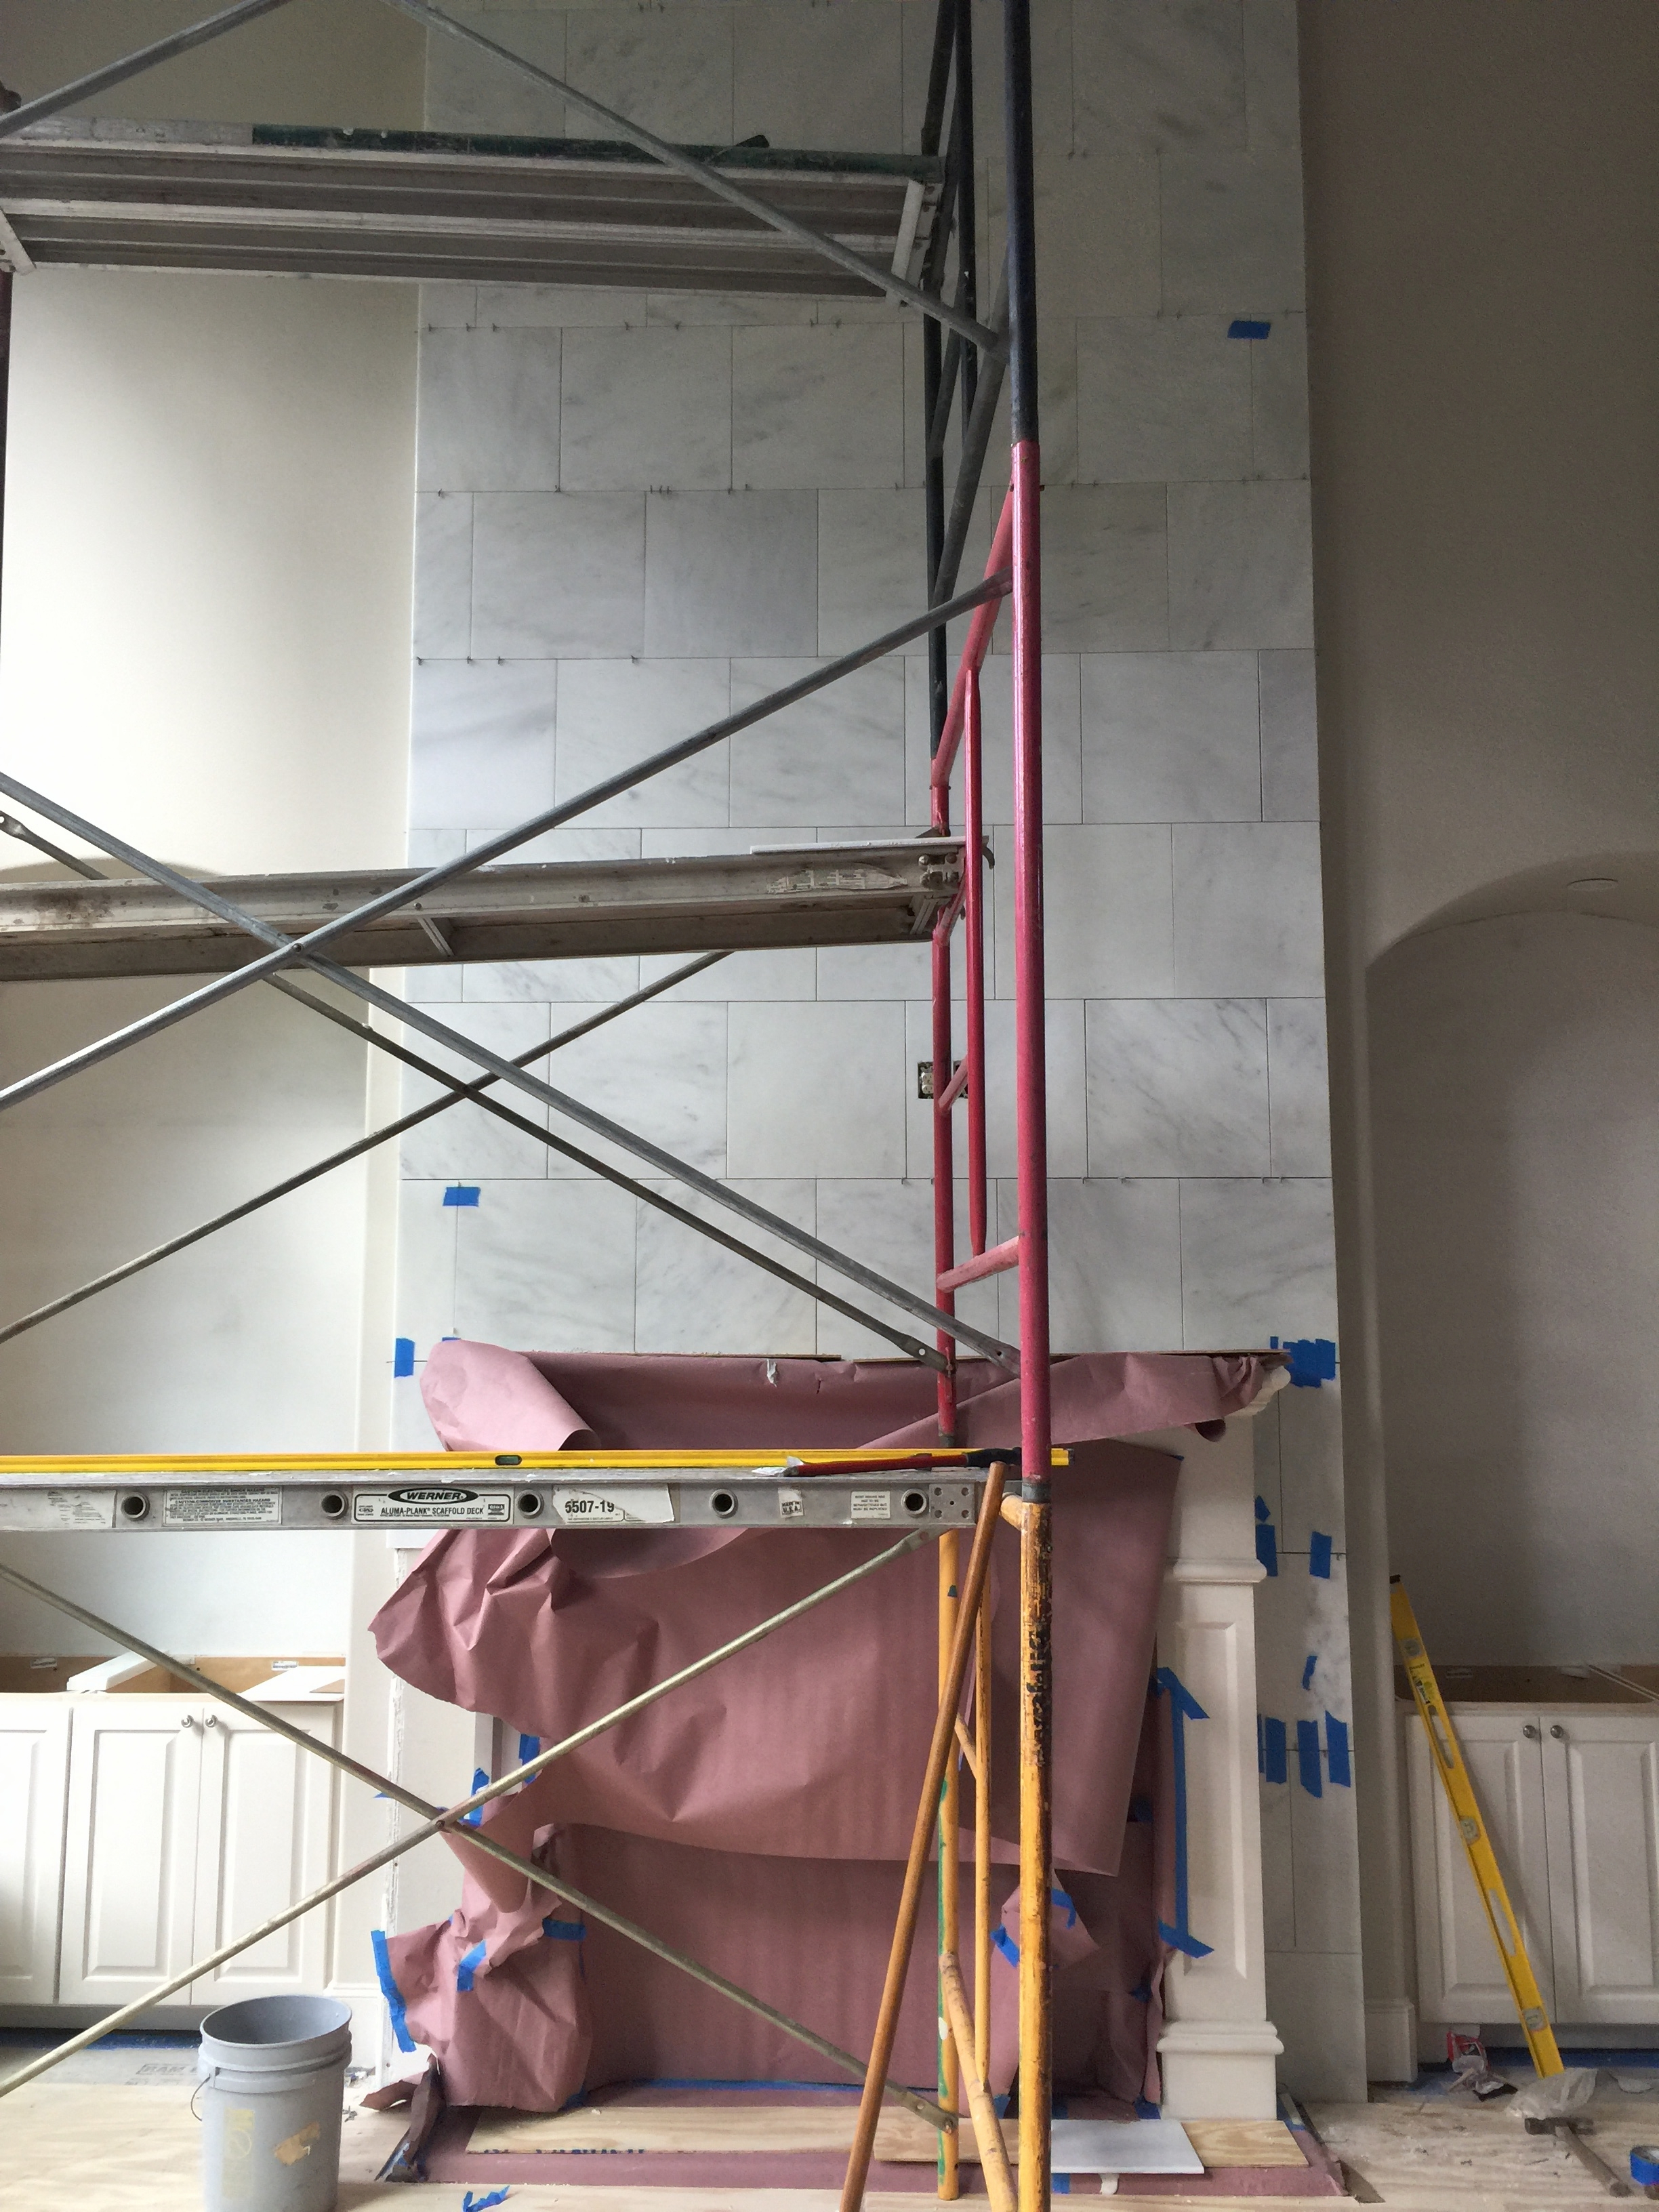
Job site visit - marble tile cladding on fireplace
3) Interior Design Lesson To Learn - Let the space dictate the design
In this project below, we have the dark bar area. Now, I'm all about a dark, moody, dramatic space, but this just looks heavy and tired to me. It also doesn't celebrate or enhance the main attribute of this bar area, which most definitely is the beautiful volume of this space, with the 12' high ceiling. And yes, I've written about that aspect of design before too, right here.

The whole arrangement here is a little awkward and I am definitely not loving the side backsplash. :-(
So, here's my quick sketch of what we're going to do.
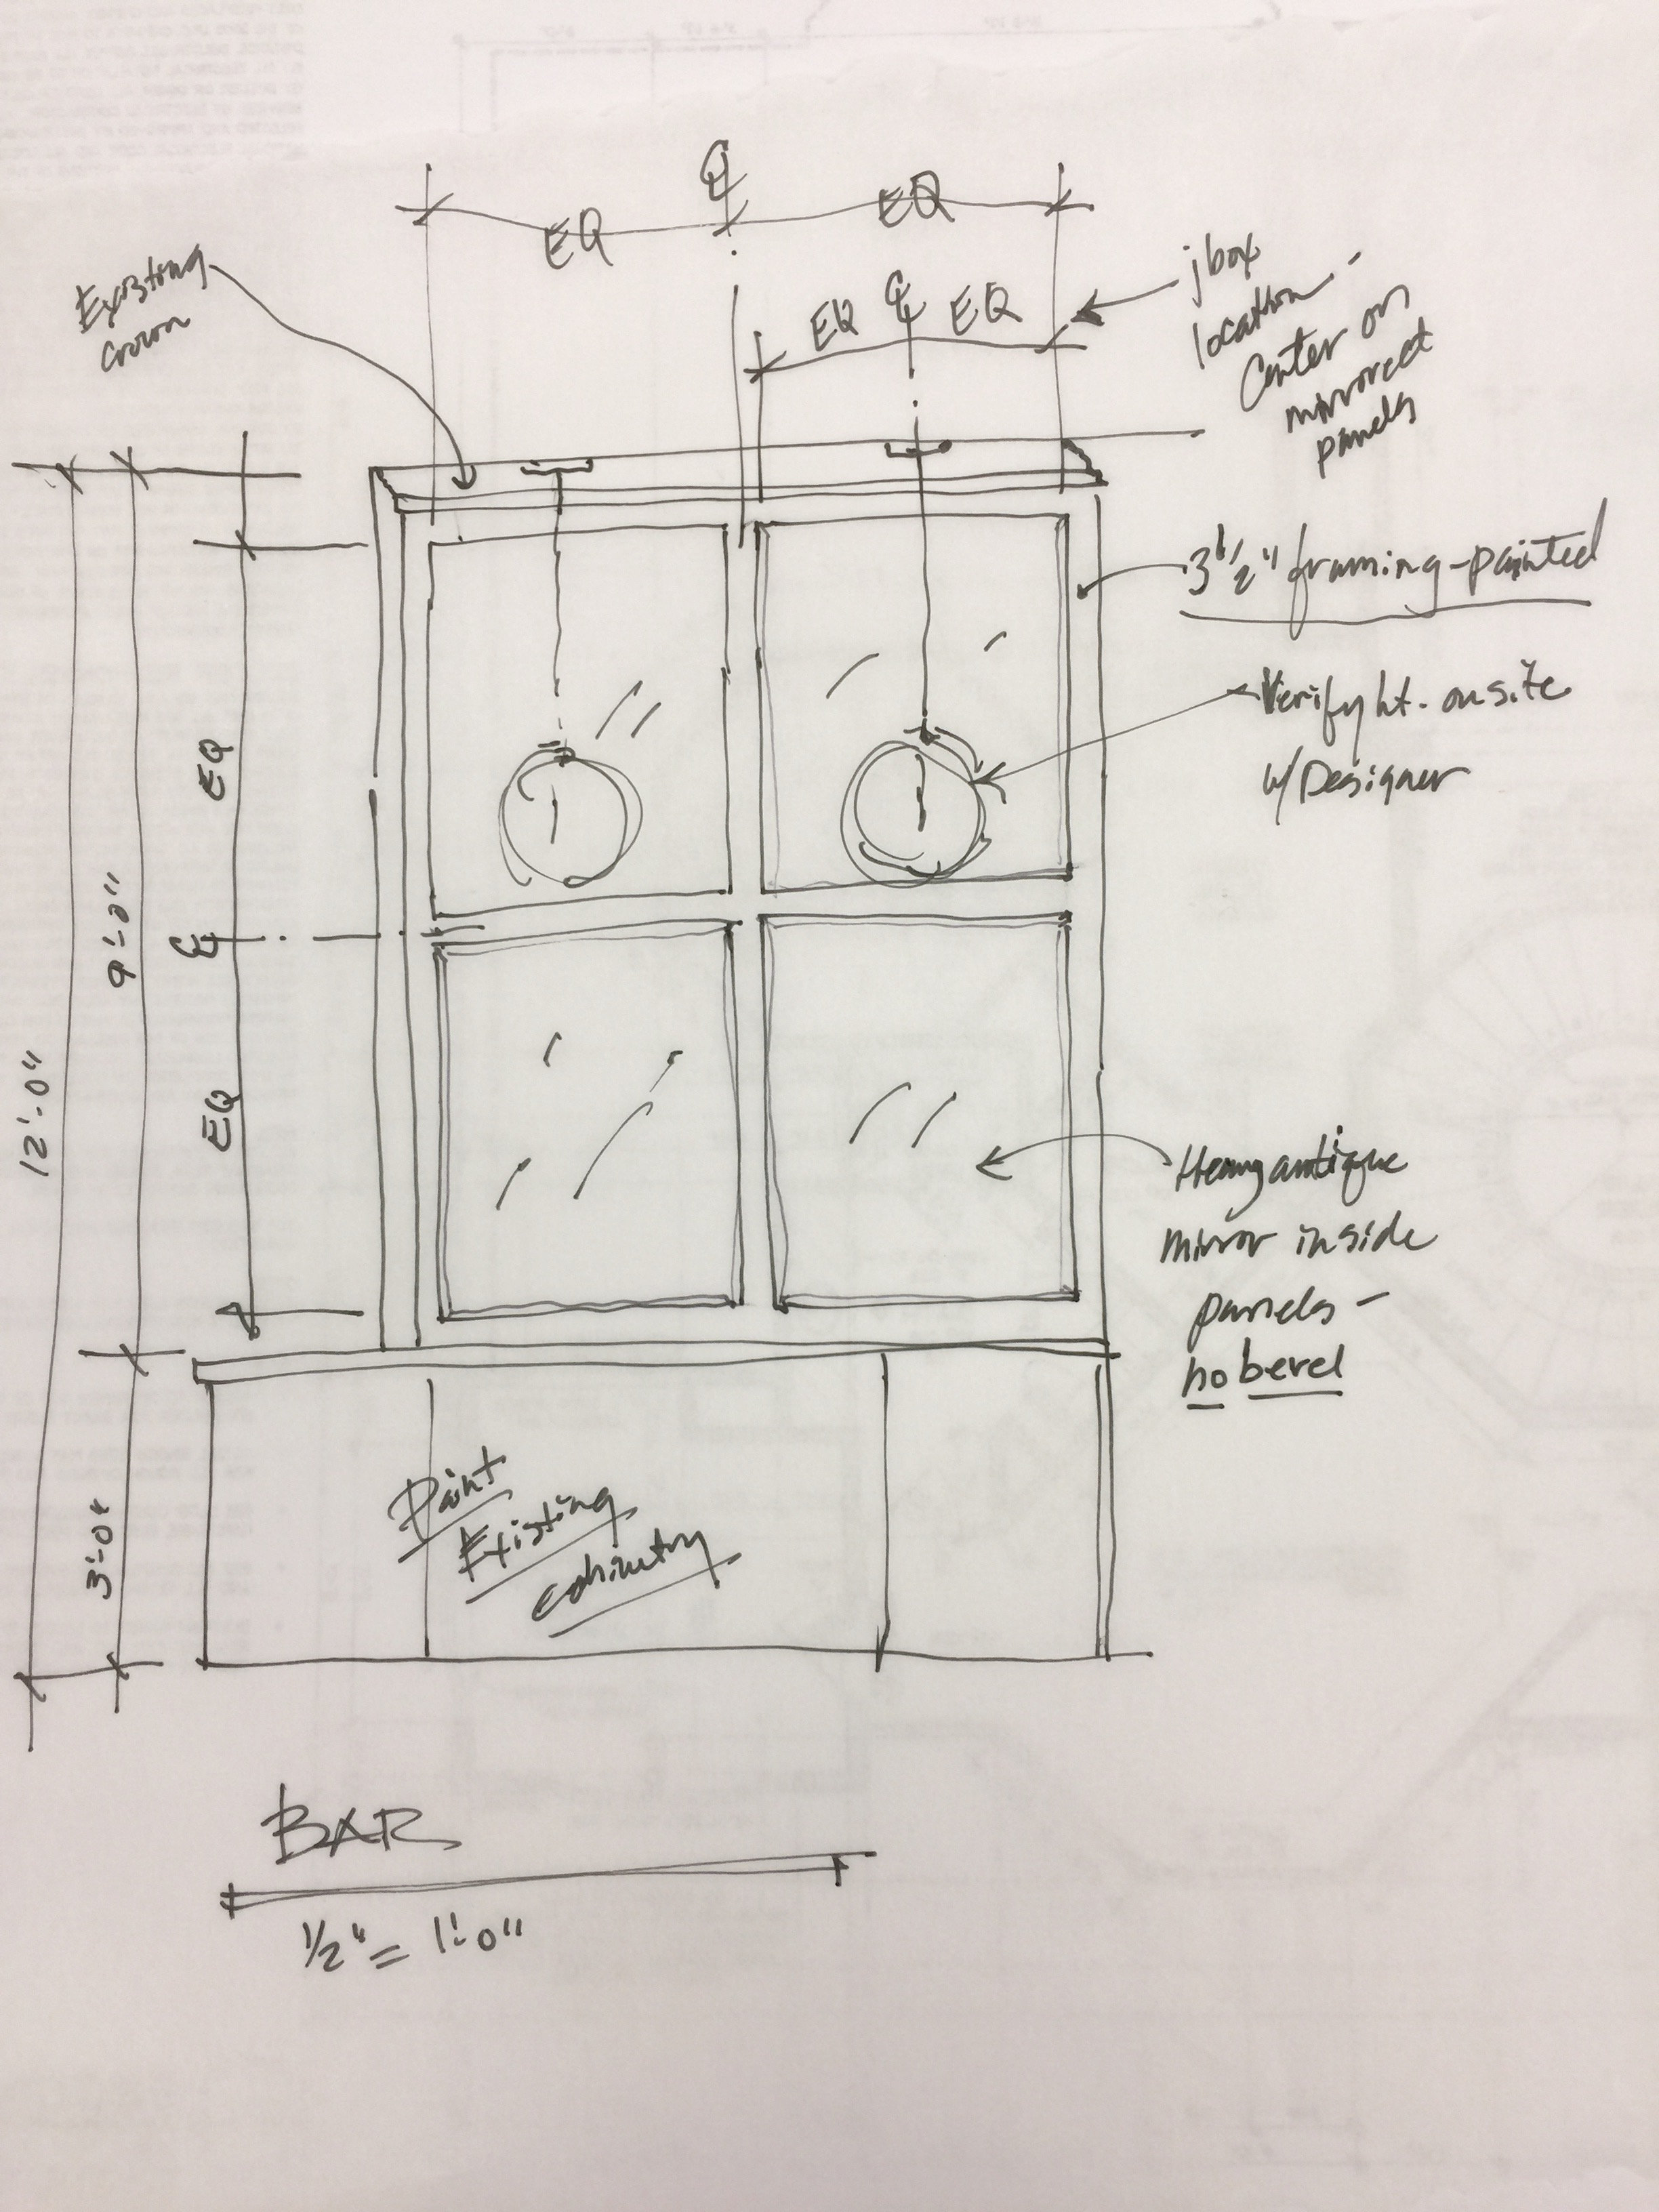
We're going to get rid of the uppers altogether, there is plenty of storage elsewhere and it is not needed for function. Then we will add some paneling with antiqued mirror insets to reflect light and sparkle into the area and then relocate the pendants to work with the overall elevation.
Oh, and we'll be painting those dark cabinets too, in a creamy white to add brightness and flow with the rest of the adjacent spaces.
Looking better already, no?
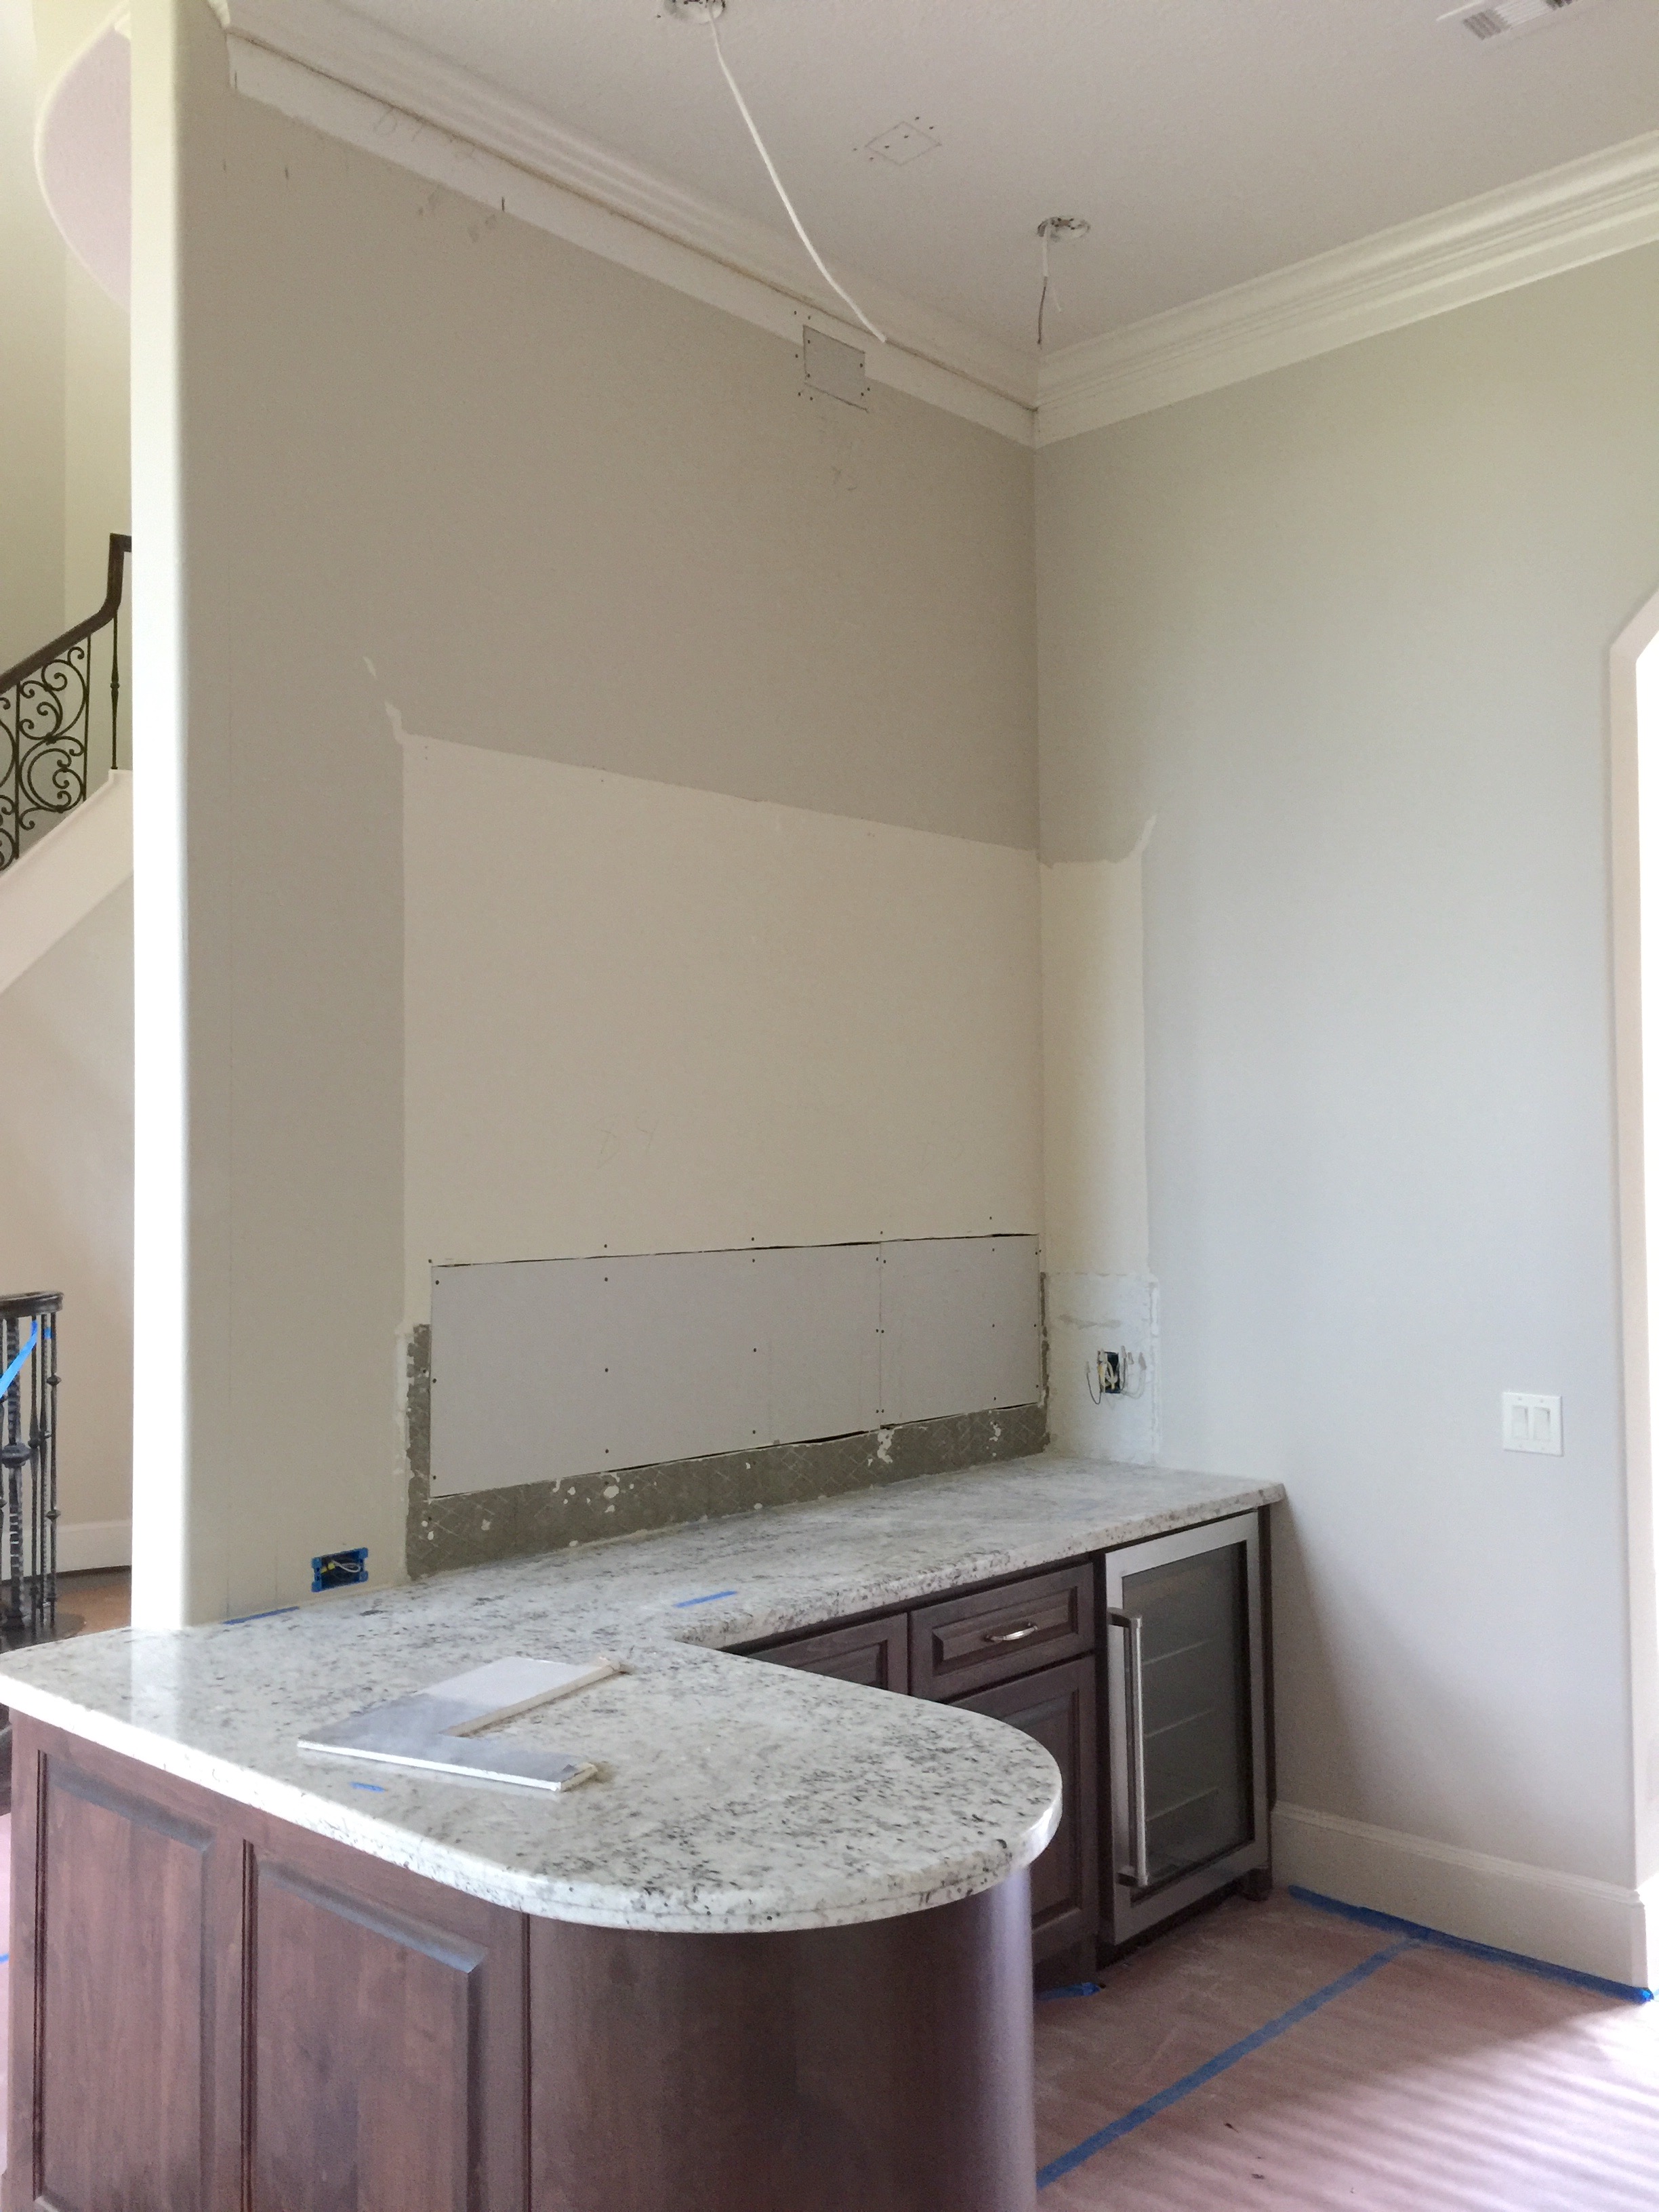
Bar with upper cabinet removed for more open space
And here’s the end result pic! :-)
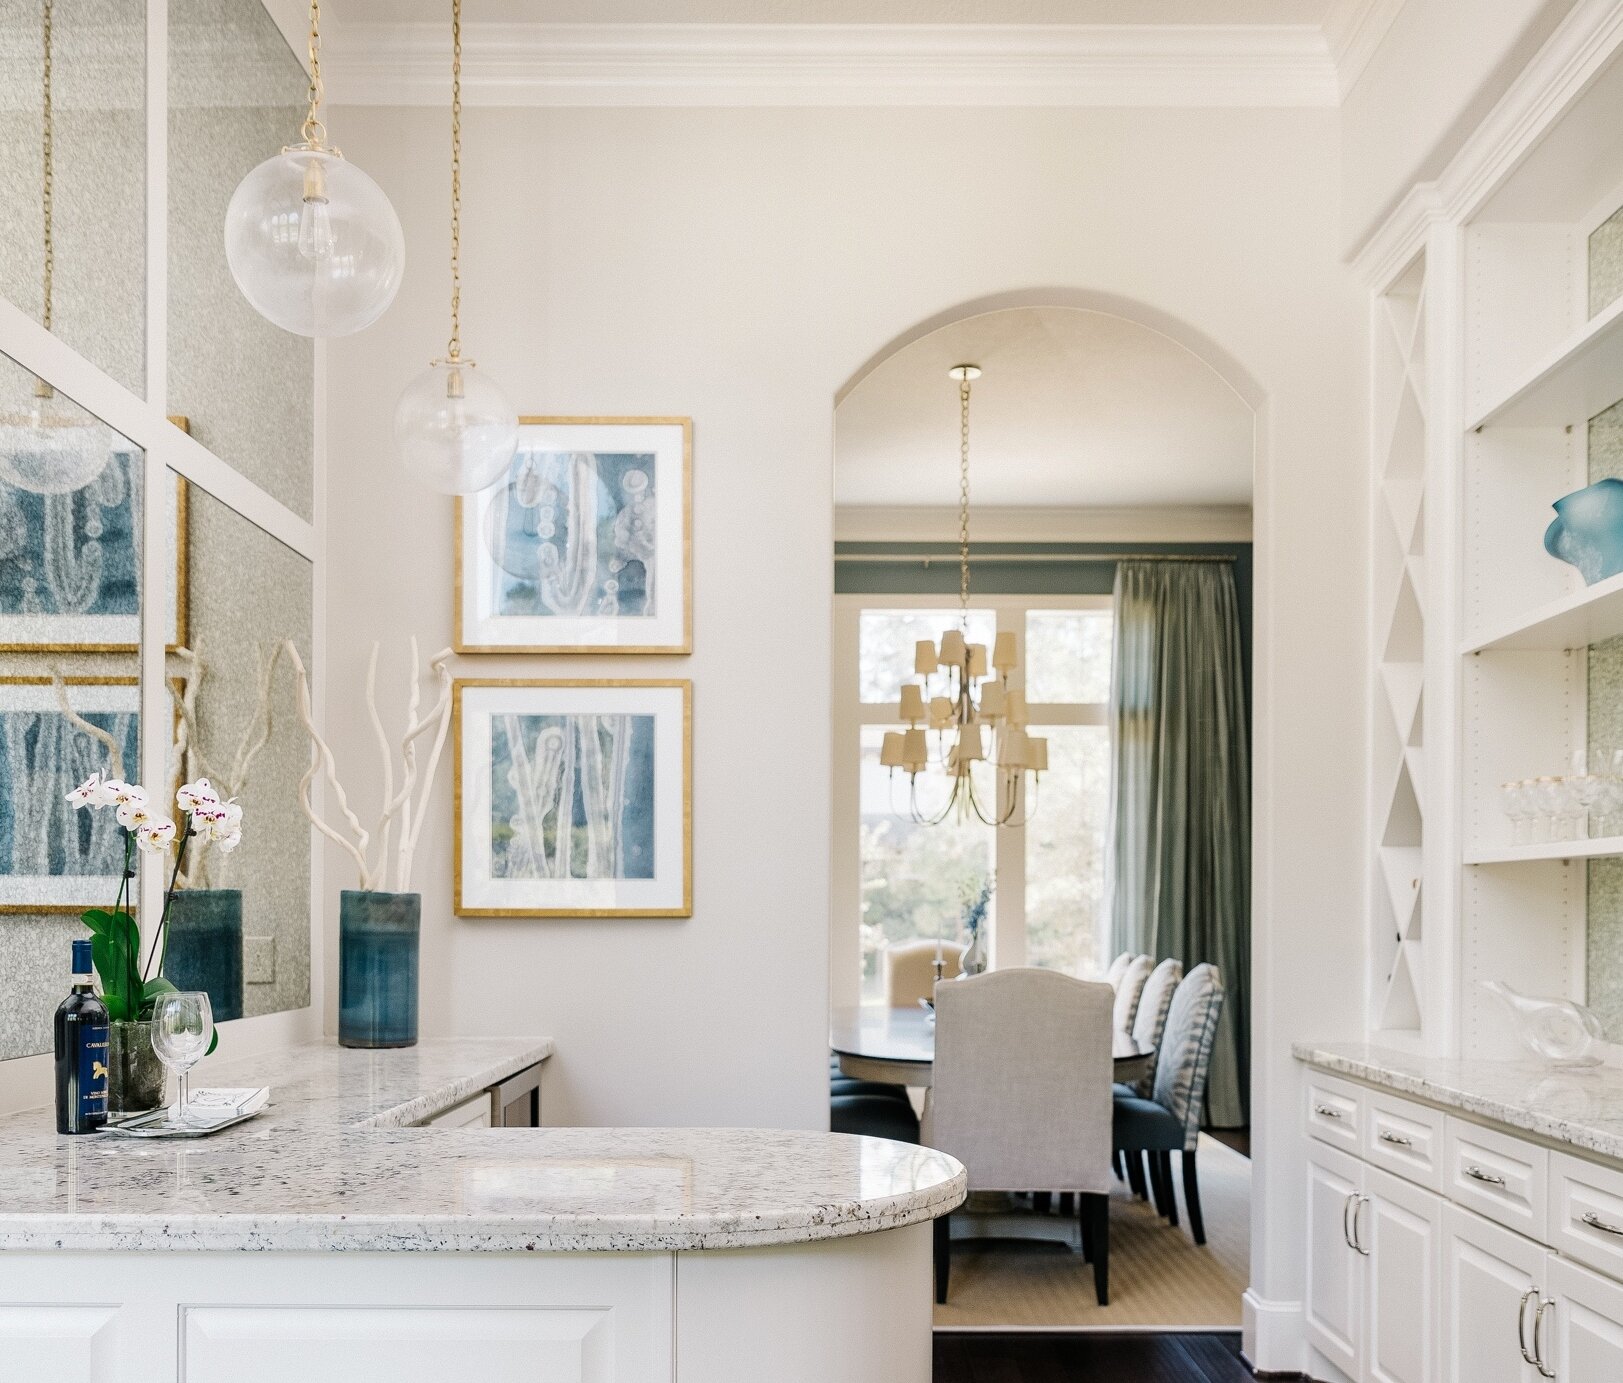
AFTER - The remodeled bar area has no upper cabinets on that side now, with mirrored panels that reflect the light and better fit the use of the space. Tall built-ins on the opposite side of the bar were redesigned to house the needed storage in a more useful way. Carla Aston, Designer | Colleen Scott, Photographer
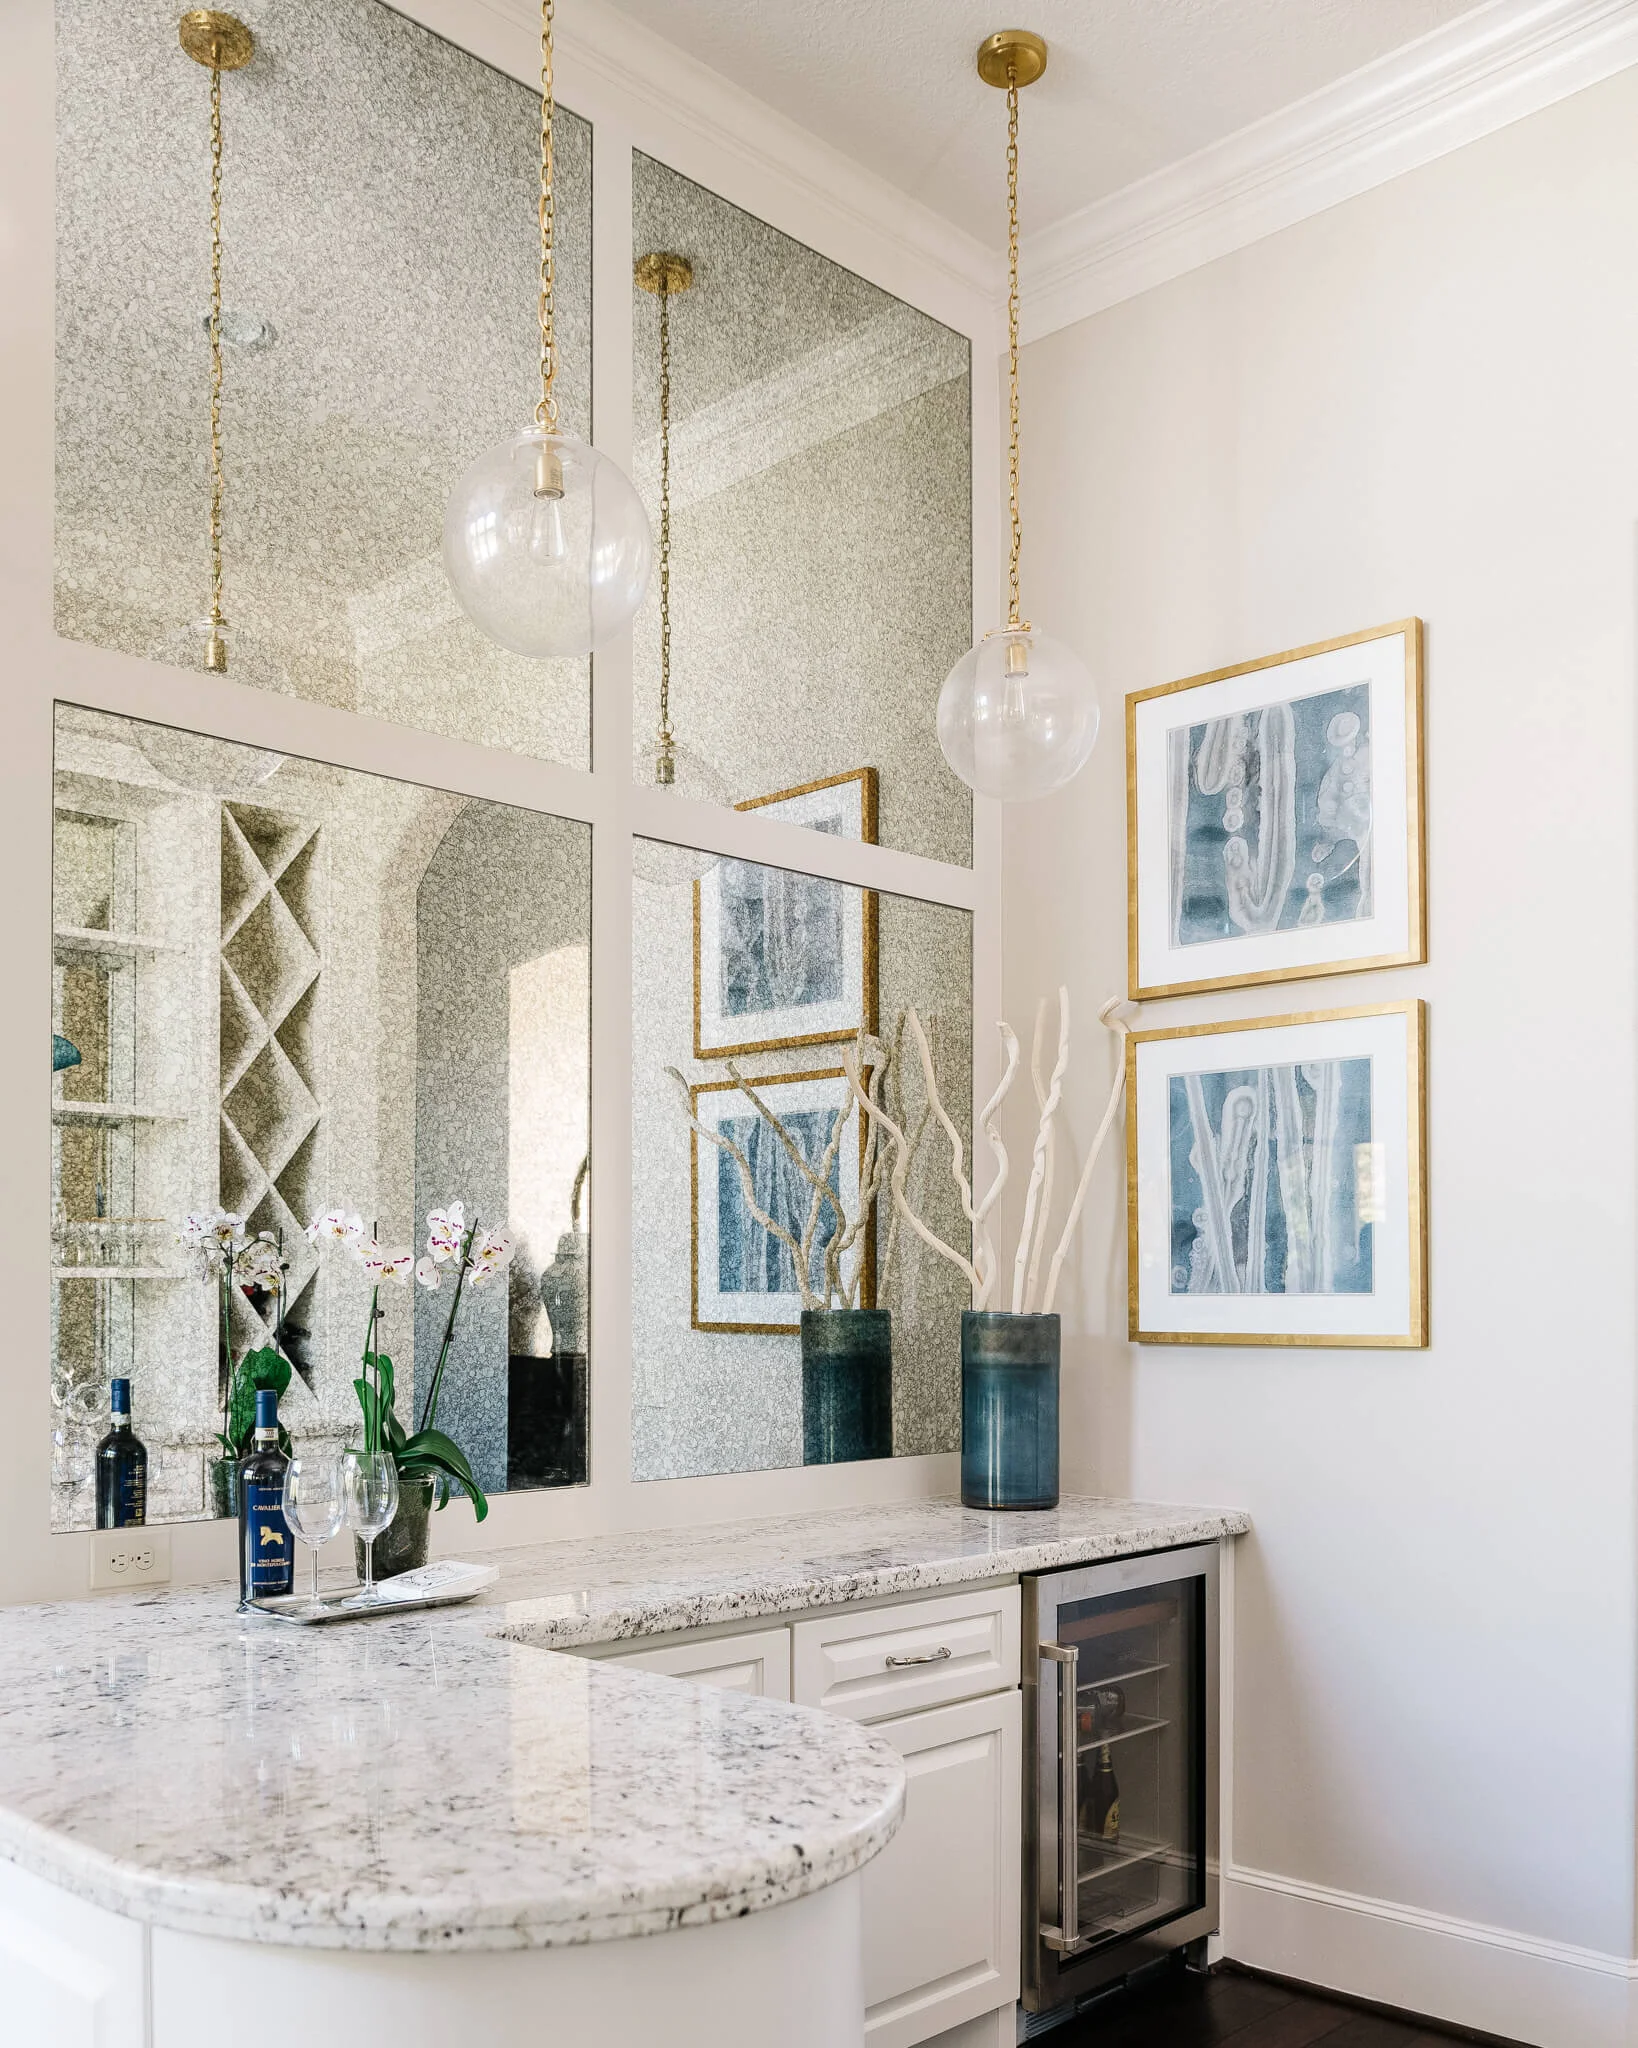
This remodeled bar area is much lighter, brighter, and more inviting after the dark upper cabinets and awkward backsplash were removed. Antique mirrored panels reflect the new pendants and artwork, as well as the modified built-in shelves and wine rack on the opposite wall. Carla Aston, Designer | Colleen Scott, Photographer
Need more tips on remodeling for your next project? I have some here, below, that might help, as featured in my shop of helpful digital downloads.