
Okay, so I already know what you’re going to say:
You should paint them!
Well guess what…
You’re right — you should paint these! But...
We can make them look even better if we spend a bit more money.
That’s right — we can make dated, bulky, unwanted, ugly cabinets look great by simply adding a bit more. They’ll surprise you with their new, refreshed look. I promise!
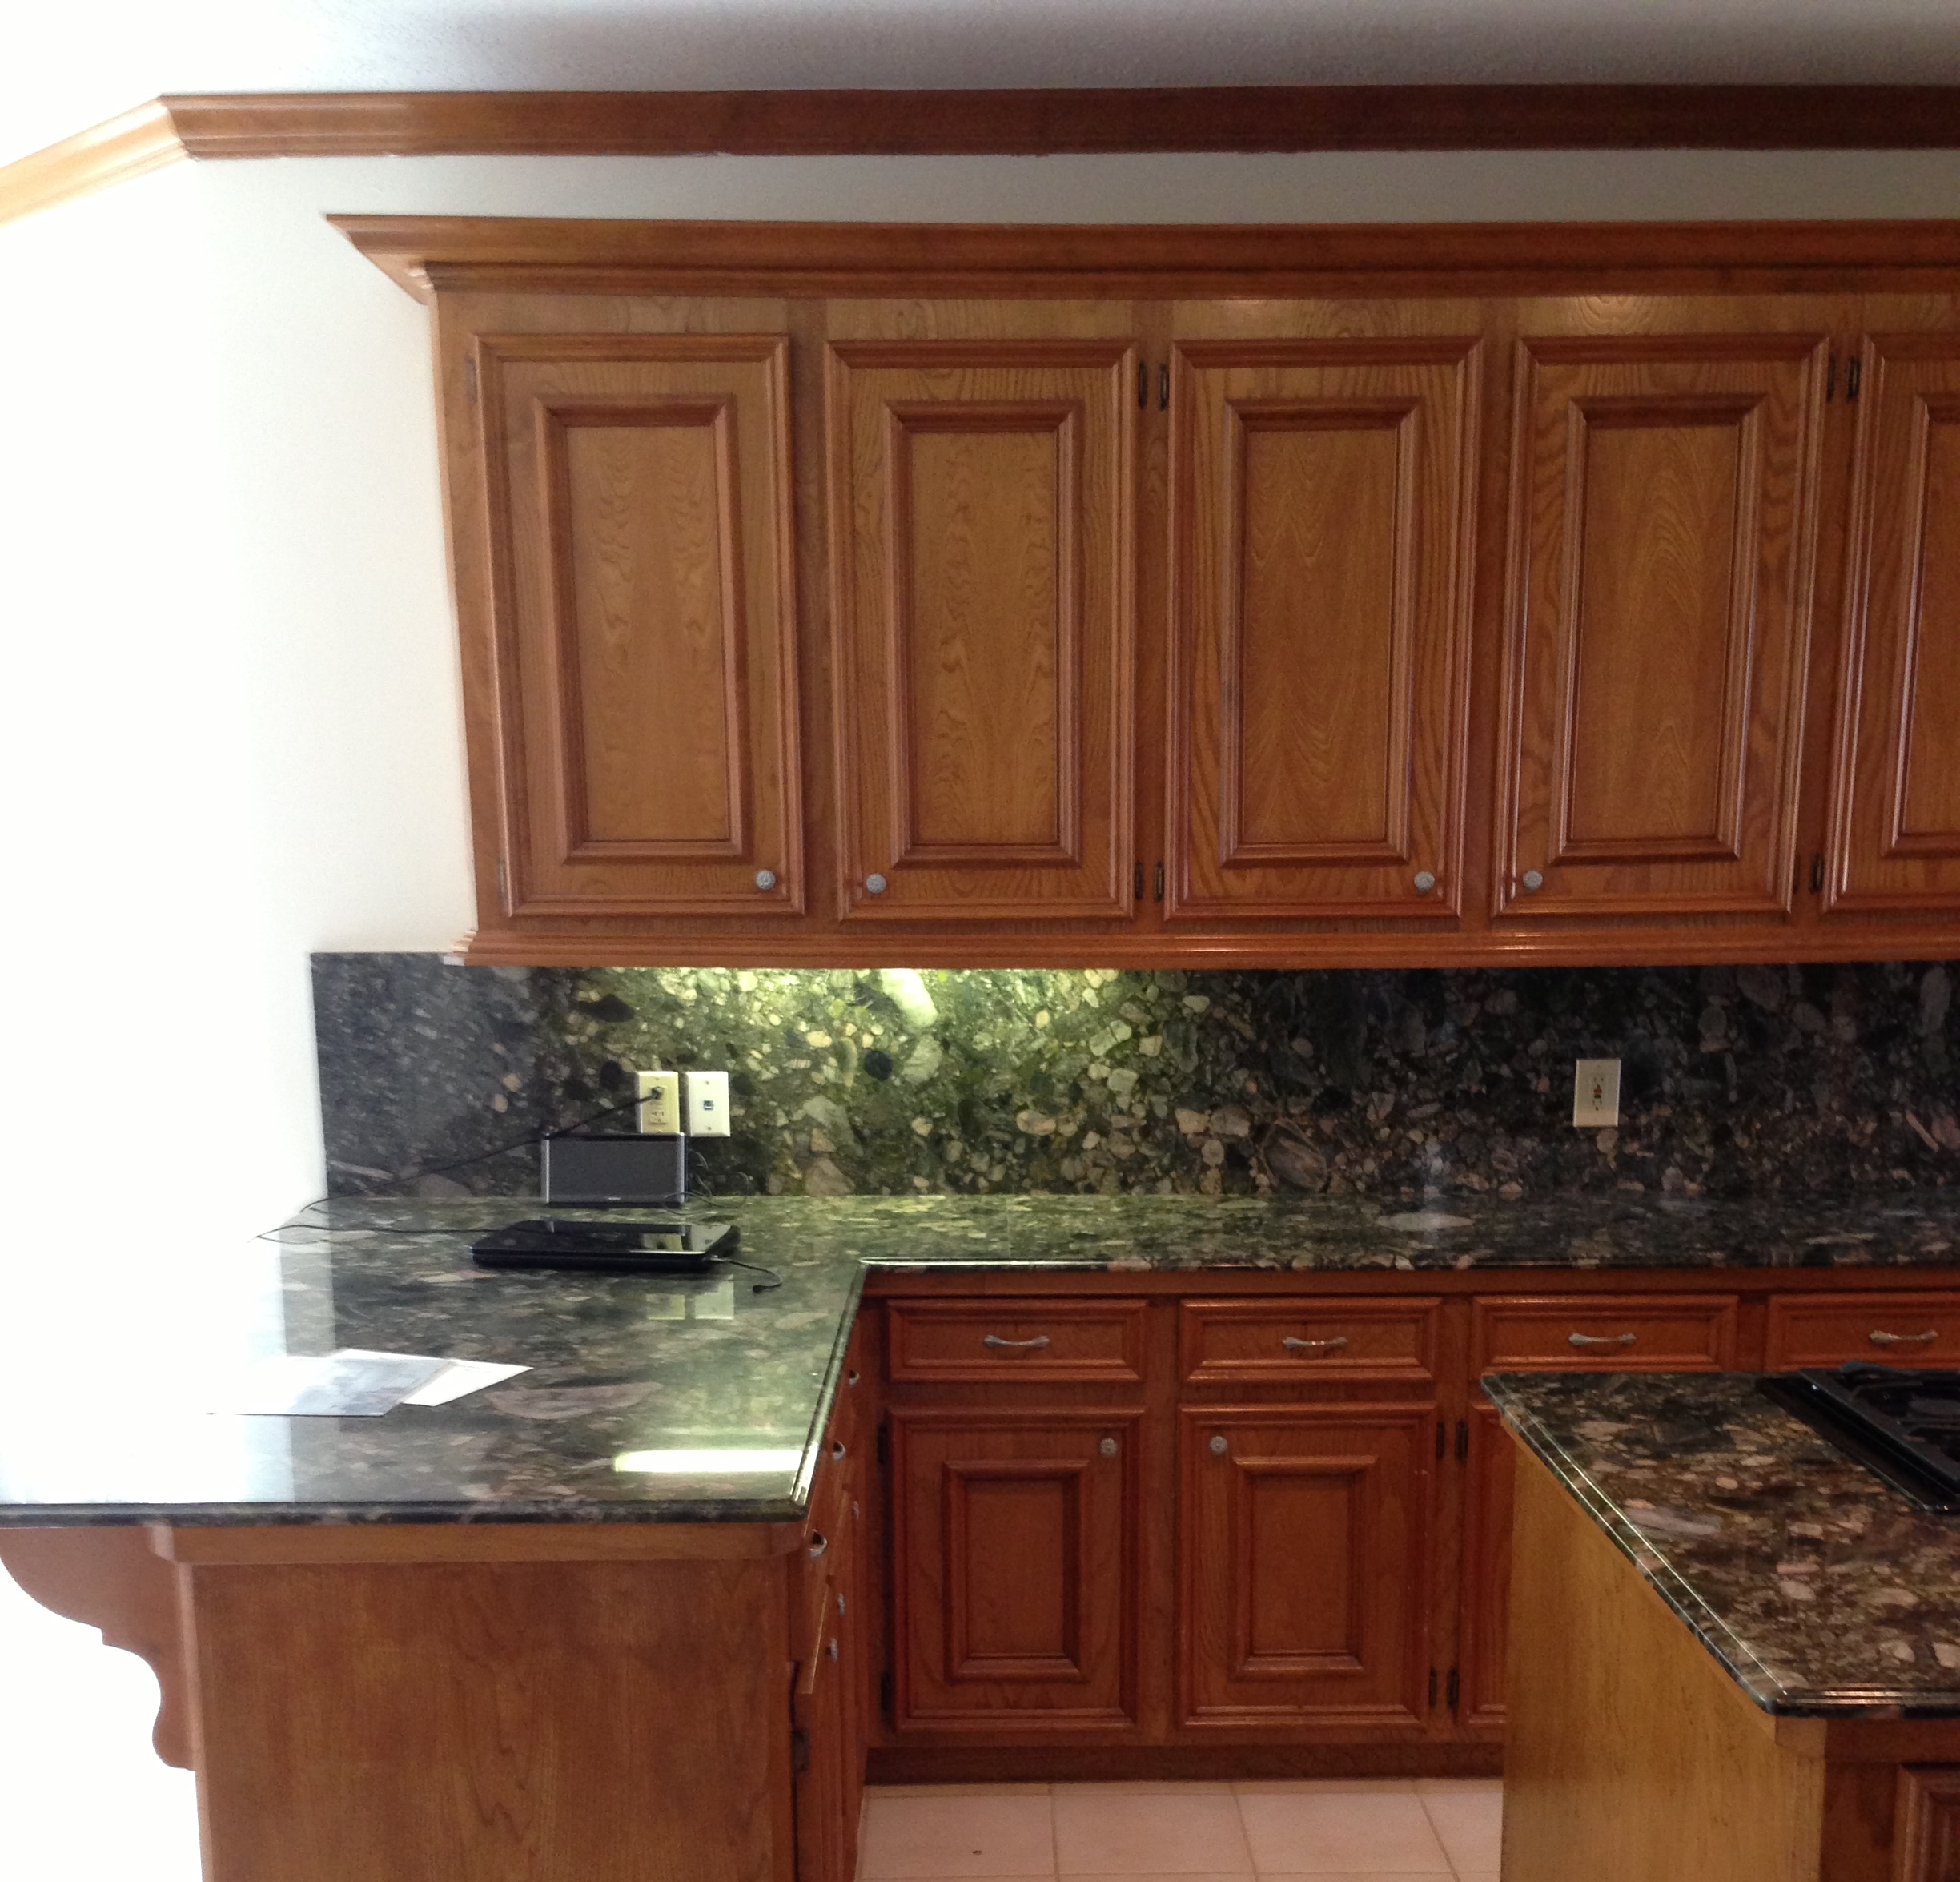
Here’s the culprit:
Those cabinets. My client did not like them — not one bit.
She didn’t like the oak, the shiny finish, or the bulky mouldings (especially the ones at the bottom of the cabinets). We needed this kitchen to look lighter, brighter, taller, and more open.
What I wanted most for these homeowners were new cabinets or, perhaps, new cabinet doors with Euro hinges, etc. Unfortunately, they weren’t in the budget.
RELATED: On the opposite wall we did open shelving. Click here to see my drawing of the mockup.
So what did we wind up doing?
Well, we certainly didn’t add extra cabinets at the top. With a 9’ ceiling, we didn’t have enough room.
Instead, we added a plywood box, with panels framed with moulding to match the doors. This helped extend the height of the cabinetry, making the space feel taller and more spacious.
We could also remove the bulky mouldings top and bottom and trim the cabinets out with something smaller and finer. And, yes, we could paint them, too; because paint is capable of covering all kinds of sins. ;-)
Here are the cabinets under construction:
And here they are painted:
Painted kitchen cabinets with new paneled box above| Interior Designer: Carla Aston
We changed out the ugly old hinges to these knife hinges, as these were the only type that would be more concealed and still work with their existing doors.
When everything is complete, this will turn out to be a really dramatic makeover for both the kitchen and the home.
Fast forward to months later....we photographed the end result of this job. Wanna see?
Need some more remodeling tips and solid design info to give your project the design swagger it needs?
I have some helpful advice right here.

A collection of tips, advice, and Q and A on all things concerning backsplash design. Want to know where to end your backsplash if you have an awkward detail? I've likely addressed a similar situation right here.

I've described 9 details that are often found in DIY remodels. If you are designing your own remodel, you DON'T have to make these mistakes yourself.
Here's a post of a similar idea I did in another project.

Here's a similar example of this same idea, taking the cabinets to the ceiling, this time we added doors because we had more room. Click through to see more.
I know you’re gonna love this one. ;-)